
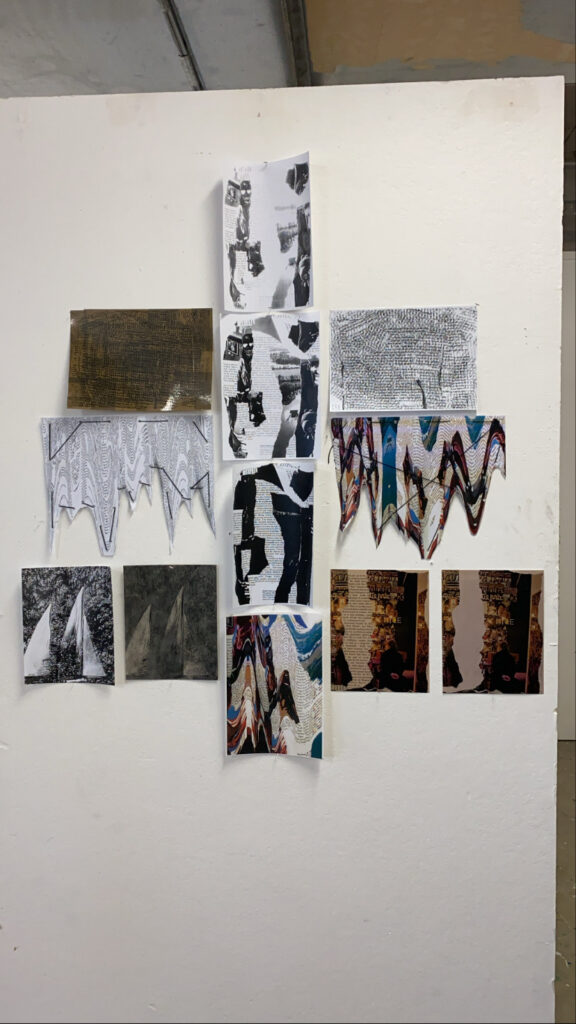
During the 4 weeks, I used images from a National Geographic book to create a majority of my pieces.
I used random photos and texts, ripped the edges off, and stuck them on top of each other. The 3 images going down are scanned copies of the original in the darkest tone to lightest.
The 2 pieces covered in text was scanned through the printer multiple times so that the writing didn’t look the same each time.
The pieces with thread were done by being wiggled on the scanner, holes were made using a hole puncher and thread going through the holes. I liked how I incorporated a new technique because I was getting bored of the same thing over and over again.
On the bottom left are the images from a National Geographic book, I ran it through the scanner and played with the tone. Then I used a different type of material; the texture was interesting but I went over it with sand paper and I think I made it better, although I still liked how the original looked.
Lastly, on the bottom right are 2 images from a National Geographic book; I ripped the edges and stuck it onto a page of words. I scanned the image onto a photo a found laying around in the studio. I accidentally spilled nail polish remover onto one of them and the ink started to rub off, so I did the rest.
Kia Ora, Diana!
Congratulations on a good start to your degree! It was great to hear about some of your making strategies, especially the ones that embrace accidents. Often when I’m seeking inspiration, embracing happenstance as you did with the acetone* can be a fantastic way to push work forward. You took a variety of risks through different materials and making strategies that tied conceptually with the brief. It was great to see how you focussed on ideas of subtraction and erasure. i.e. hole punching, sanding, cutting. I’m excited to see how you might use these strategies in the future!
Moving forward, be sure to challenge ideas of scale and presentation! i.e. How might this image look if it was the size of the wall? What would this image look like if it was on fabric?
Don’t forget to document more of your studio work, written reflections, and artist research on the blog each week too. The more you reflect, the more you’ll be able to talk about your work and find new and exciting strategies for making!
* There’s a whole school of making that you can look at with acetone; solvent transfers! If you have an inkjet printer, you can transfer that image onto fabric, paper, or another substrate by wetting it with acetone and running it through a rolling press.