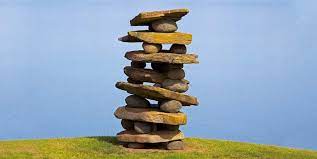
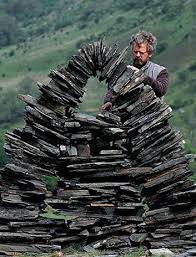
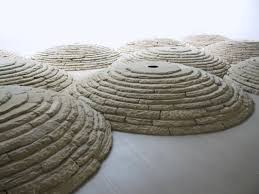
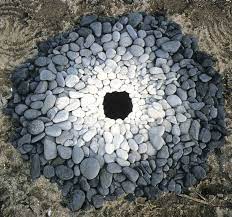
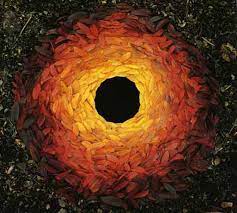
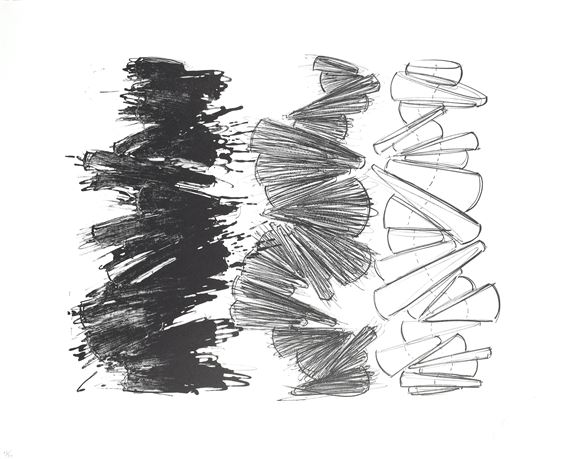
British artist Andy Goldsworthy creates site-specific art. His art process involves using natural materials such as colourful leaves, flowers, plants such as thorns, twig branches, hedge trees, pinecones, mud, stones, icicles and snow. He likes to work outside with the many details of nature, and is known for balancing and stacking rocks, like the New Zealand artist: Chris Booth.
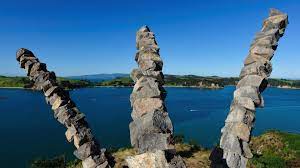
New Zealander Chris Booth’s Stone Sculptures
Goldsworthy prepares materials such as stones, twigs or leaves and rearranges by shaping them in the natural environment. He creates transitory works using his bare hands and found tools, yet, has also created permanent sculptures using machine tools.
He arranges natural materials into numerous shapes and patterns, and then immediately photographs his sculptural installations to show them at their best, before the natural process of change and decay occurs with time, and weather.
Andy Goldsworthy Artworks
Andy Goldsworthy Artworks
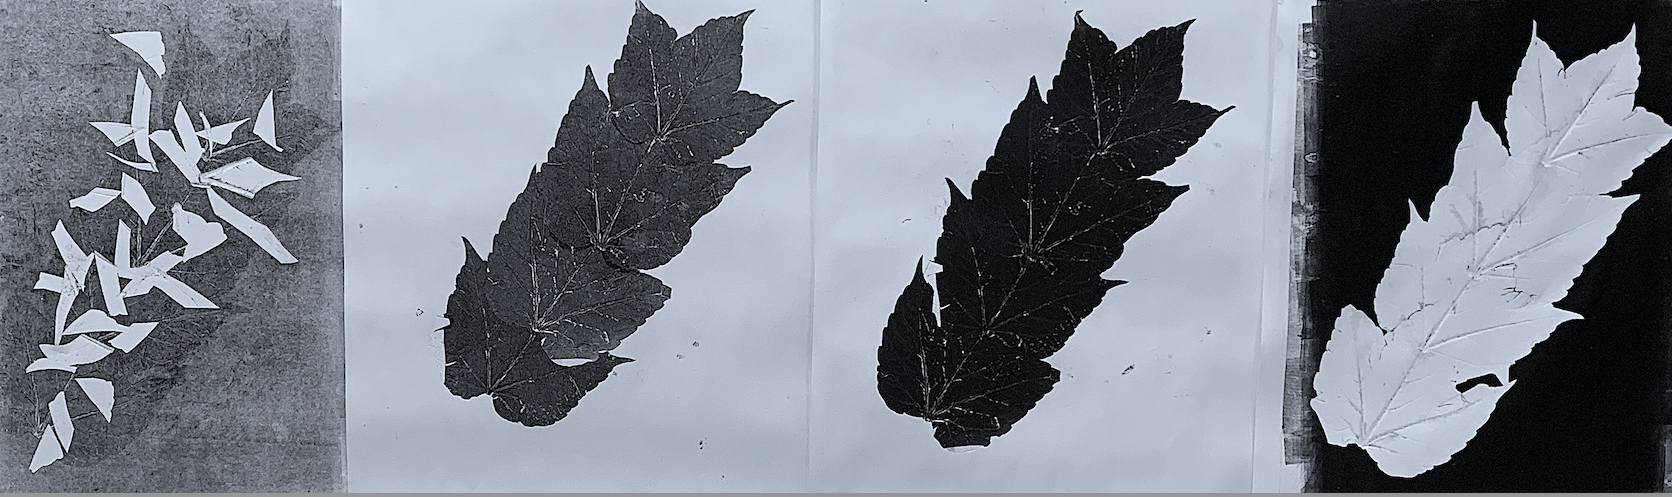
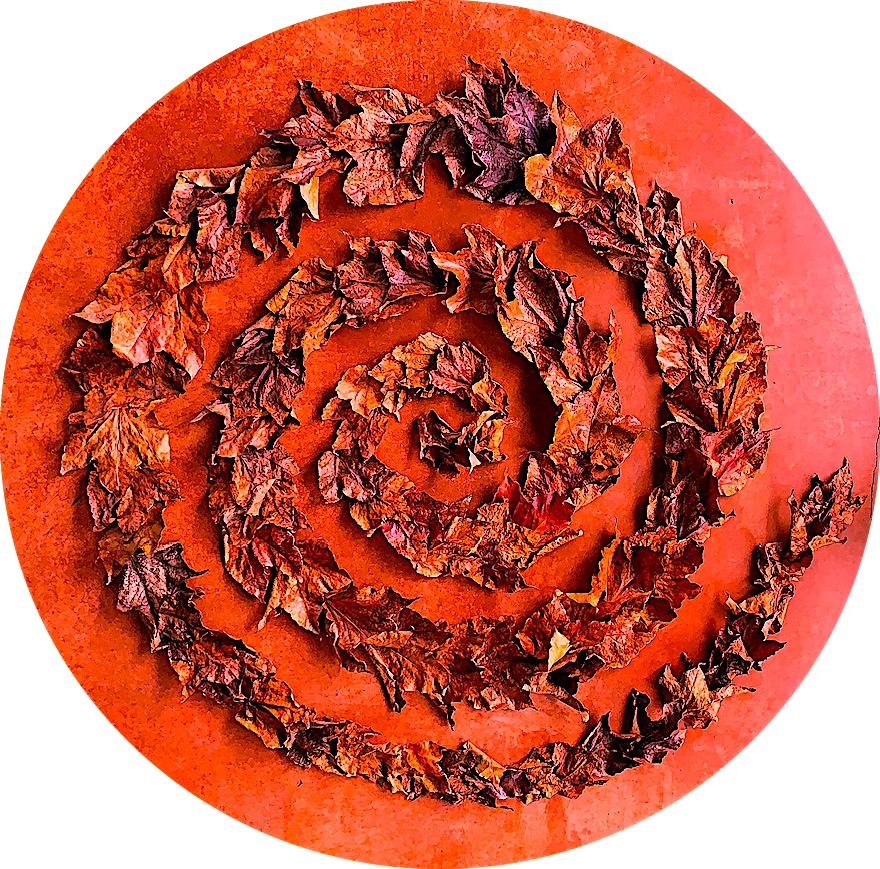
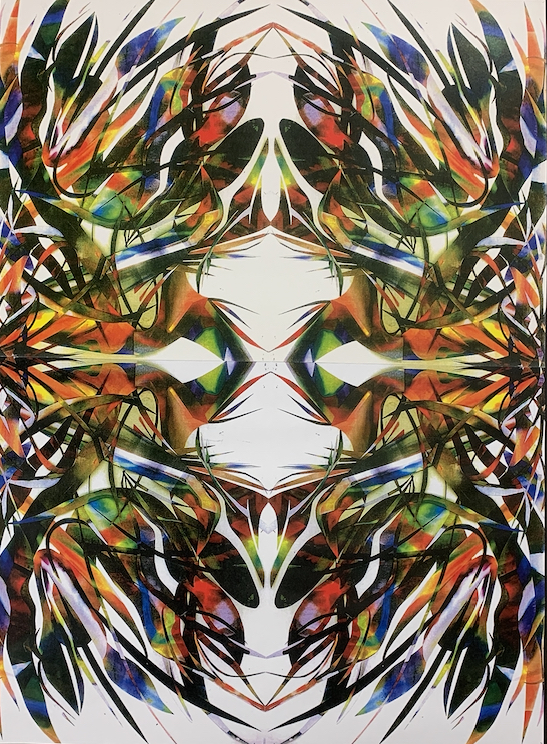
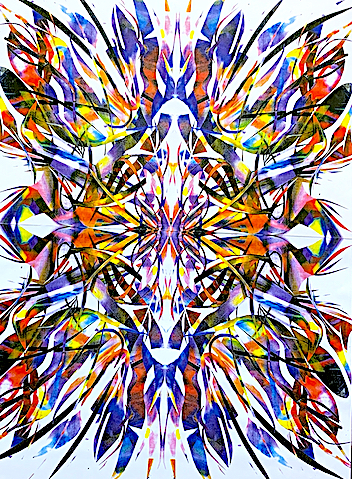
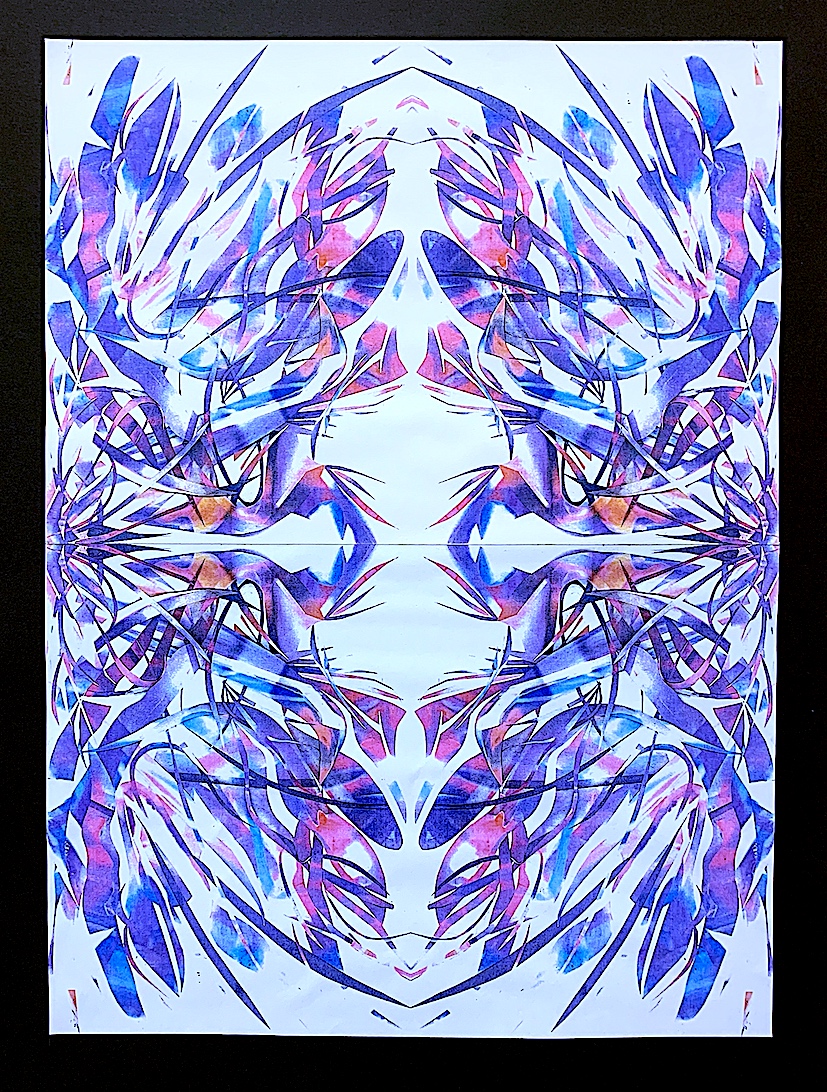
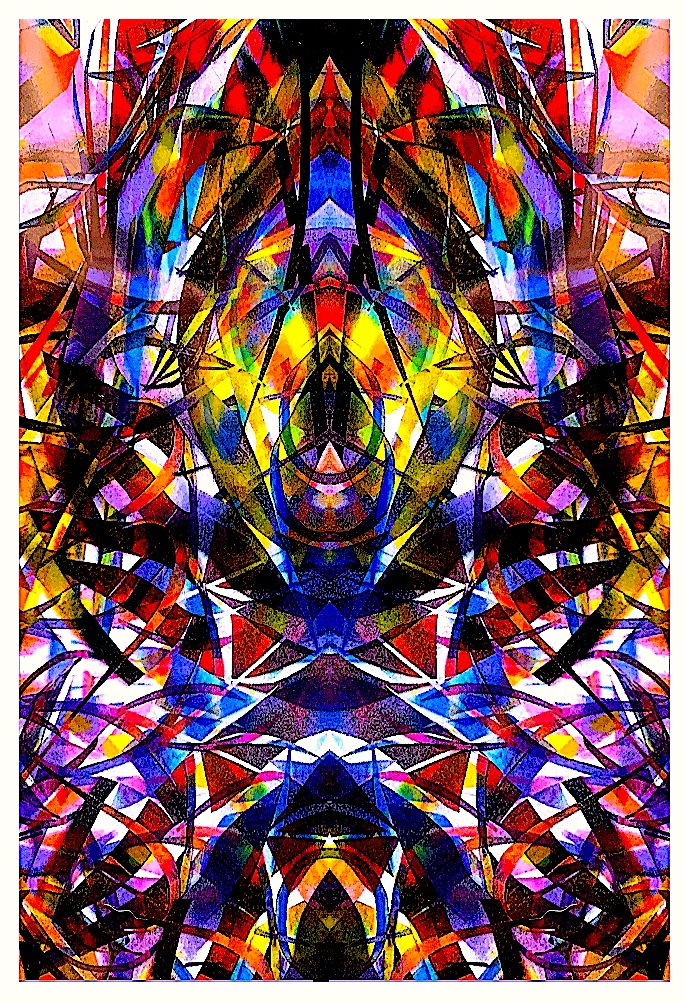
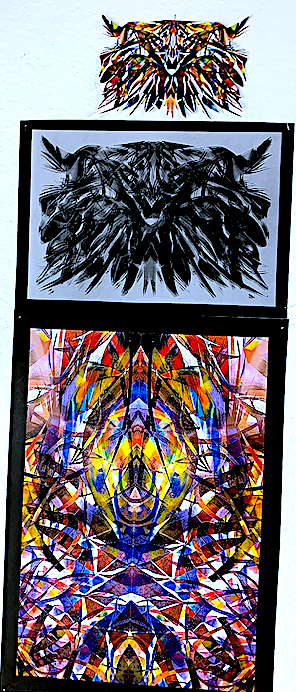
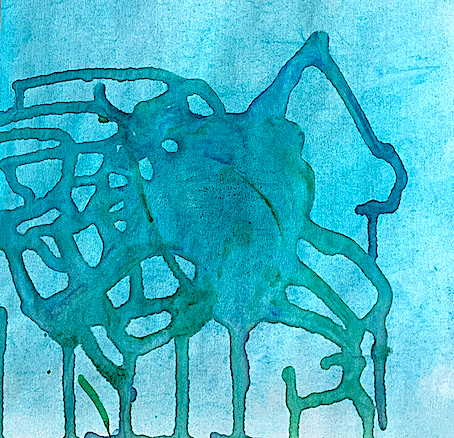
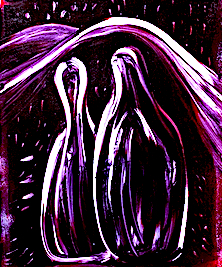
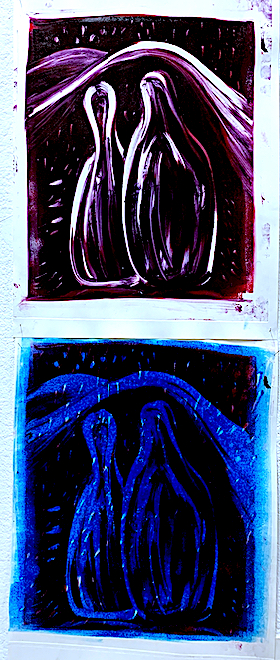
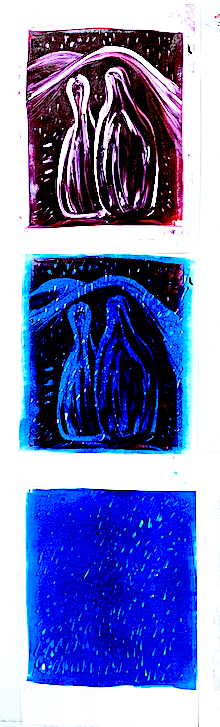
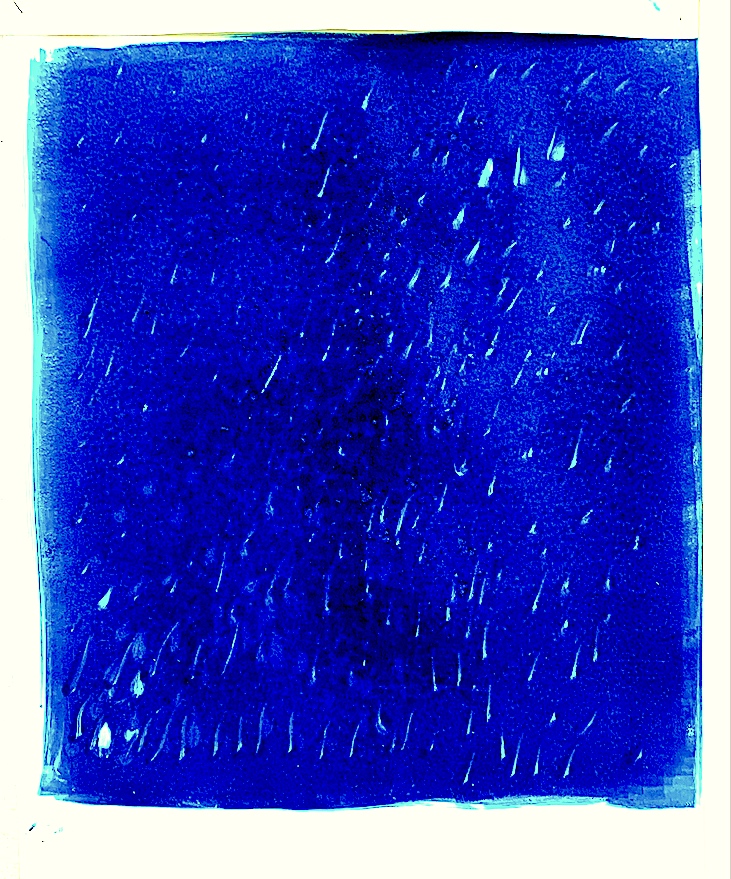
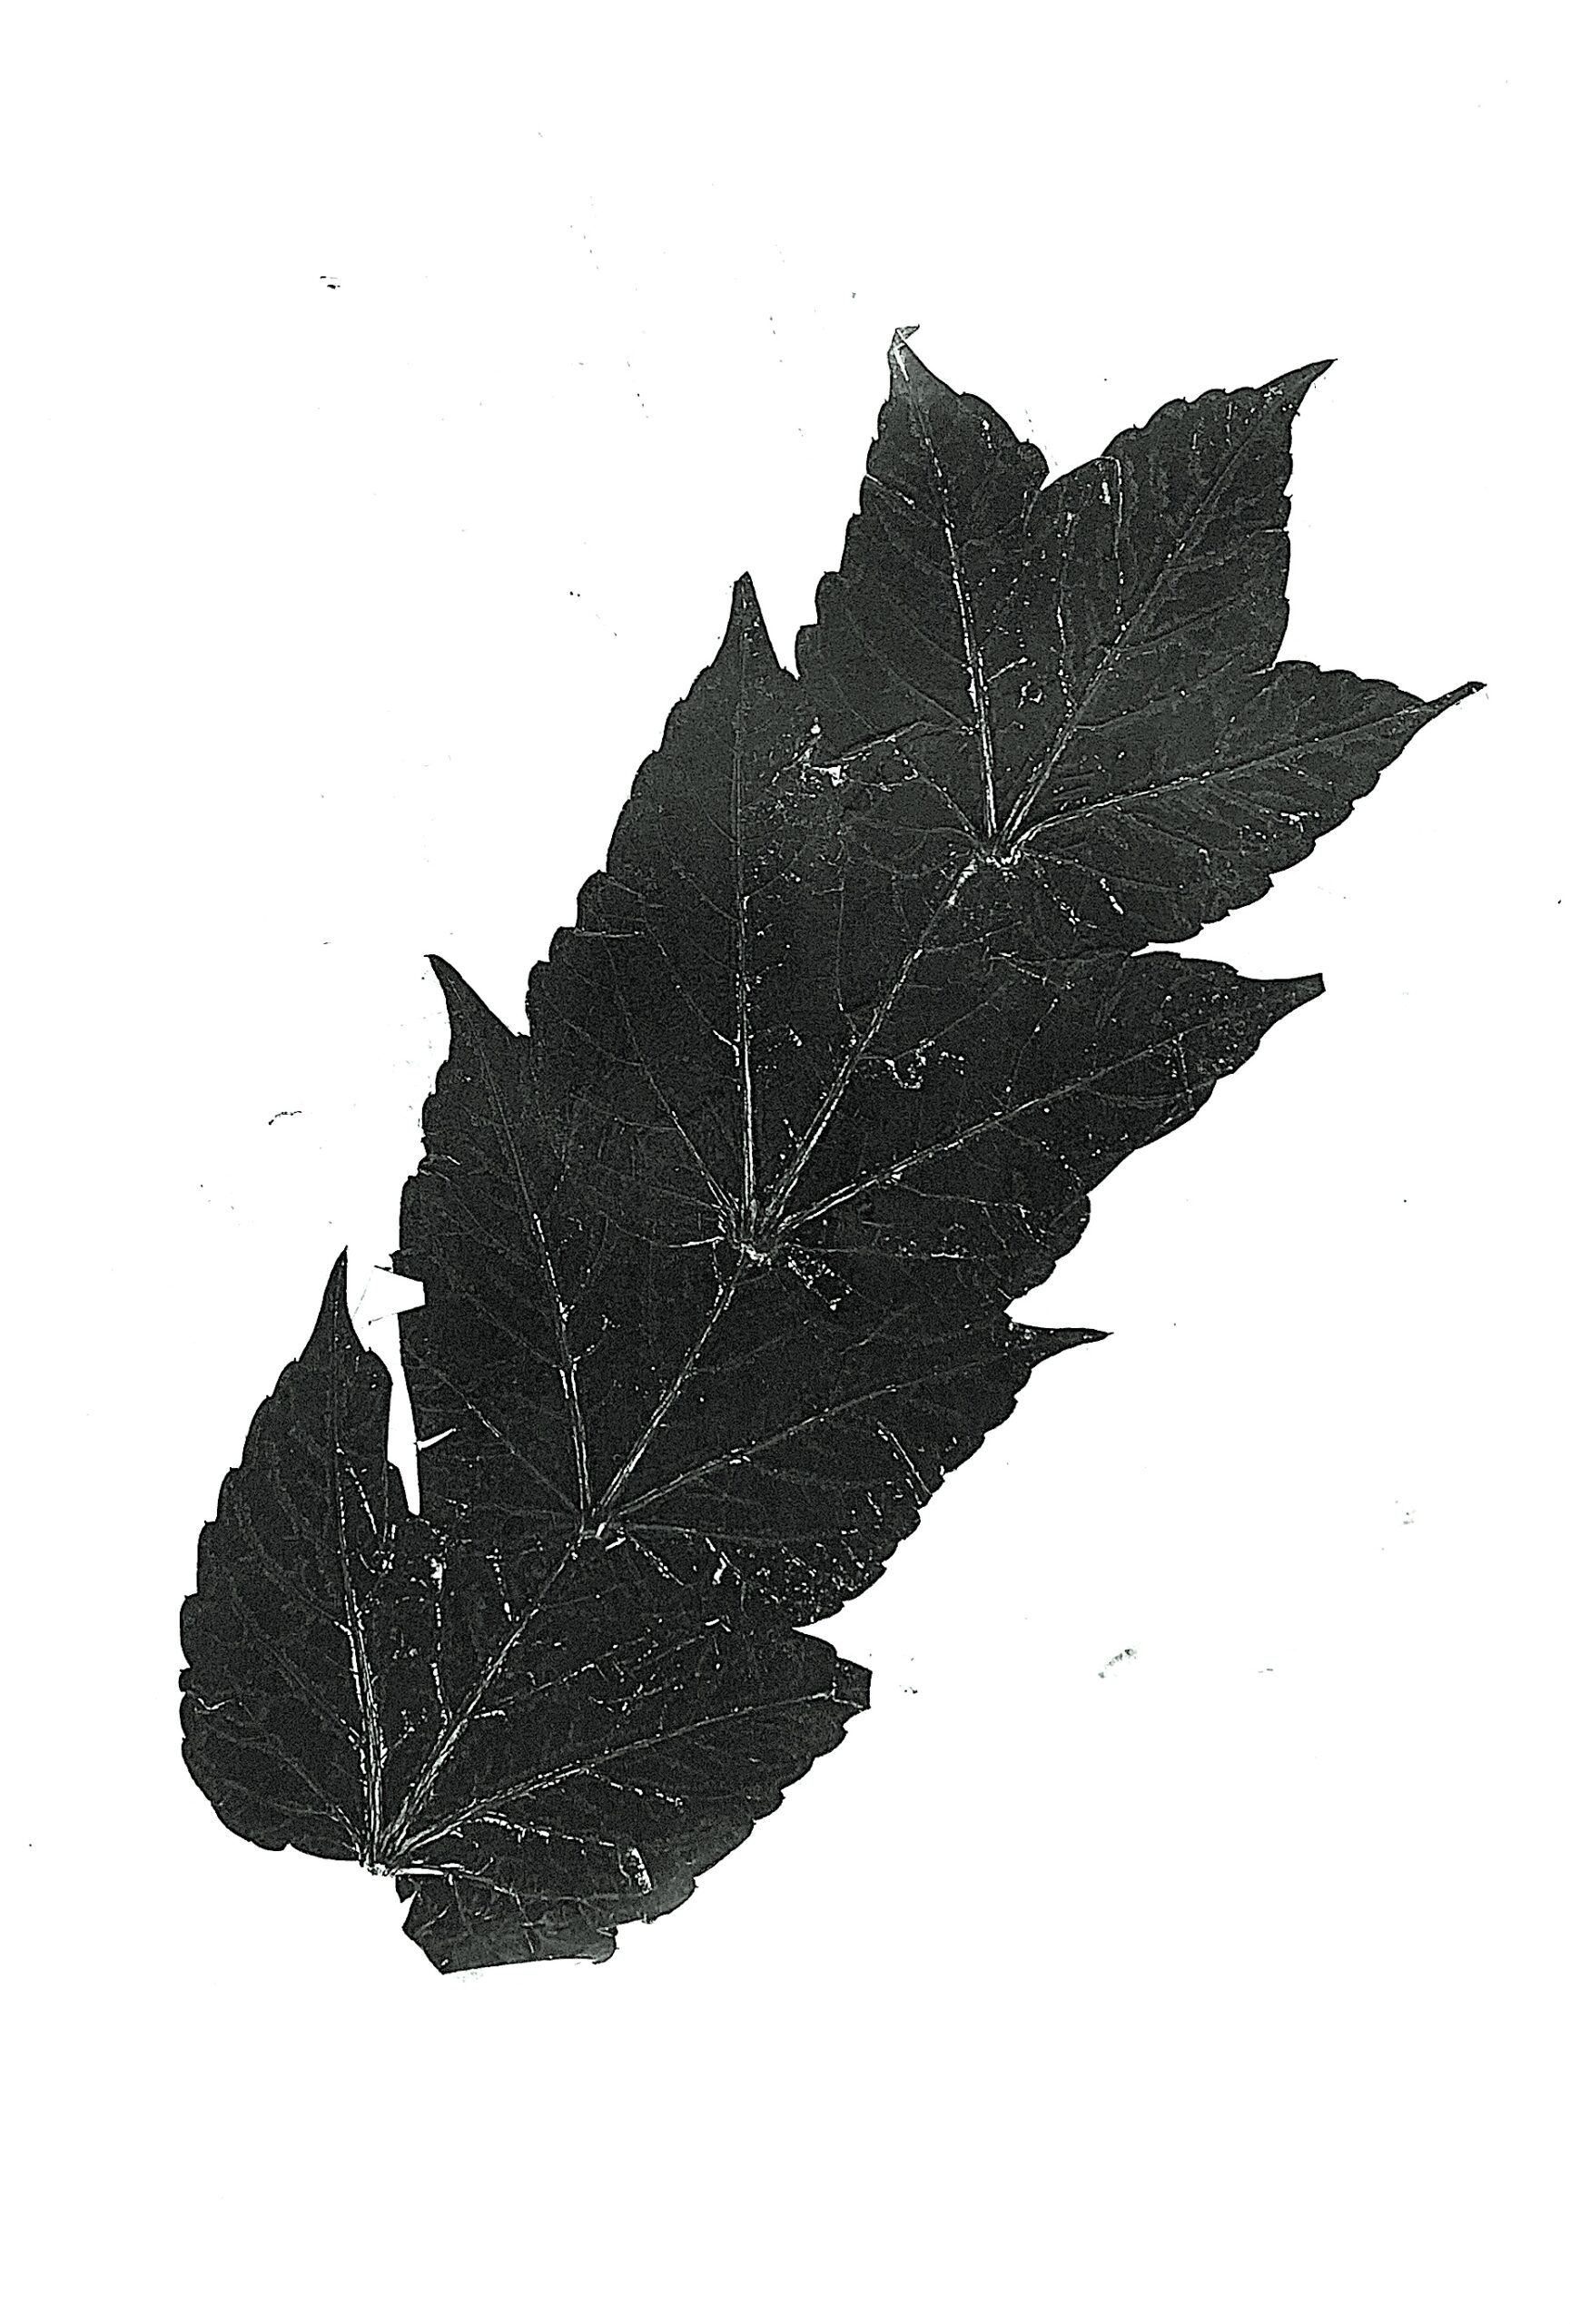
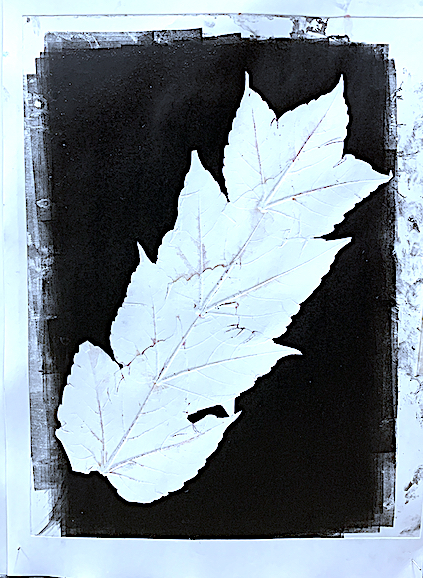
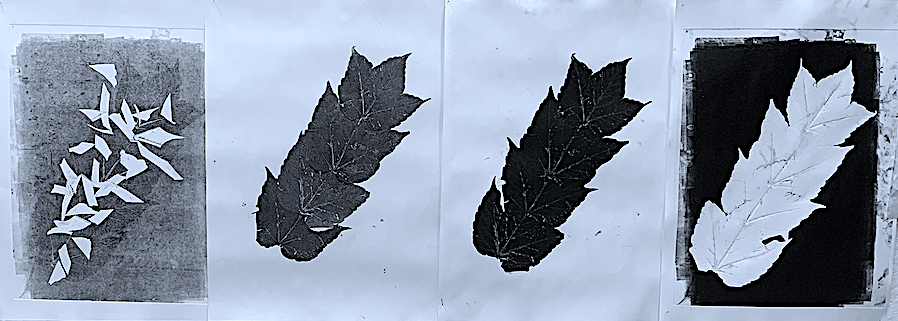
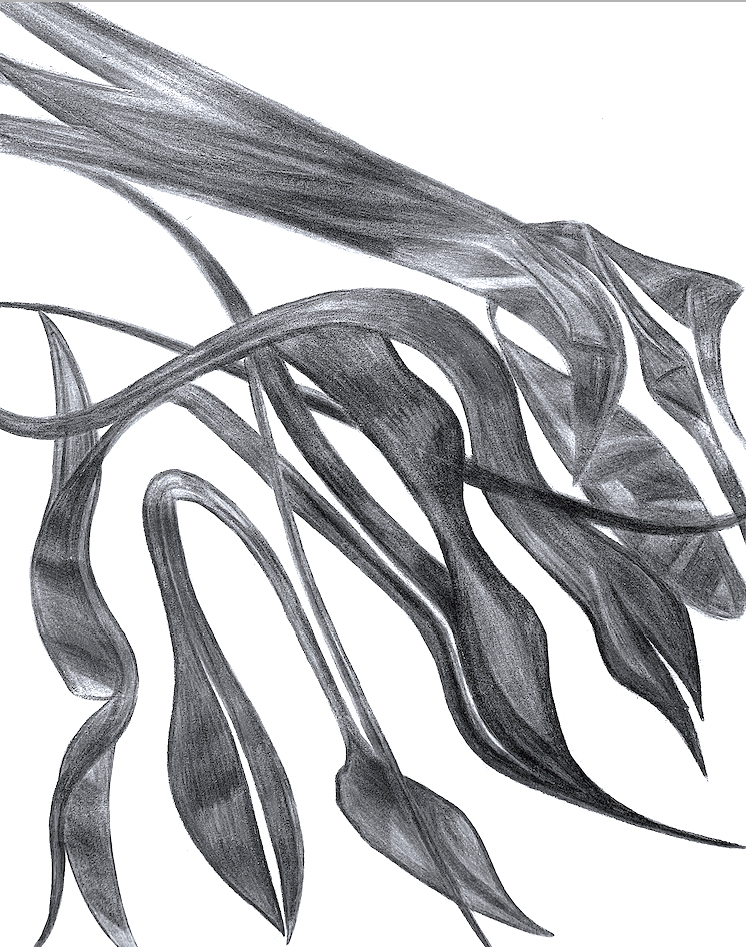
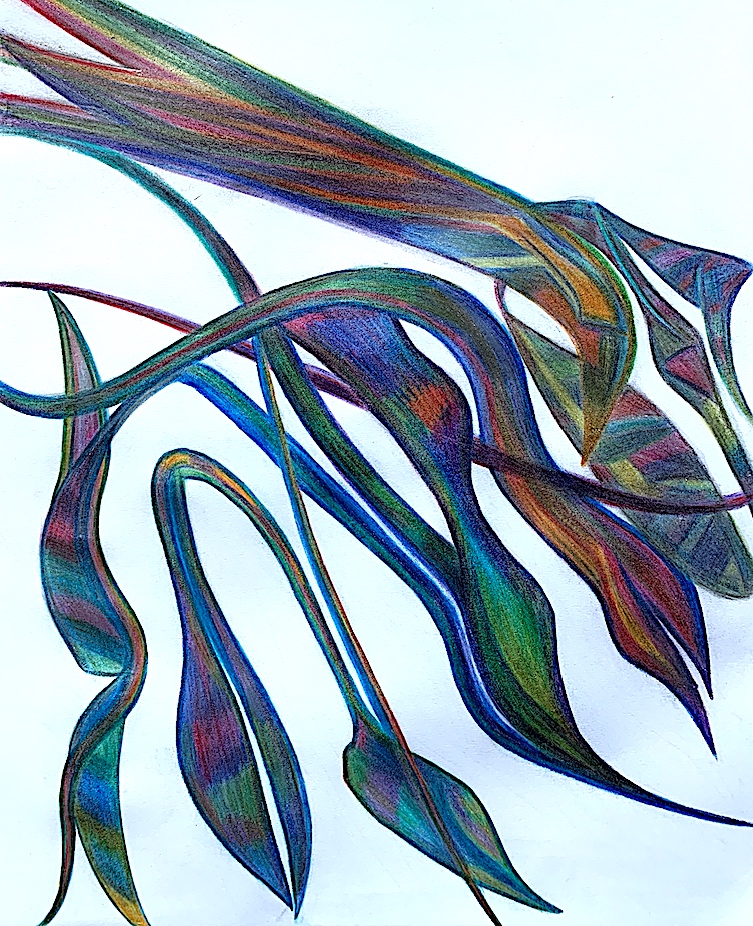
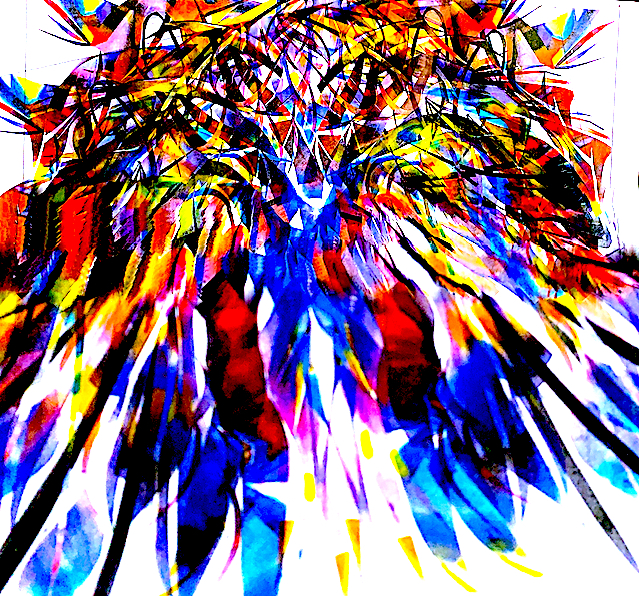
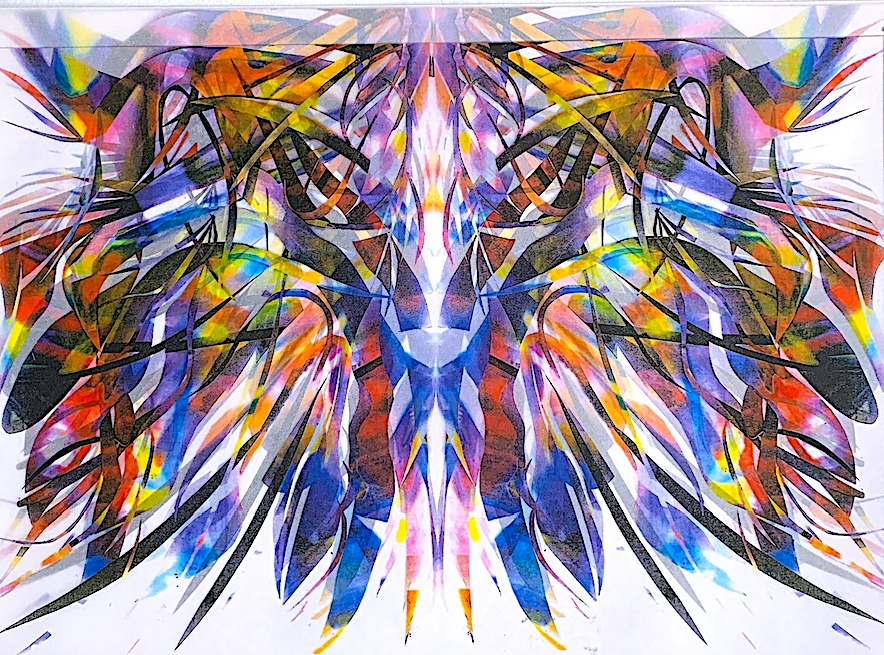
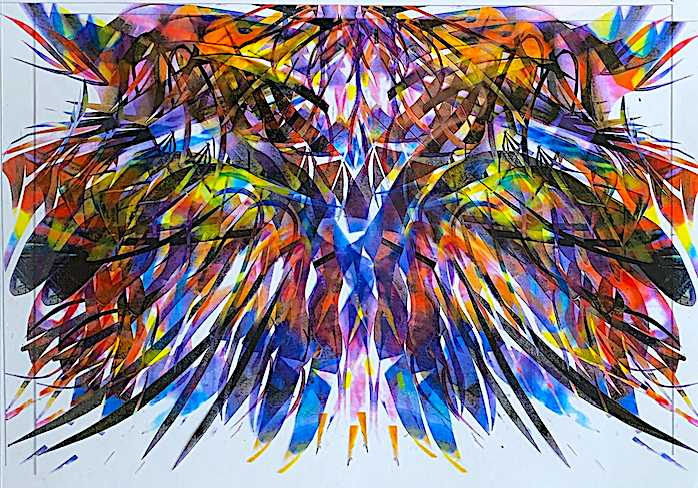
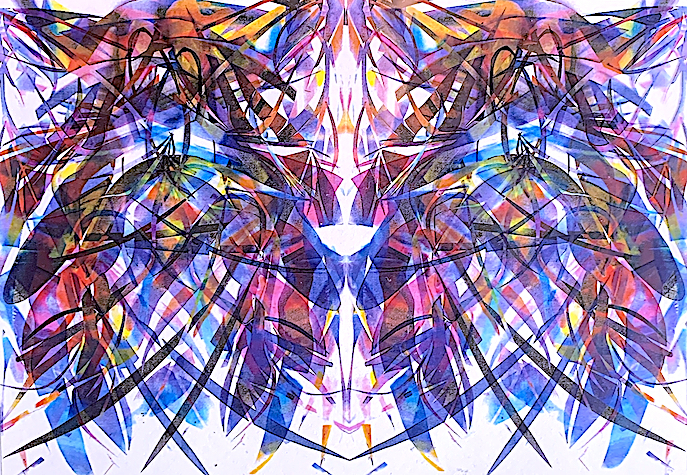
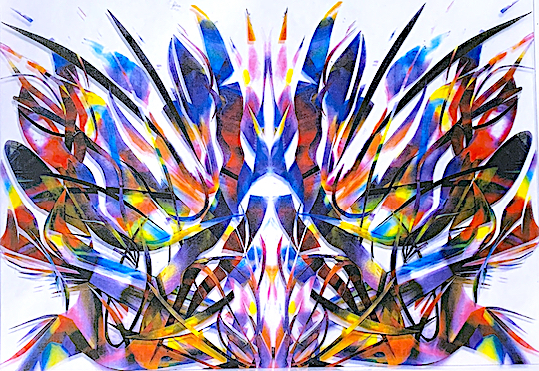
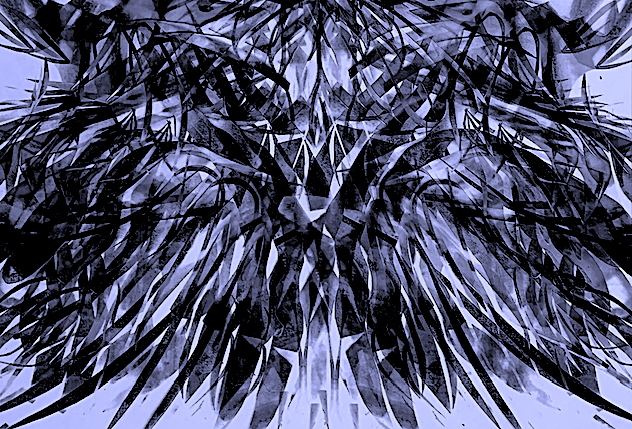
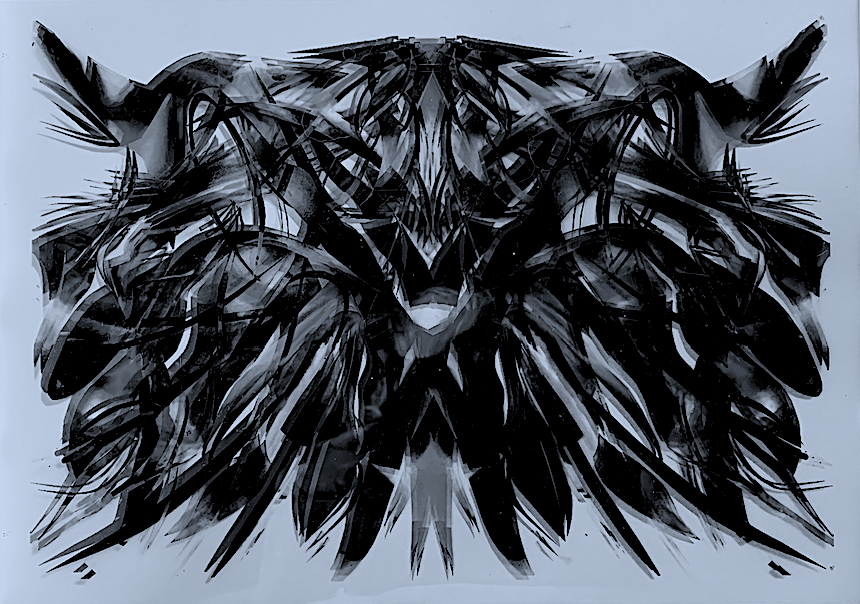
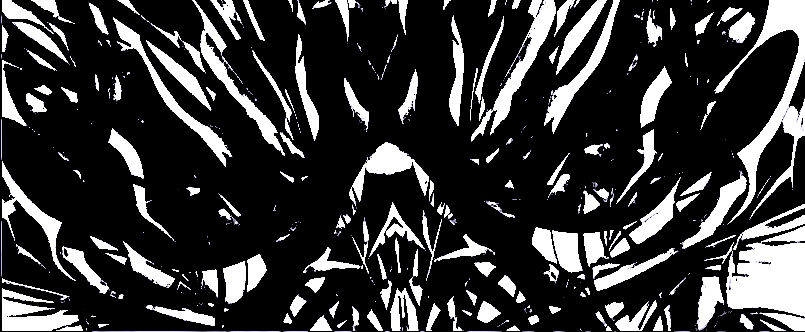
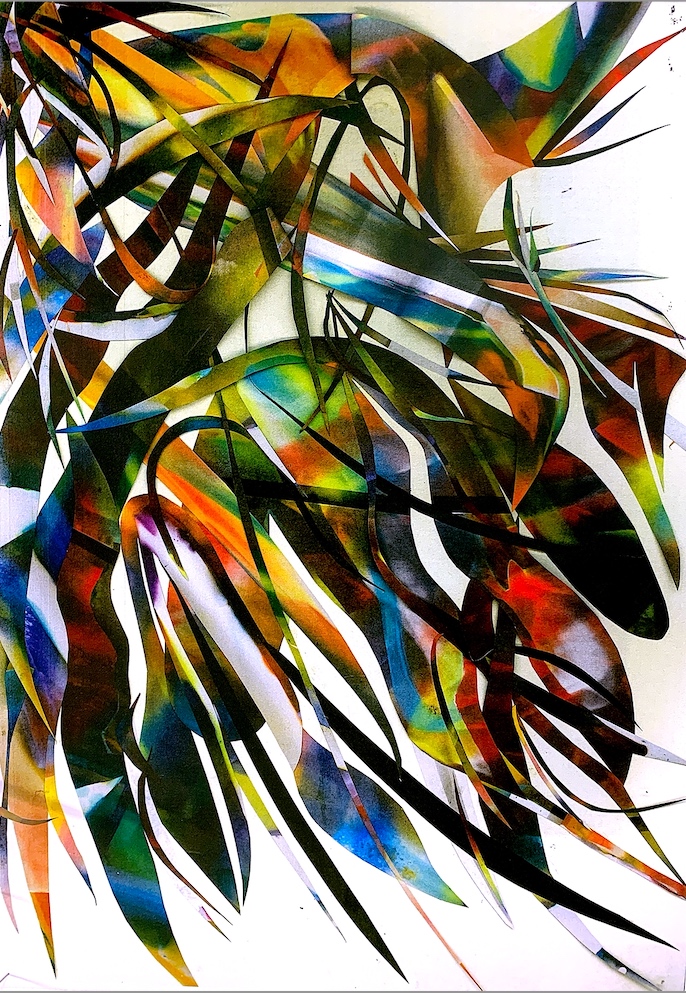
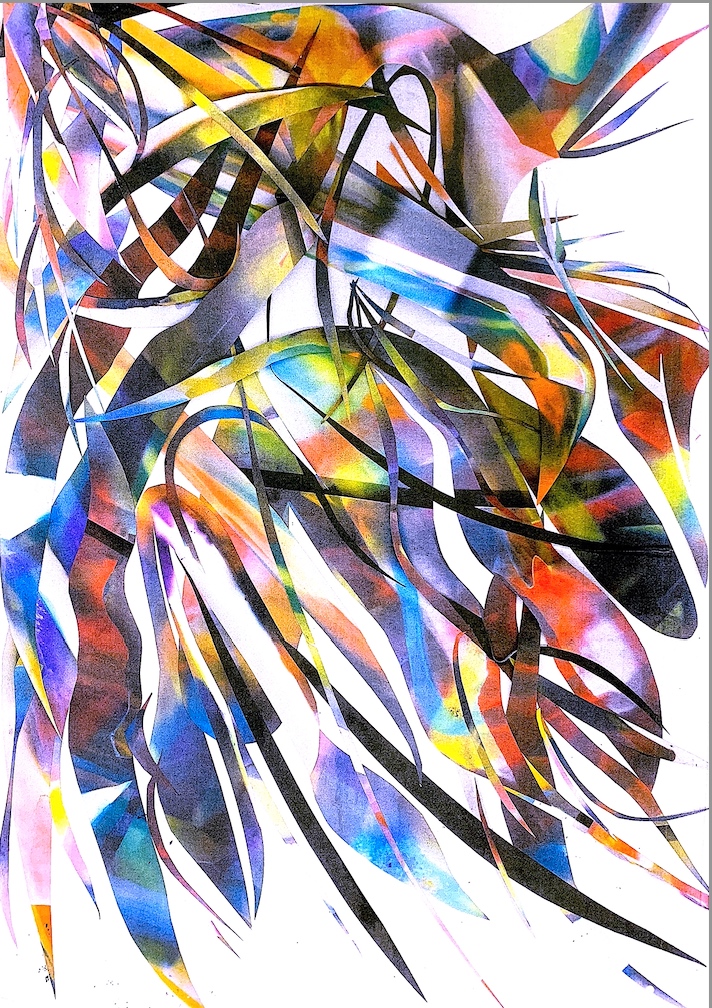
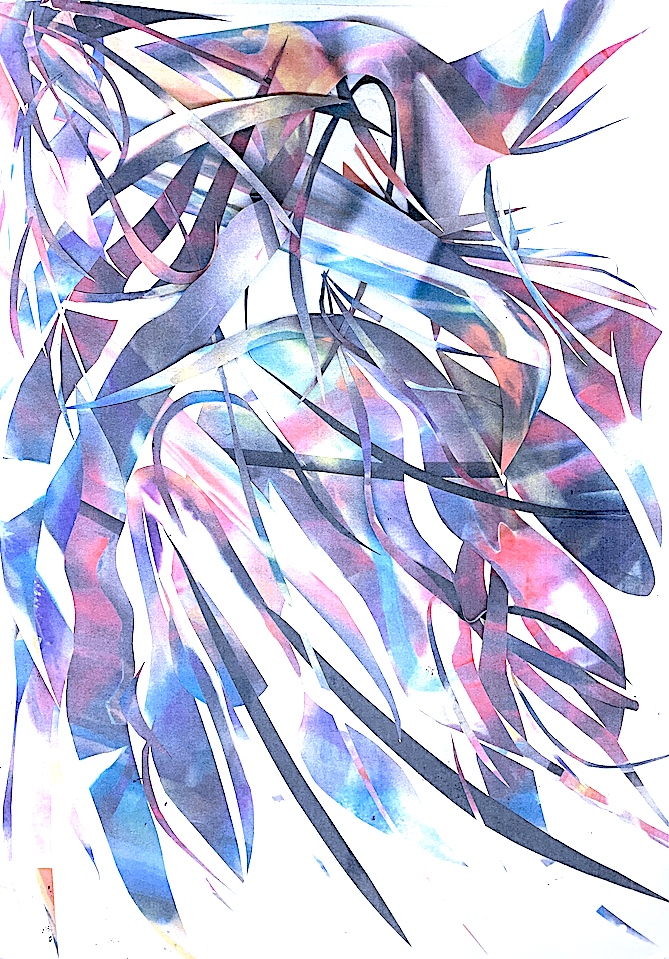
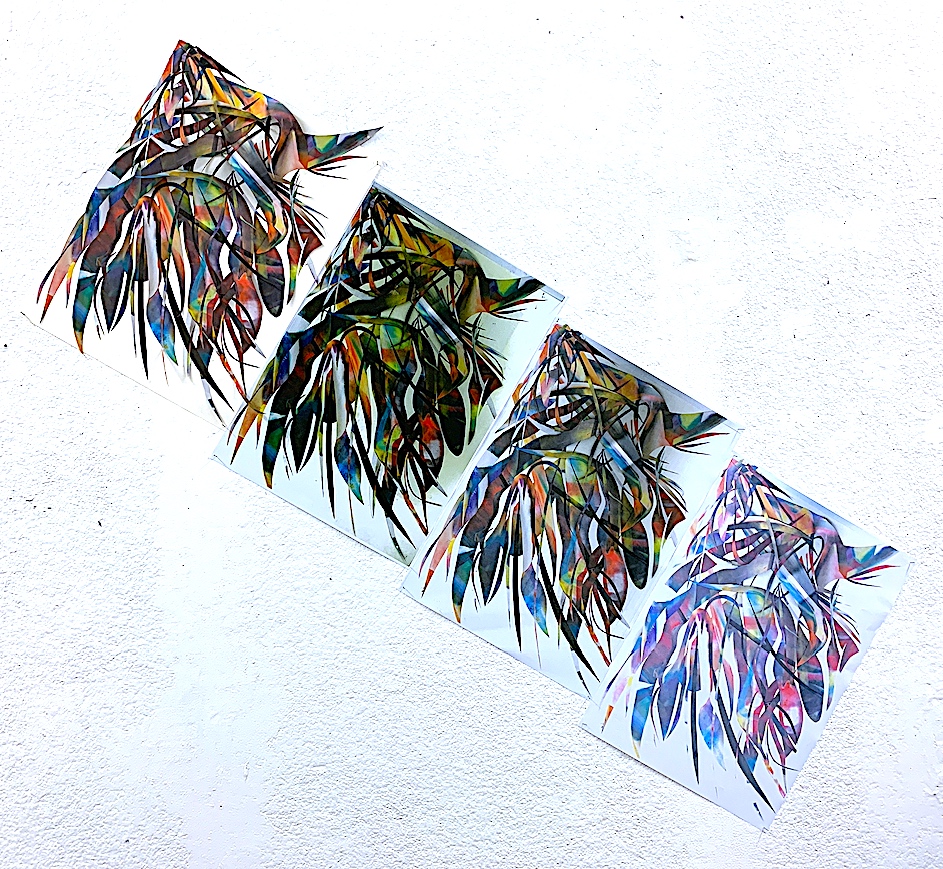
After printing my Virginia Creeper vine leaves in the Printmaking workshop, I created my own digital photographs with the same type of vine leaves, à la Andy Goldsworthy style.
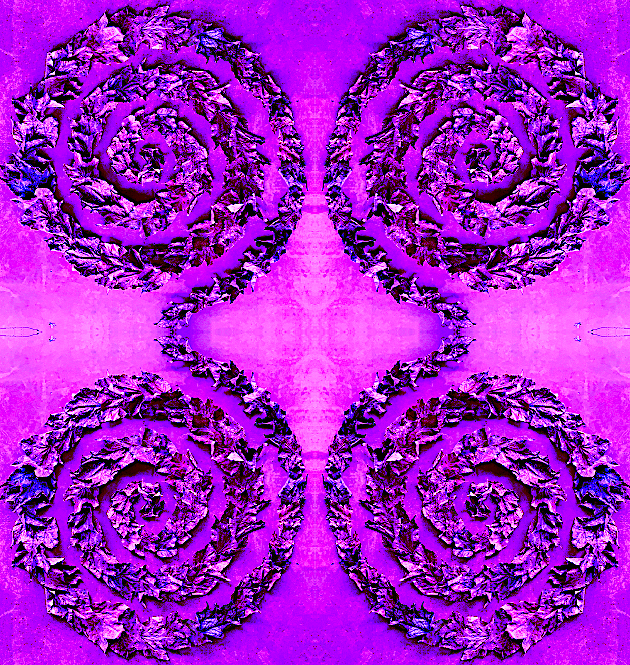
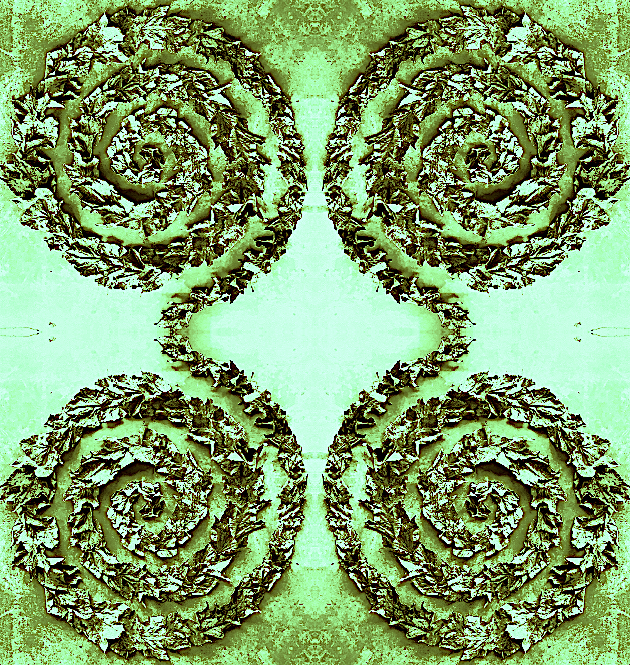
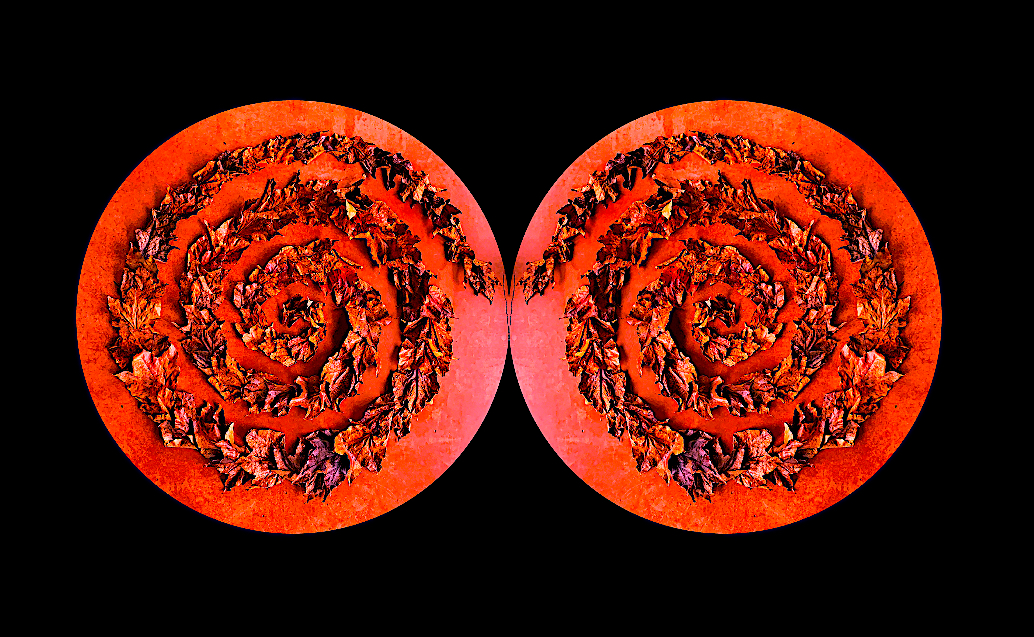
Figure 1. Four Eco-Prints of Virginia Creeper Vine Leaves.
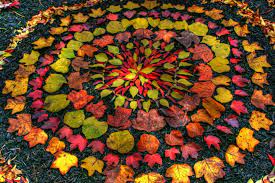
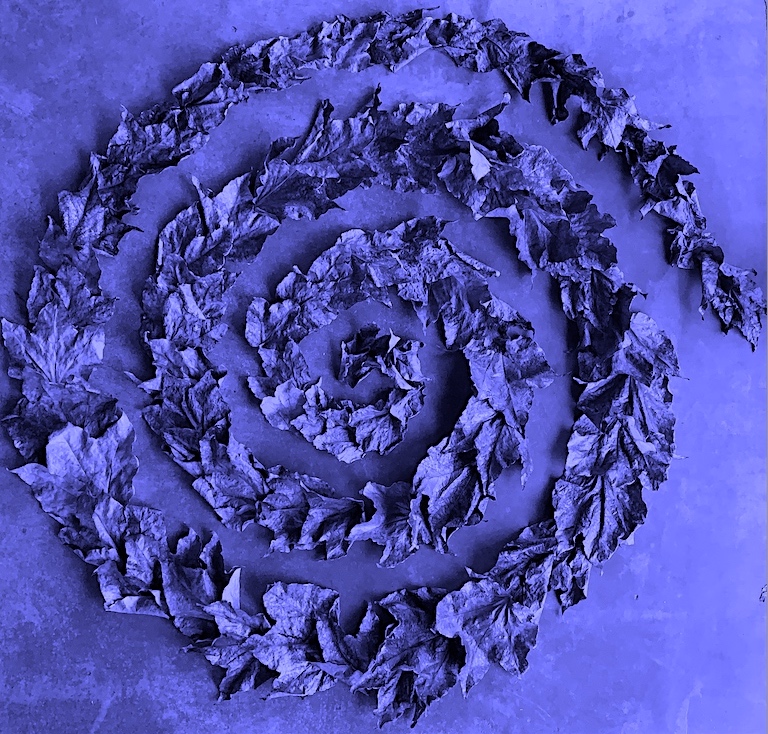
CHANGE: Nature’s seasons change the size, shape, colour, and texture of plants. Each Autumn season, the deciduous Virginia Creeper Vine sheds at maturity. Its green summer leaves transform to dark ruby red, fiery orange and yellow, and to warm brown, before falling from its host.
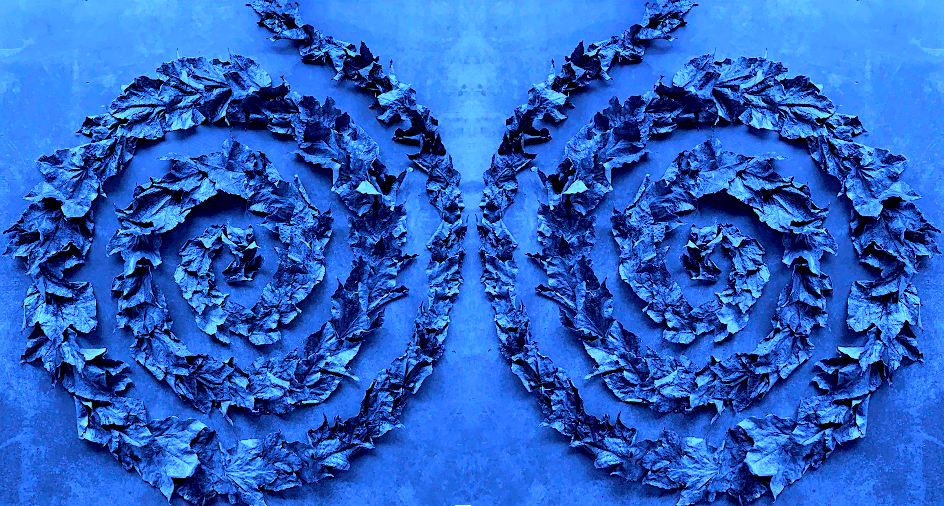
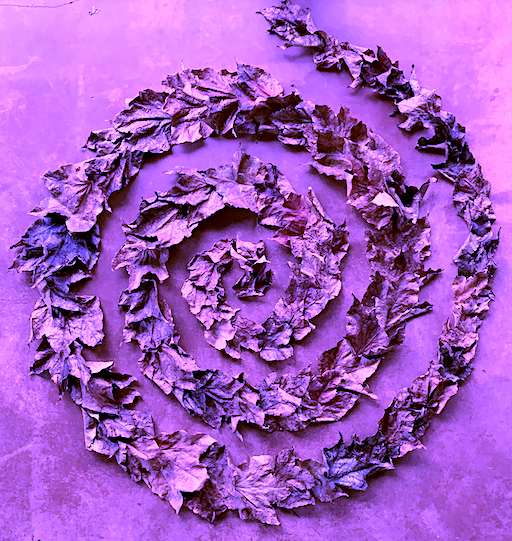
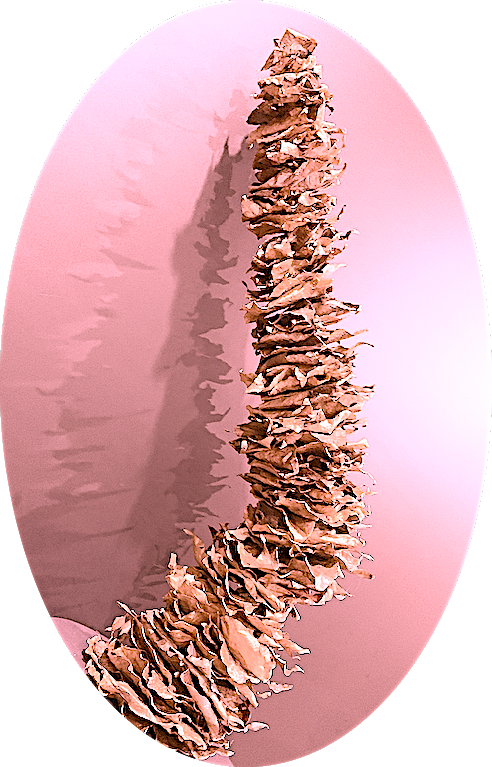
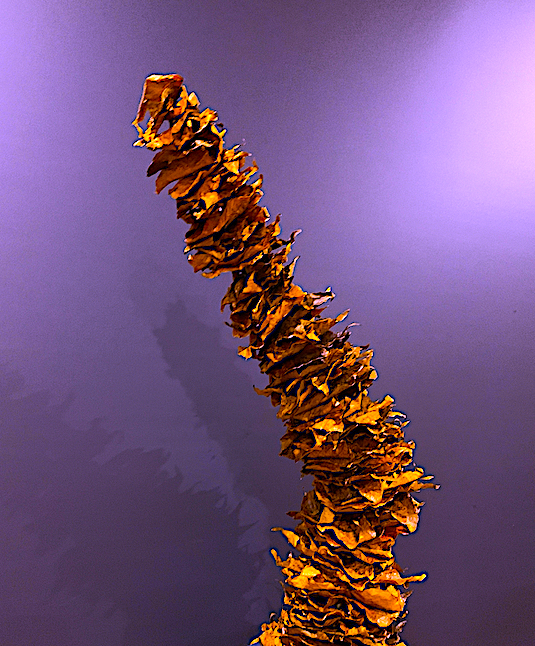
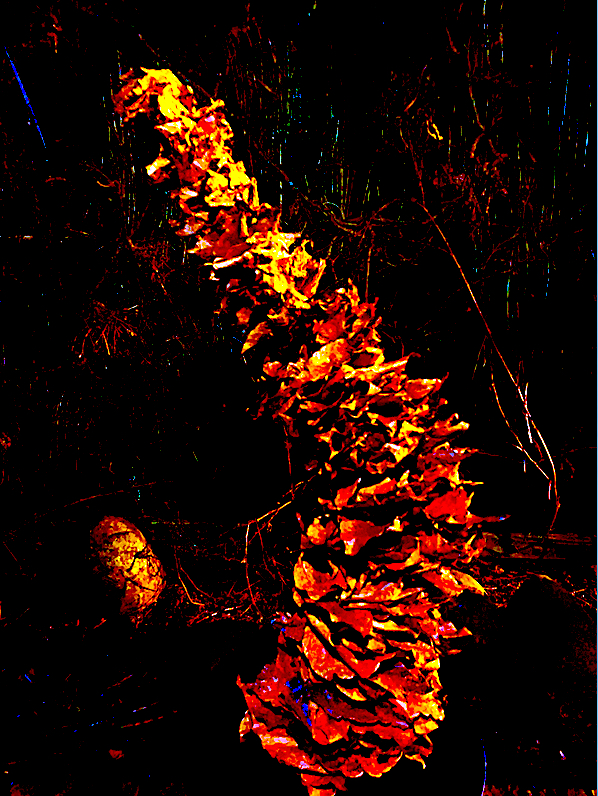
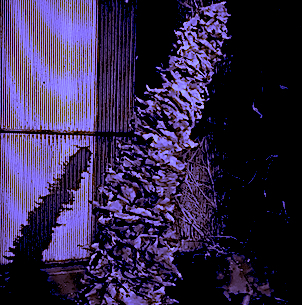
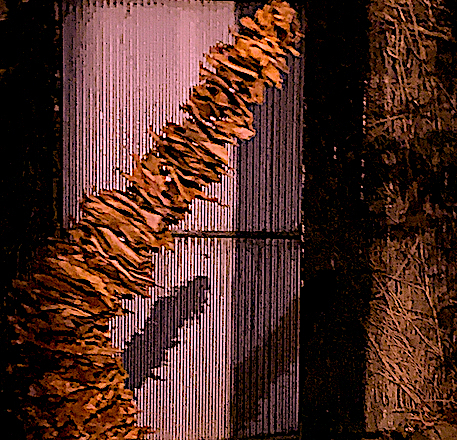
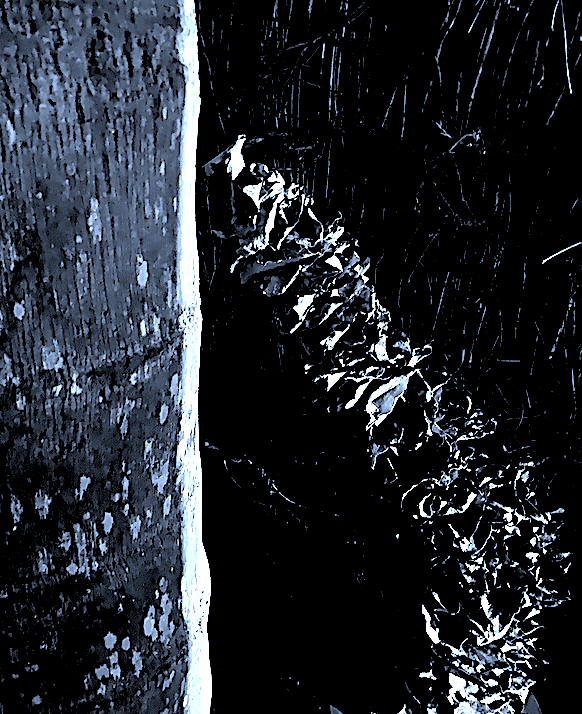
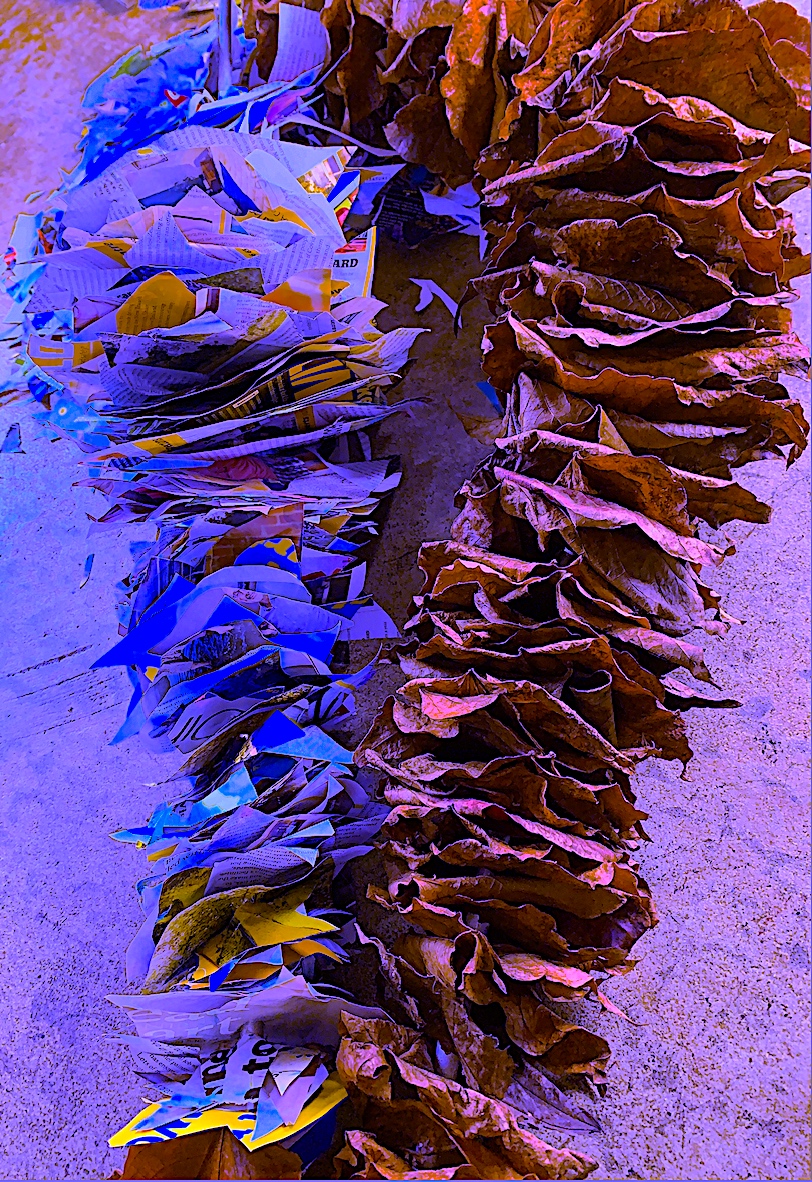
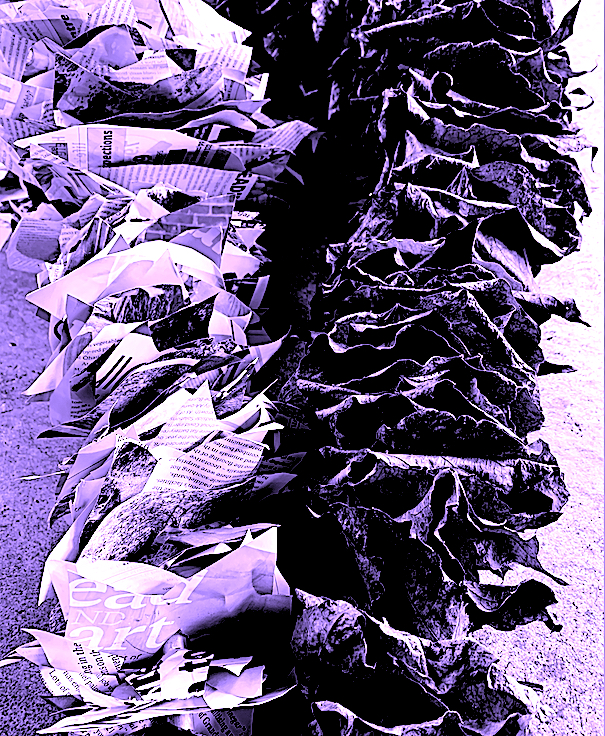
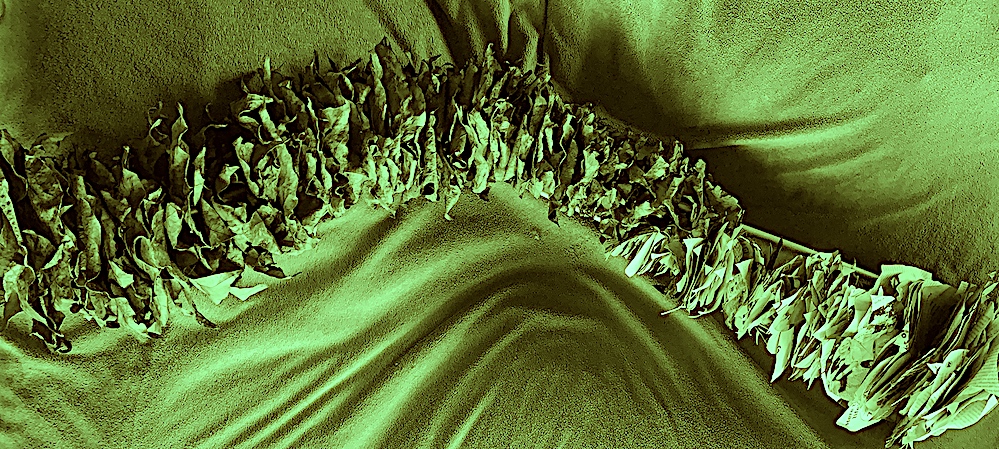
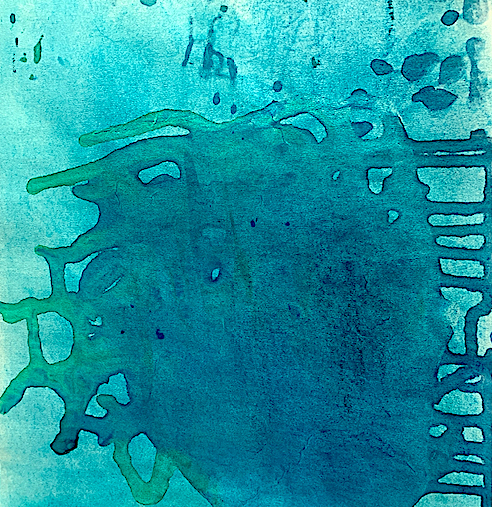
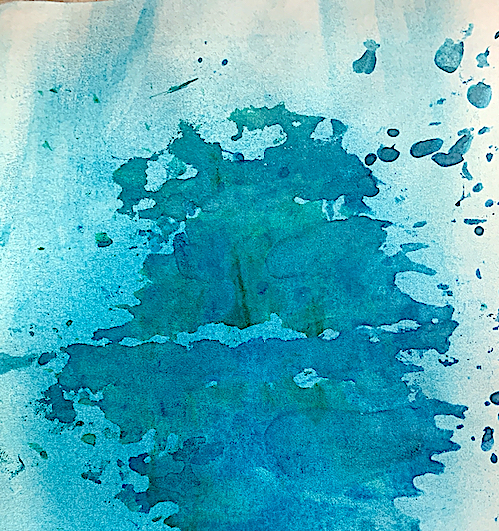
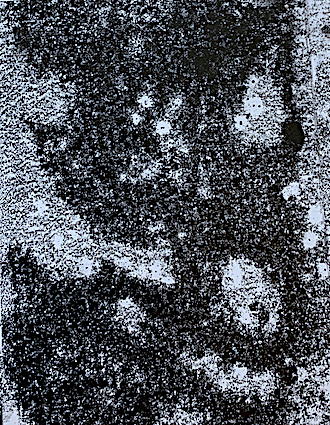
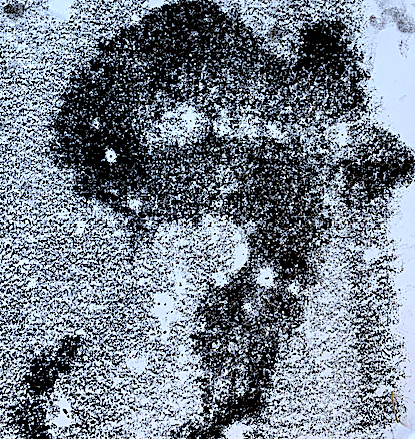
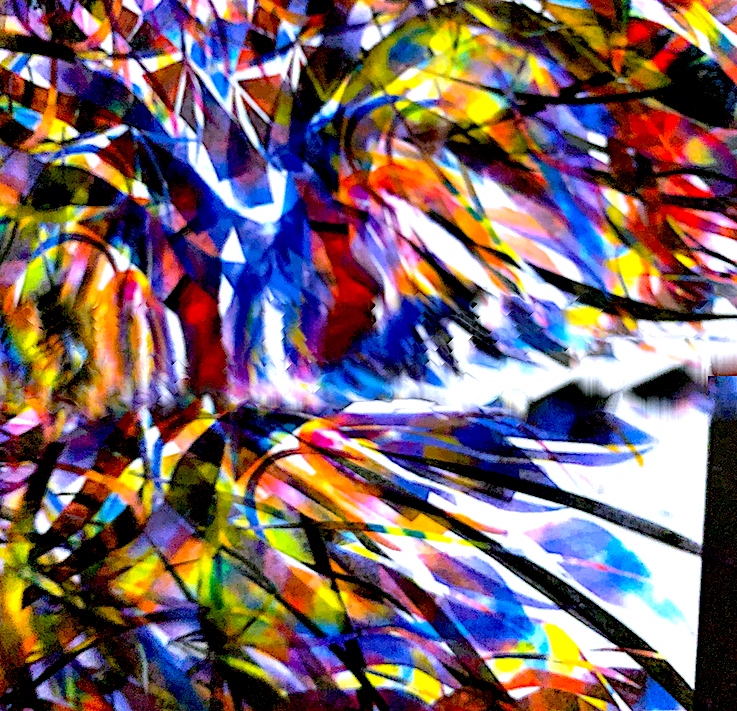
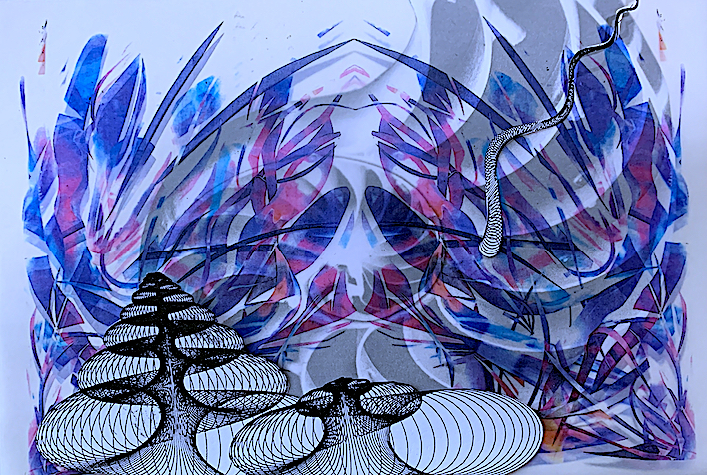
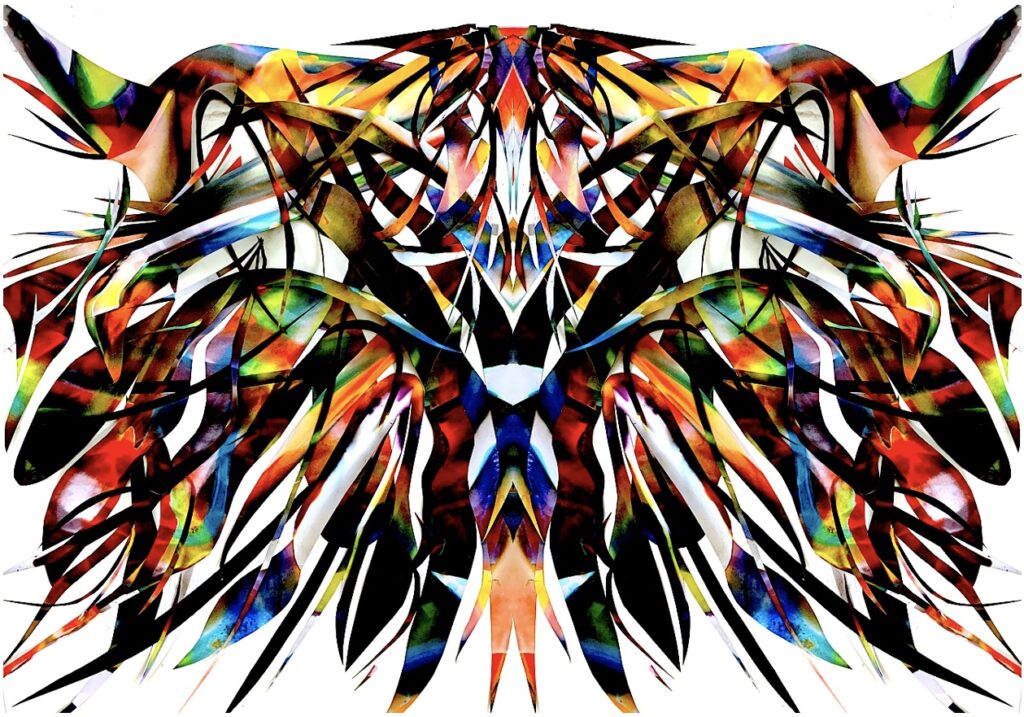
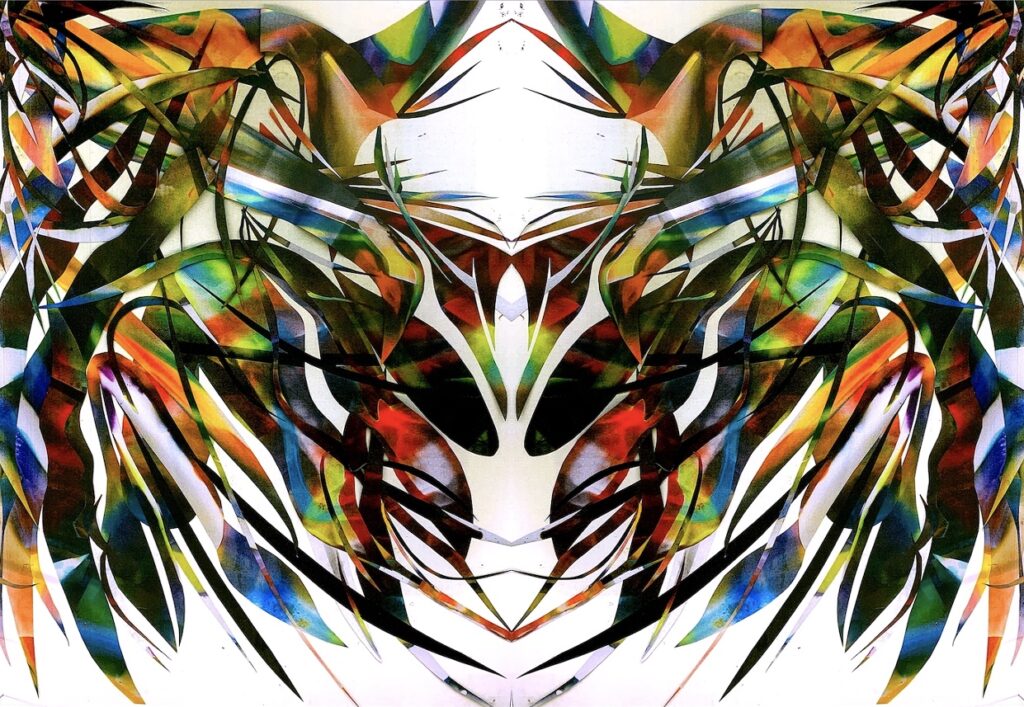
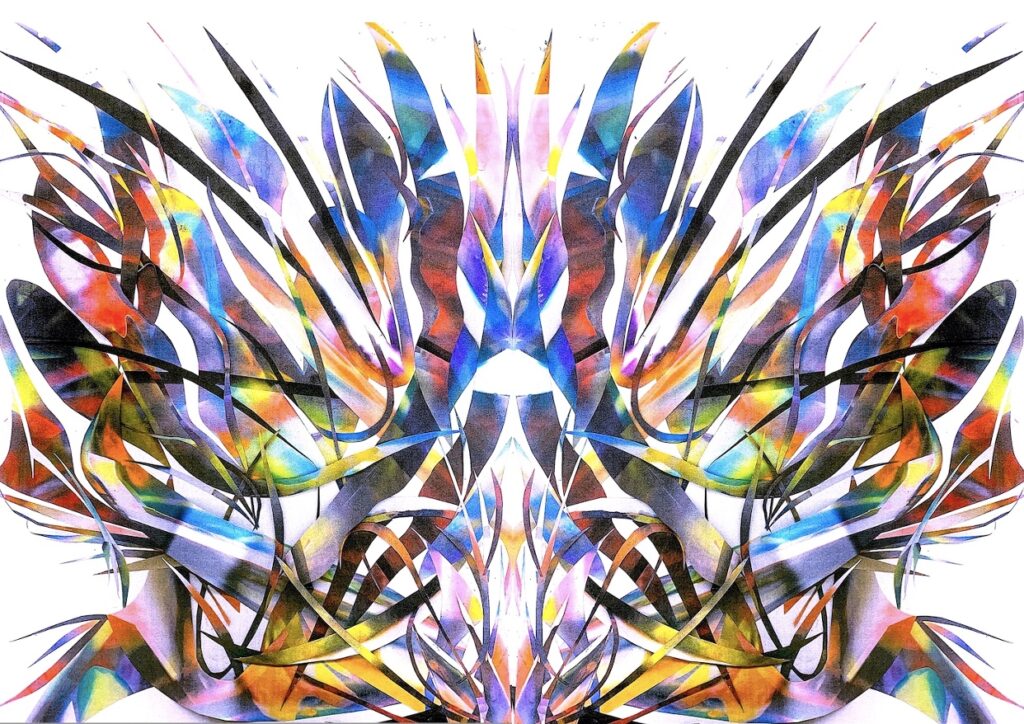
PALIMPSEST RECYCLING & REUSING NATURE to make an artwork. ECO-INSTALLATION – Connecting back to my first plant-leaf-inspired collage concept, and my leaf prints above, I gathered this leaf plant matter before decay set in. Both Sculptor Tony Cragg and naturalist Sculptor Andy Goldsworthy make connections to nature within their art, and create stacked-up layered sculptures. Like Andy Goldsworthy and Collage artist Fred Tomaselli who both utilise leaves in their artworks, I gave new life to a bunch of brown, crispy, disintegrating leaves by resurrecting them into a new form. I placed this layered leaf eco installation sculpture back into the garden where their layers originally blew in the breeze, and enjoyed the sun and rain. Now, their original dormant host vine sits vacant of leaves and will sleep through Winter, only waking in Spring time to repeat the leaf growth cycle.
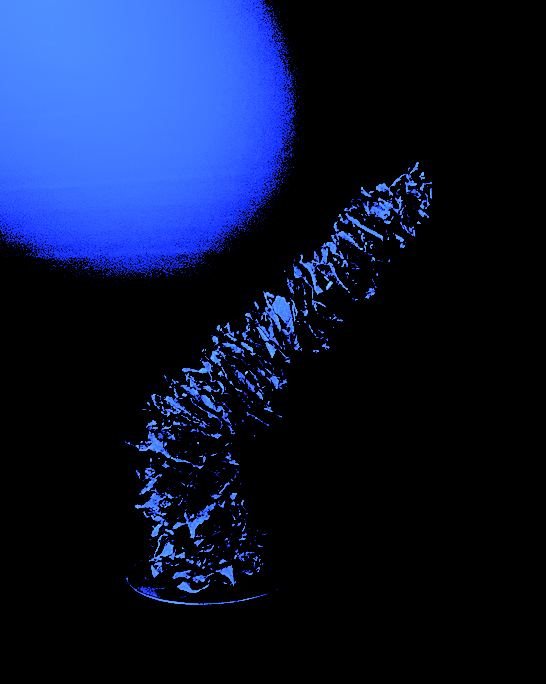
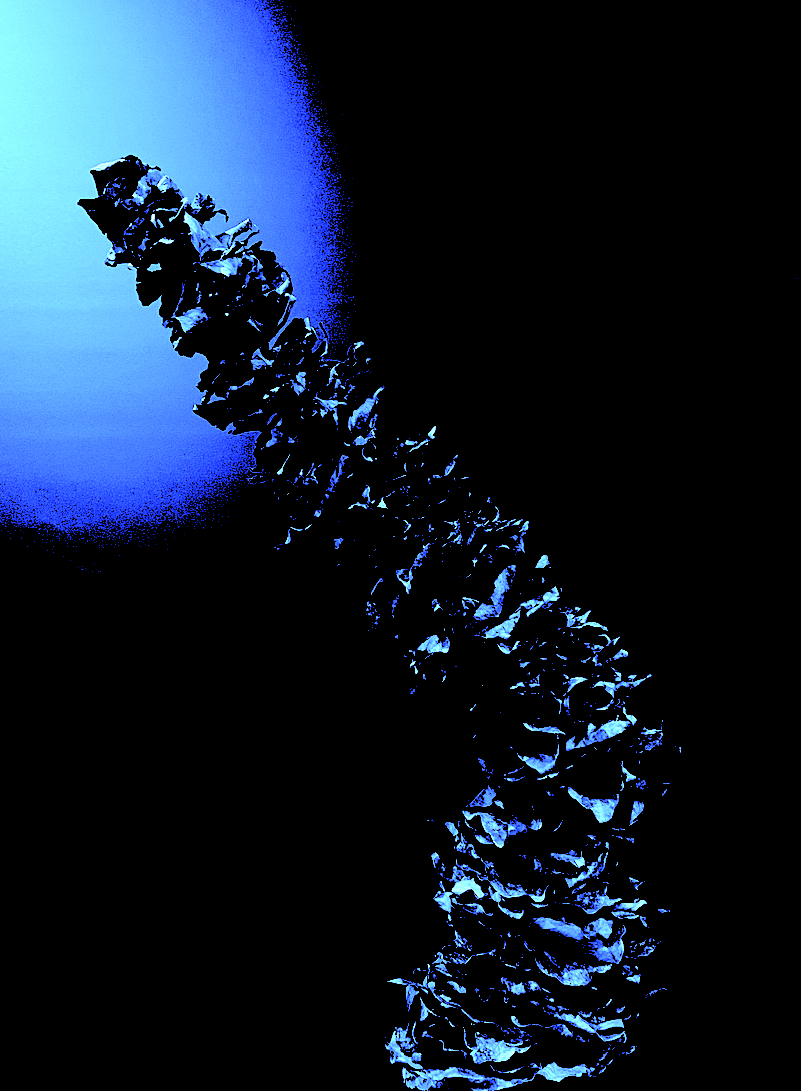
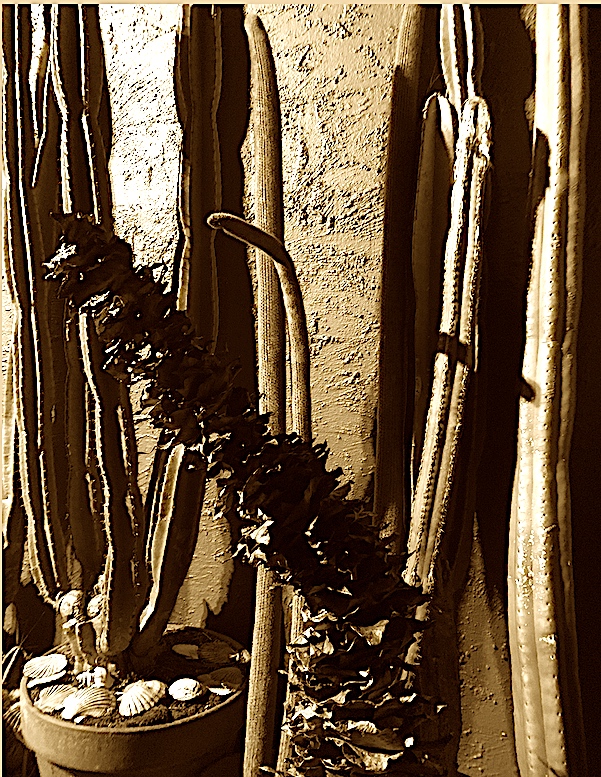
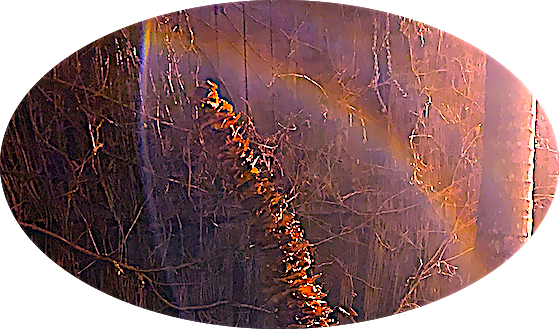
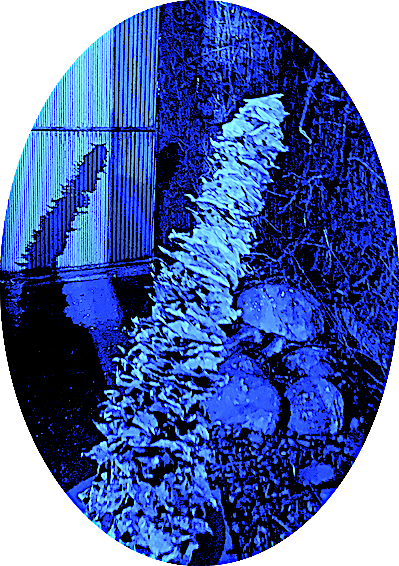
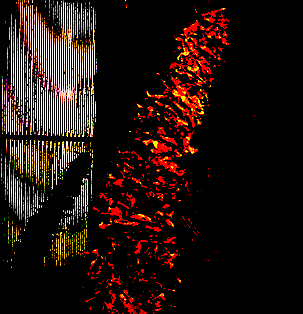
Figure 15. Eco-Installation: ‘BENDING BLUE MOON’ Sculpture (Virginia Creeper Leaves), 680mm x 220mm.
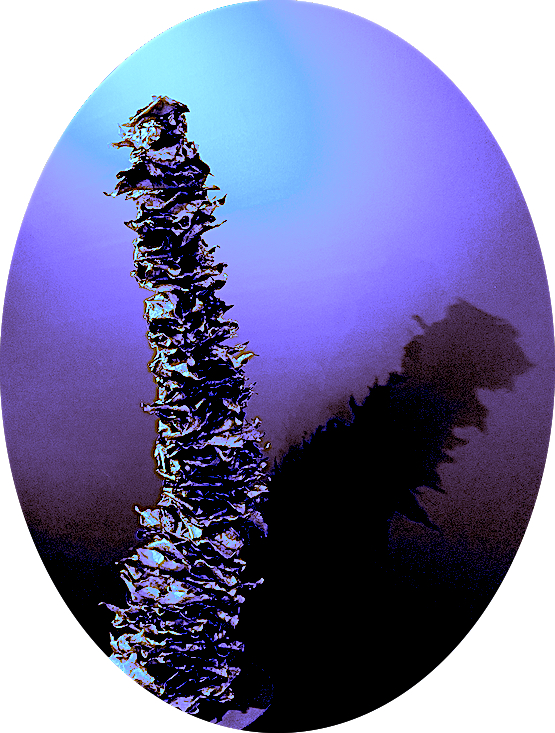
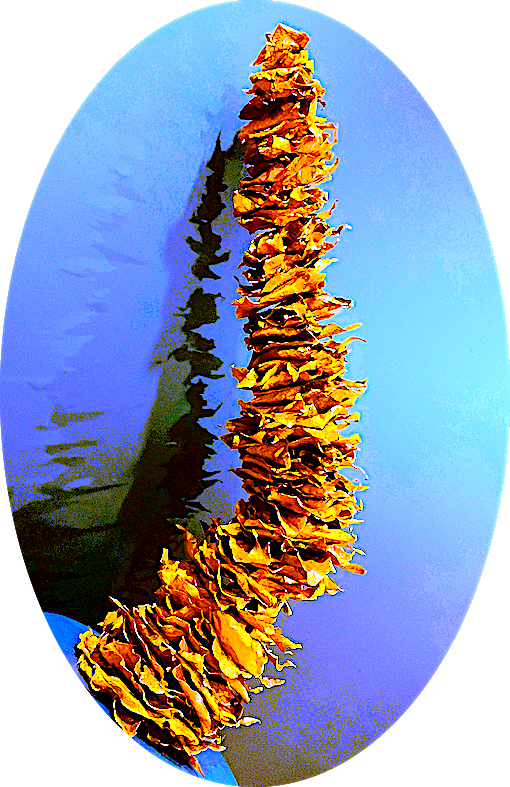
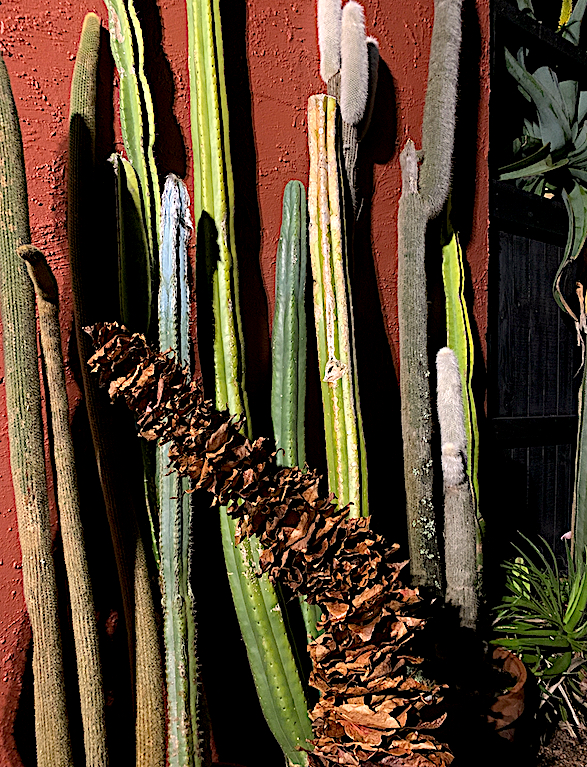
Figure 16. Site Specific Eco-Installation: ‘VISITS CACTUS’, 680mm x 220mm.
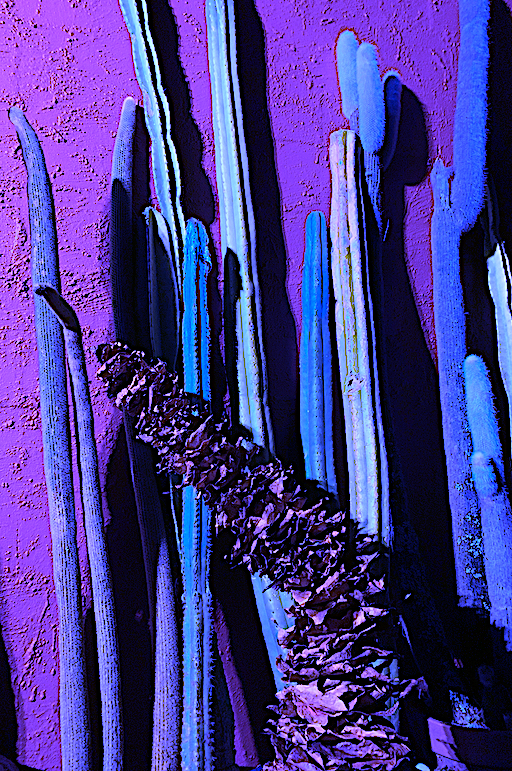
Figure 17. Site SpecificEco-Installation: ‘VISITS FAWN CACTUS AT DAWN’, 680mm x 220mm.
Figure 18. Site SpecificEco-Installation: ‘VISITS PURPLE CACTUS AT DAWN’, 680mm x 220mm.
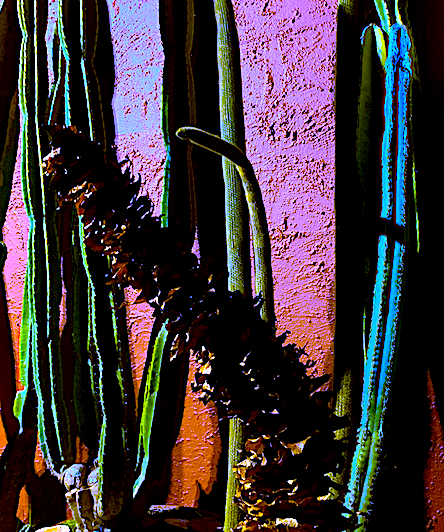
Figure 19. Site SpecificEco-Installation: ‘BENDS LIKE CACTUS AT DAWN’, 680mm x 220mm.
Figure 20. Site SpecificEco-Installation: ‘MEET, GREET AND COMPARE TEXTURES AT DAWN’, 680mm x 220mm.
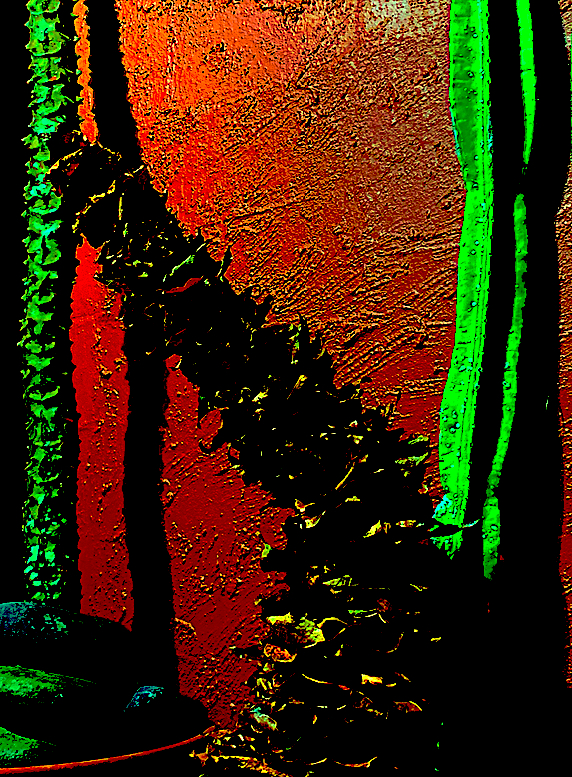
Figure 21. Site SpecificEco-Installation: ‘VISITS BIRTHPLACE AT DAWN’, 680mm x 220mm.
Figure 22. Site SpecificEco-Installation: ‘VISITS BIRTHPLACE AT DAWN LIGHT’, 680mm x 220mm.
Figure 23. Site SpecificEco-Installation: ‘SEES OWN SHADOWS AT DAWN’, 680mm x 220mm.
Figures 24 & 25. Site SpecificEco-Installation: ‘SEES OWN SHADOWS’, 680mm x 220mm.
Figure 26. Site SpecificEco-Installation: ‘SEES OWN SHADOWS AND BIRTHPLACE AT DAWN’, 680mm x 220mm.
Figure 27. Site SpecificEco-Installation: ‘COMPARES BLACK AND WHITE TEXTURES AT DAWN’, 680mm x 220mm.
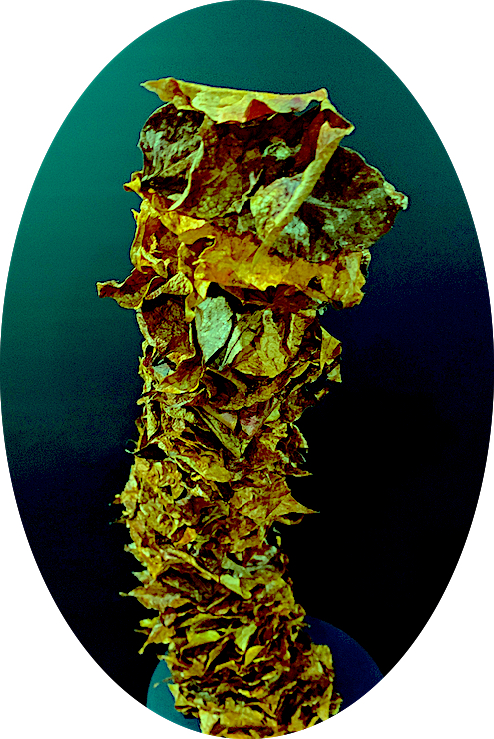
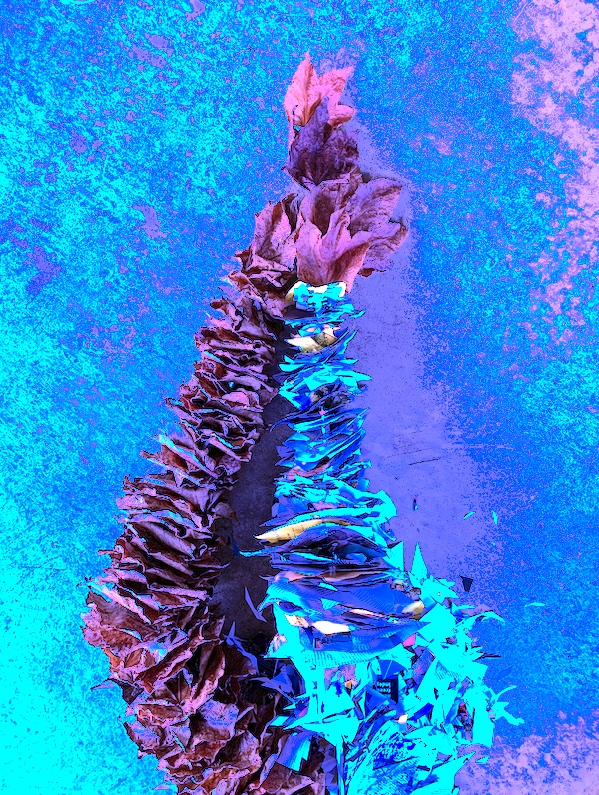
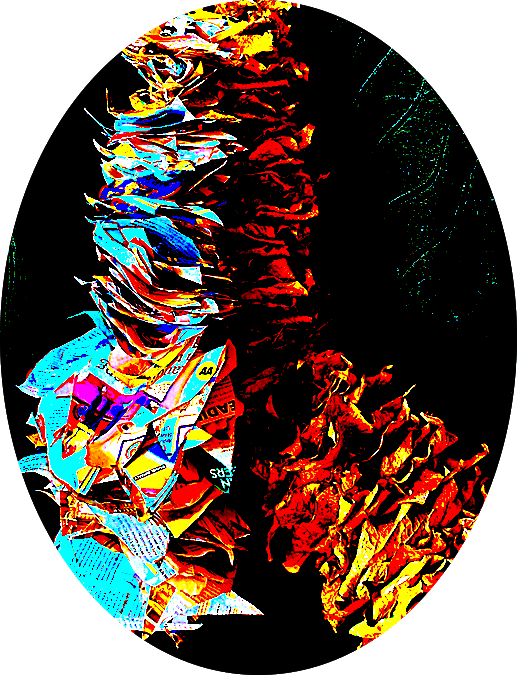
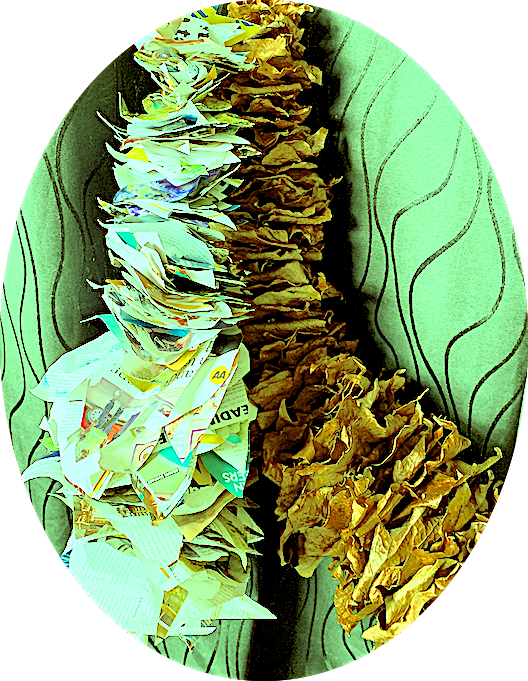
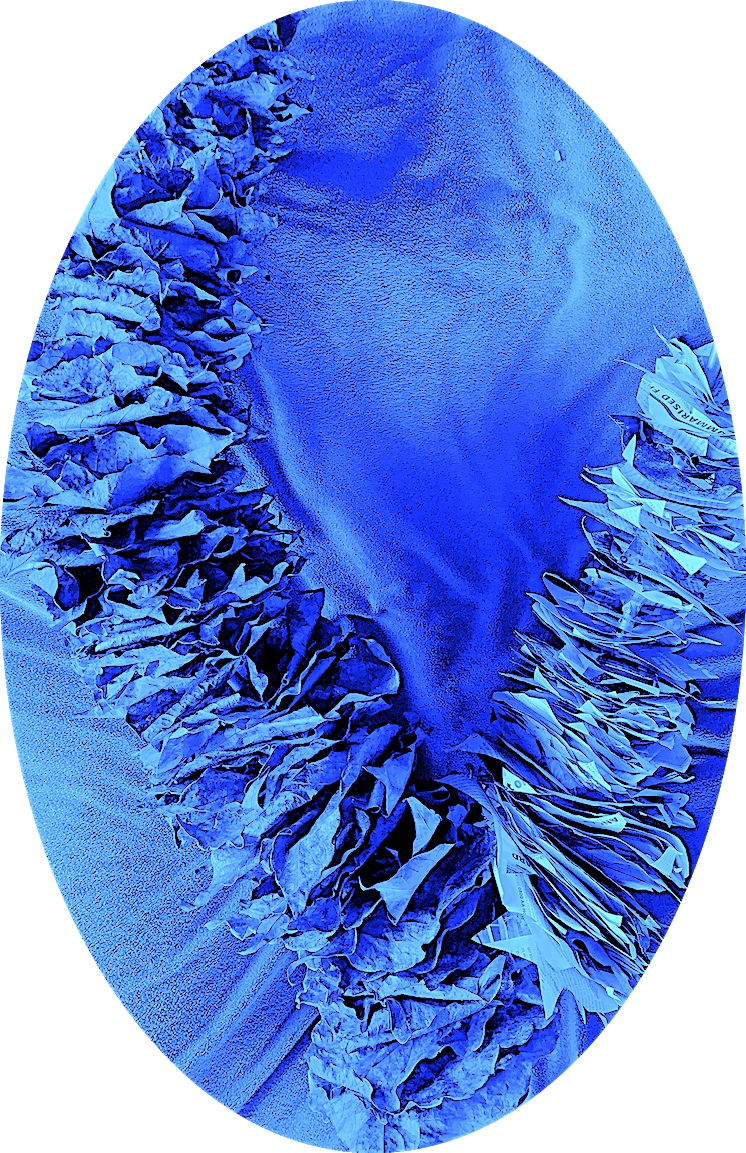
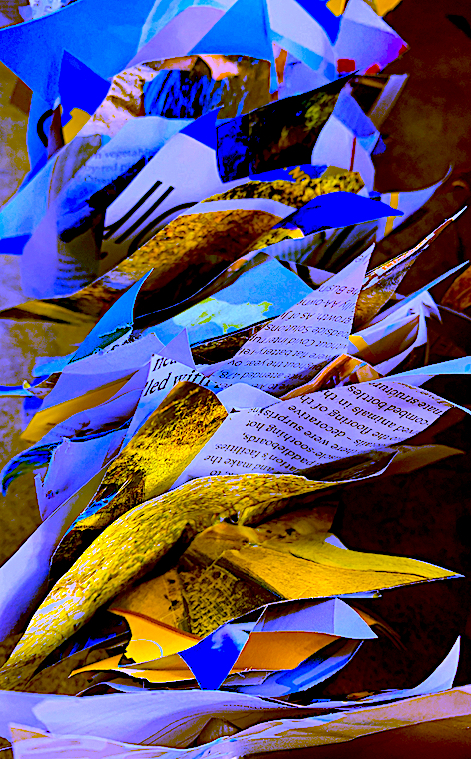
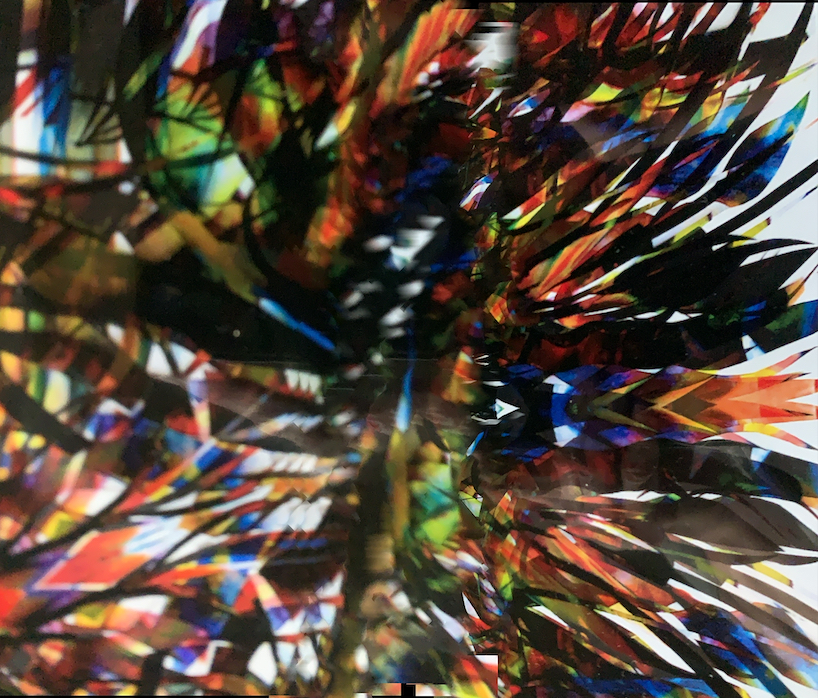
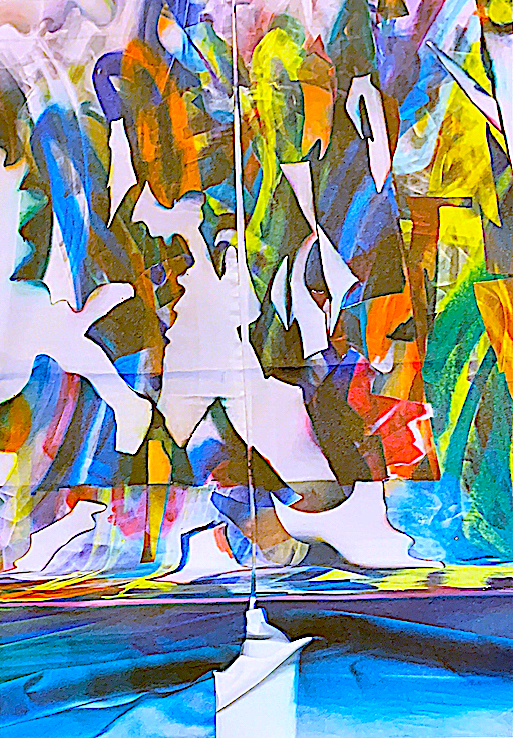
The next step in this Palimpsest process involved connecting nature with human-made processes. As humans convert the natural material of plants such as tree and flax fibre into paper, I therefore converted this paper again by recycling it. After reading a glossy magazine I reused this shiny paper rubbish to create another sculpture. This machine-made printed matter with text and photographs originally came from nature. My sculpture is inspired by plants and their natural growth.
Leaf Sculpture meets Paper Sculpture (AA Magazine printed matter).
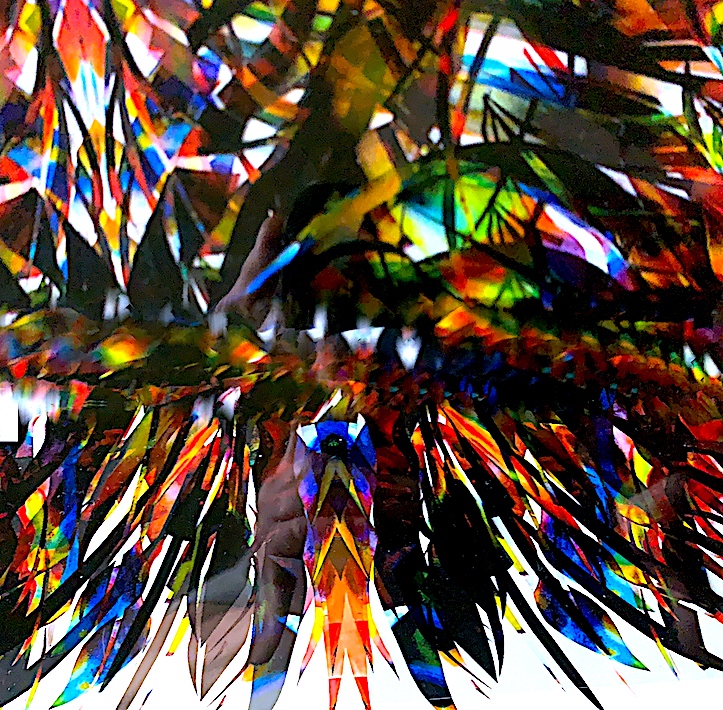
Figure 28. Site Specific Eco-Installation: ‘OPPOSITES ATTRACT 1’ – ‘NATURE (Leaf Matter) MEETS MACHINE-MADE (Printed Matter)’.
Figure 29. Site Specific Eco-Installation: ‘OPPOSITES ATTRACT 2’ – ‘NATURE (Leaf Matter) MEETS MACHINE-MADE (Printed Matter)’.
Figure 30. Site Specific Eco-Installation: ‘OPPOSITES ATTRACT 3’ – ‘NATURE (Leaf Matter) MEETS MACHINE-MADE (Printed Matter)’.
Figure 31. Site Specific Eco-Installation: ‘OPPOSITES ATTRACT 4’ – ‘NATURE (Leaf Matter) MEETS MACHINE-MADE (Printed Matter)’.
Figure 32. Site Specific Eco-Installation: ‘OPPOSITES ATTRACT 5’ – ‘NATURE (Leaf Matter) MEETS MACHINE-MADE (Printed Matter)’.
Figure 33. Site Specific Eco-Installation: ‘OPPOSITES ATTRACT 6’ – ‘NATURE (Leaf Matter) MEETS MACHINE-MADE (Printed Matter)’.
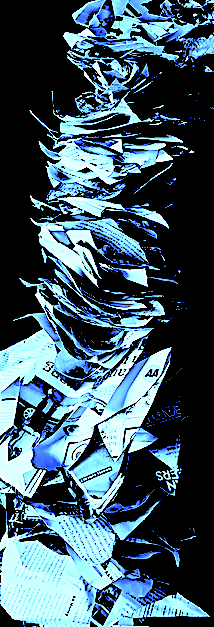
Figure 34. Site Specific Eco-Installation: Close up of MACHINE-MADE (Printed Matter)’ layered Palimpsest sculpture.
Figure 35. Site Specific Eco-Installation: Close up of MACHINE-MADE (Printed Matter)’ layered Palimpsest sculpture.
Figure 36. Site Specific Eco-Installation: ‘OPPOSITES ATTRACT 7’ – ‘NATURE (Leaf Matter) JOINS MACHINE-MADE (Printed Matter)’.
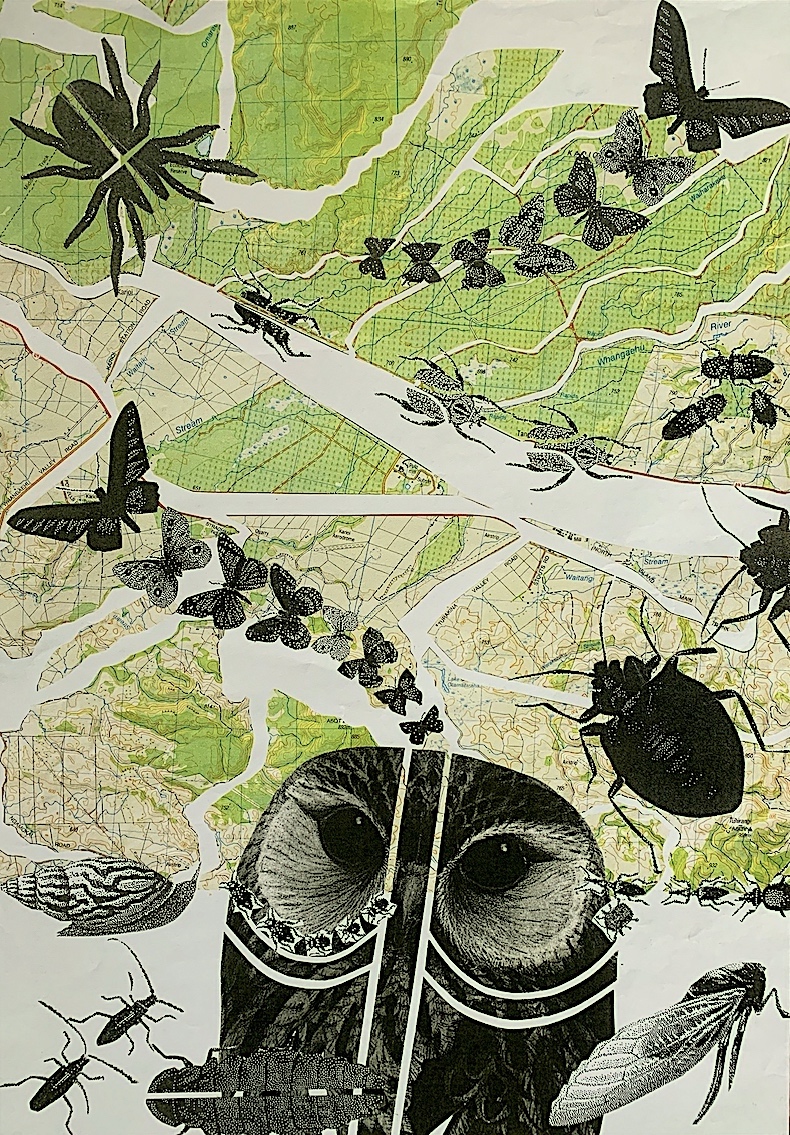
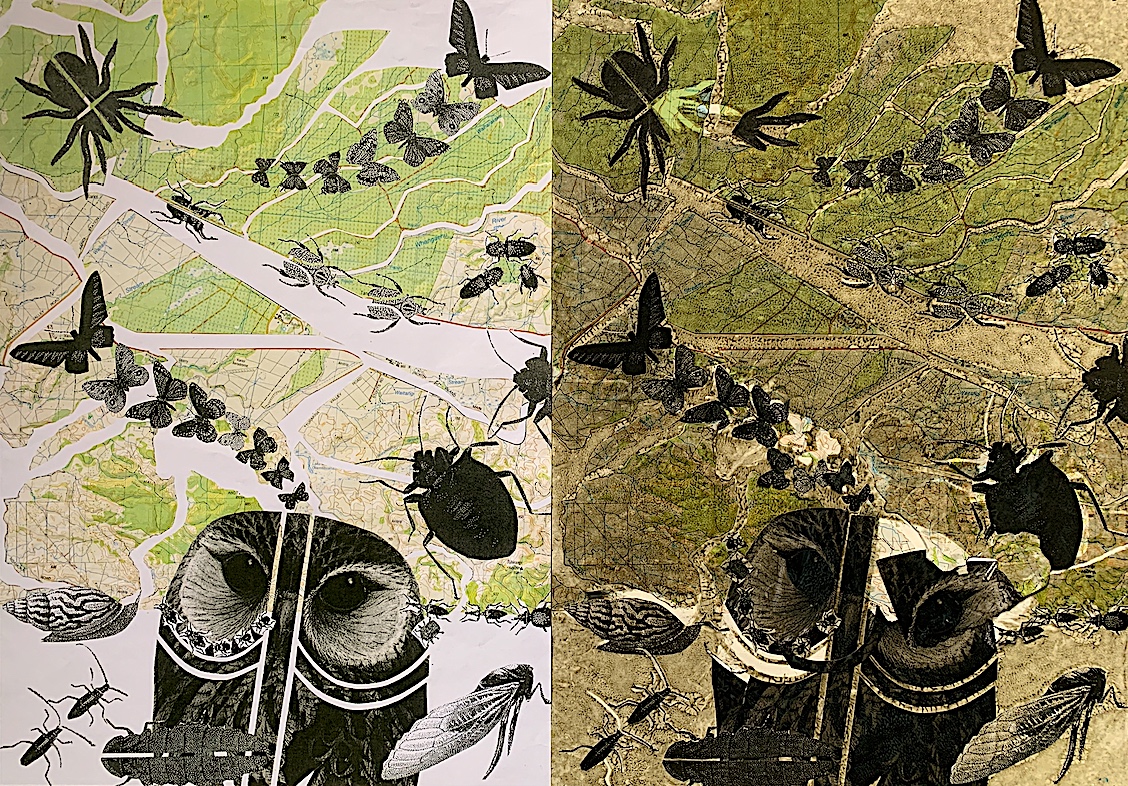
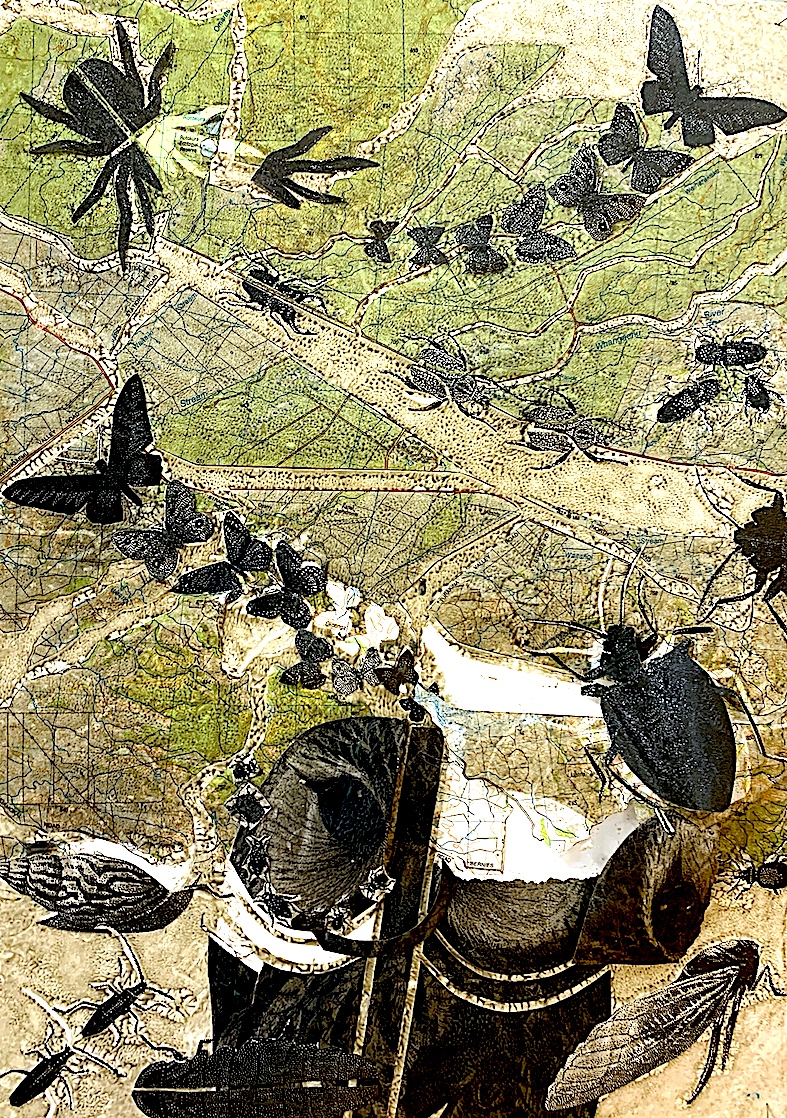
I am interested in Landscape art, the environment, geology and maps. Therefore, I used this New Zealand topographical map (below) as a background base to start my figurative animal collage, following on from my Palimpsest animal envisaged abstract collages.
Collage – Deconstructed Map: 16.05.21.
When creating my collage, I not only cut around the map’s edges, but also deconstructed it along the inner lines, as I was focusing on the visual art element of line. The reason for this was that I imagined the earth, thus map breaking apart like in an earthquake.
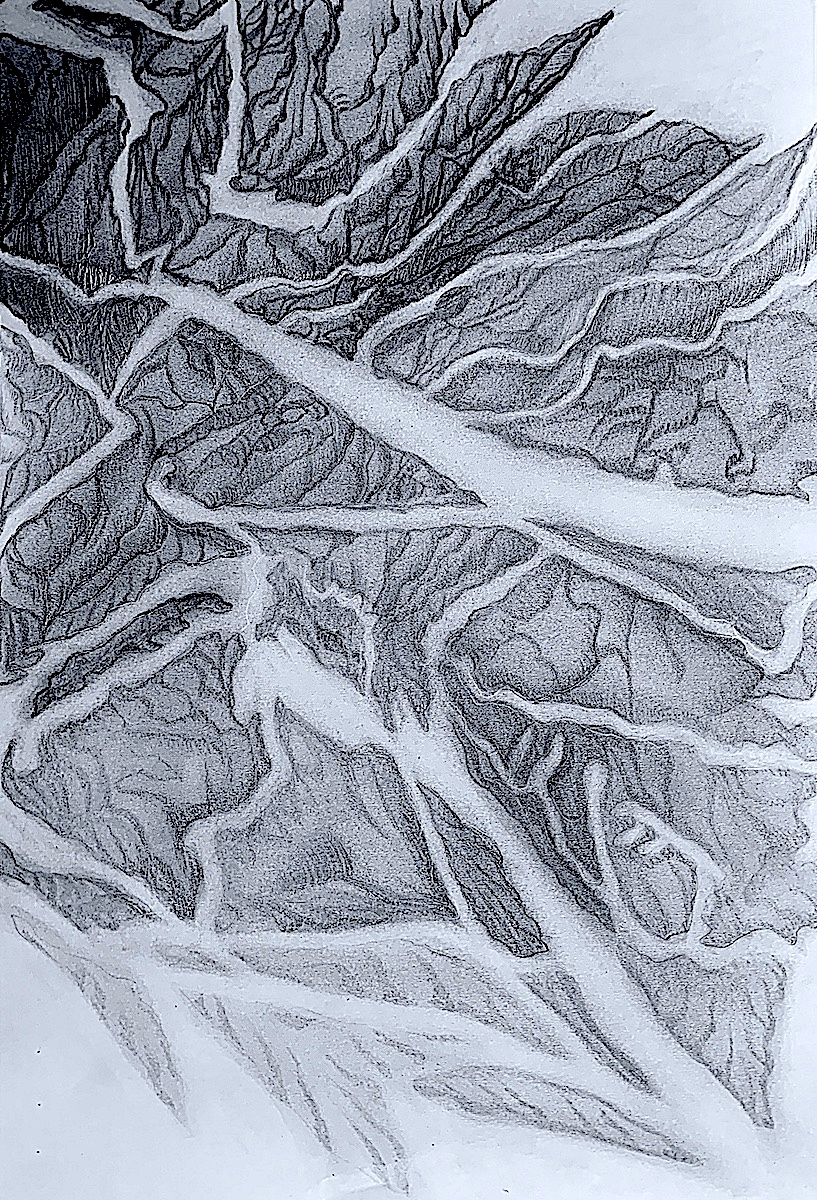
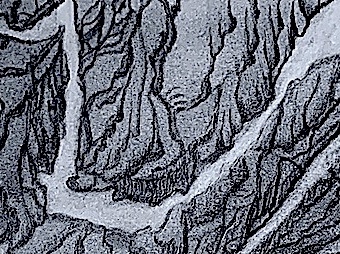
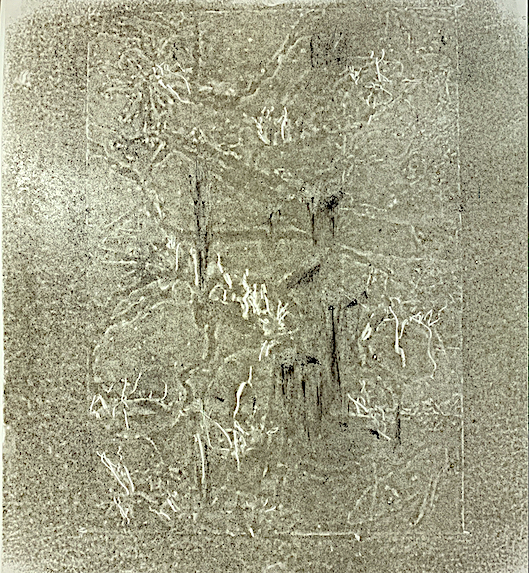
In my workbook I drew the above map, repeating the cut out shapes using just a pencil. I extended my Palimpsest journey into another direction by creating a graphite drawing (see below).
Graphite Drawing of Map Landforms. 16.05.21
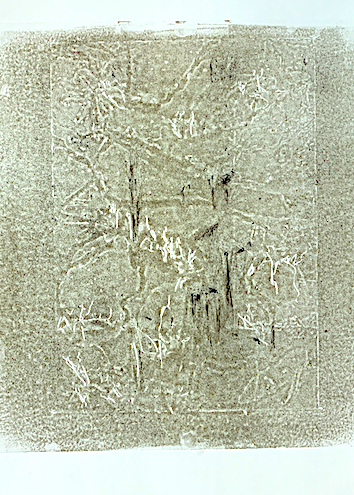
My graphite landscape is a three-dimensional drawing of tonal depth with dark and light chiaroscuro effects up and down the mountain ranges. A soft, gradual change of tone from dark to light across the whole picture plane is demonstrated from the top left diagonal to the lower right diagonal. By drawing the positive landforms and leaving the negative sea shapes blank to represent an earthquake’s breakages, I have also displayed contrast (a principal of design).
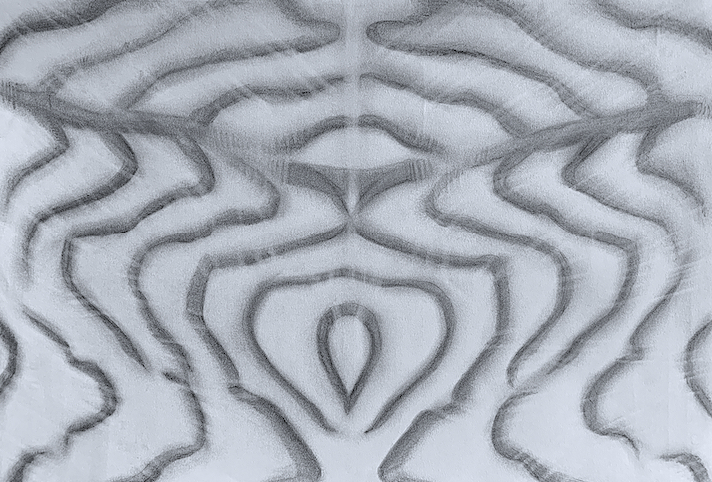
‘Landscape and Seashell Patterns‘. Workbook Graphite Drawing: 15.05.2021.
‘Landscape and Seashell Patterns‘(Horizontal Reflection). Workbook Graphite Drawing: 15.05.2021.
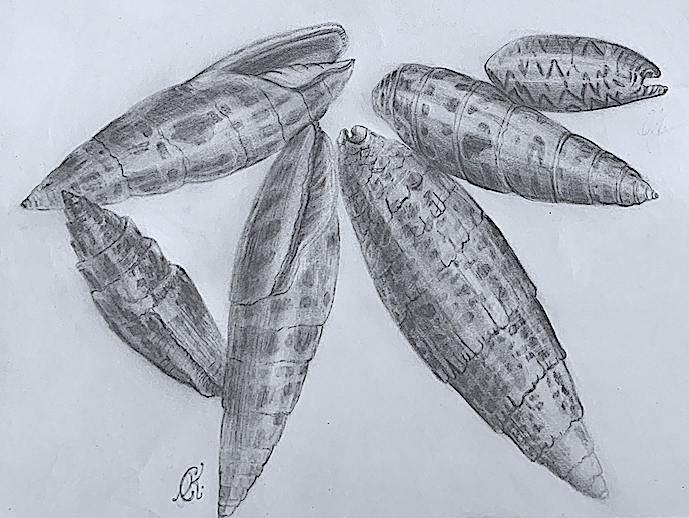
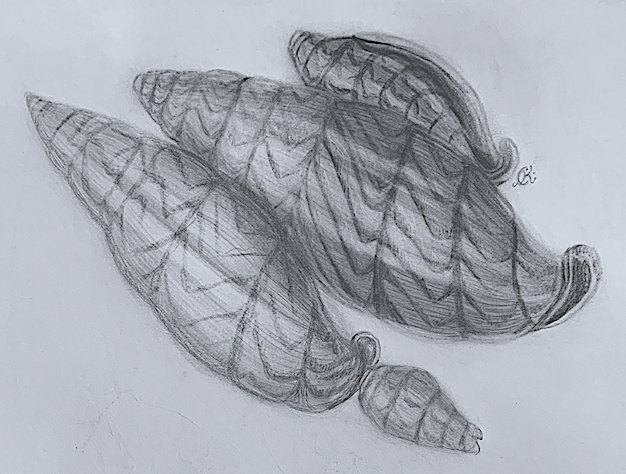
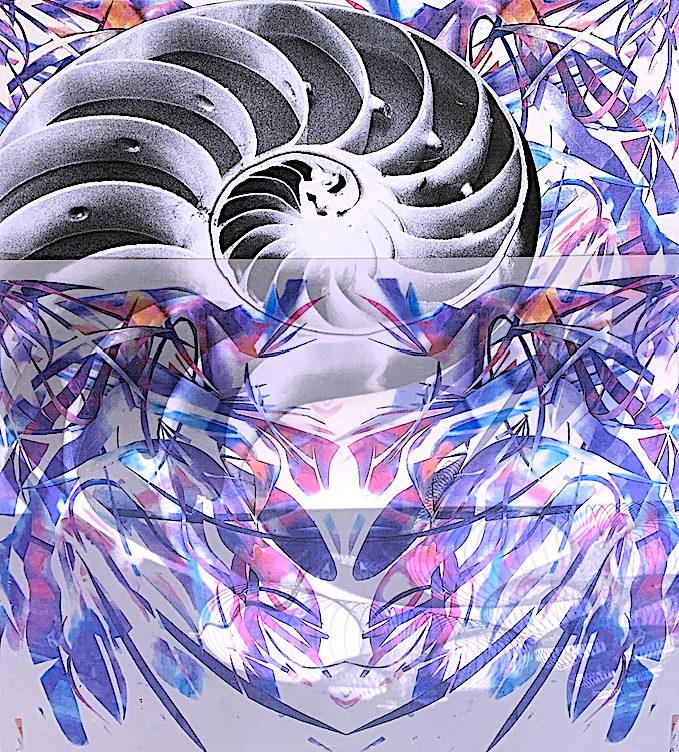
Palimpsest connection: Seeing a SEASHELL form within my above Landscape Map.
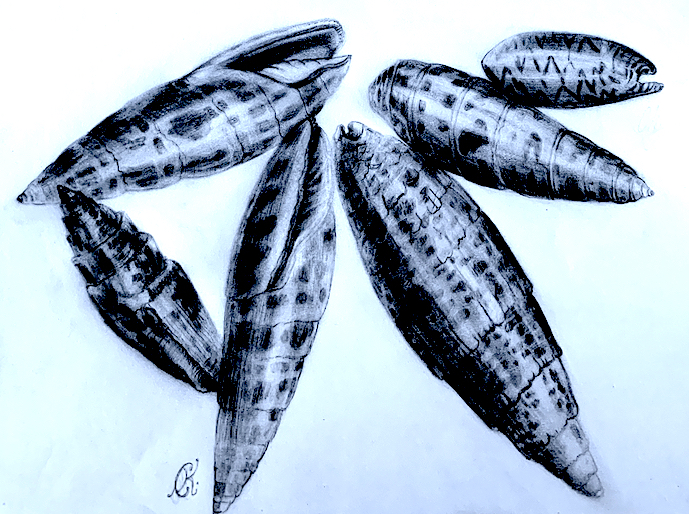
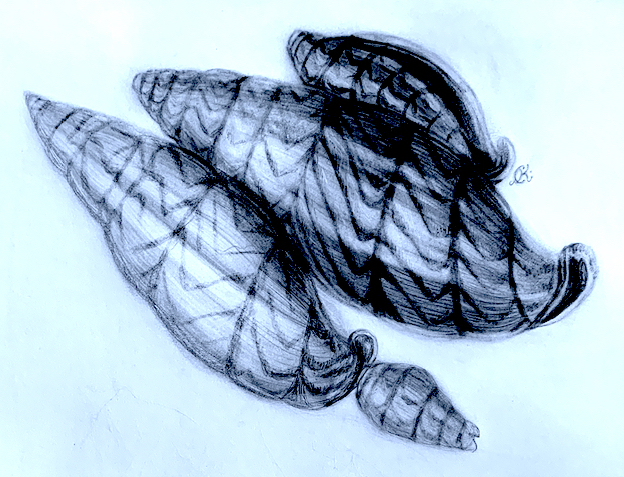
Palimpsest Subject Matter: Animal and Organic forms = SEASHELLS. (Workbook Graphite Drawing: 15.05.2021).
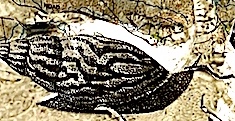
Palimpsest Subject Matter: These above SEASHELLS are connected to the SNAIL on my Collage below. (Workbook Graphite Drawing: 15.05.2021).
SNAIL SHELL (House) connected to a SEASHELL (House)
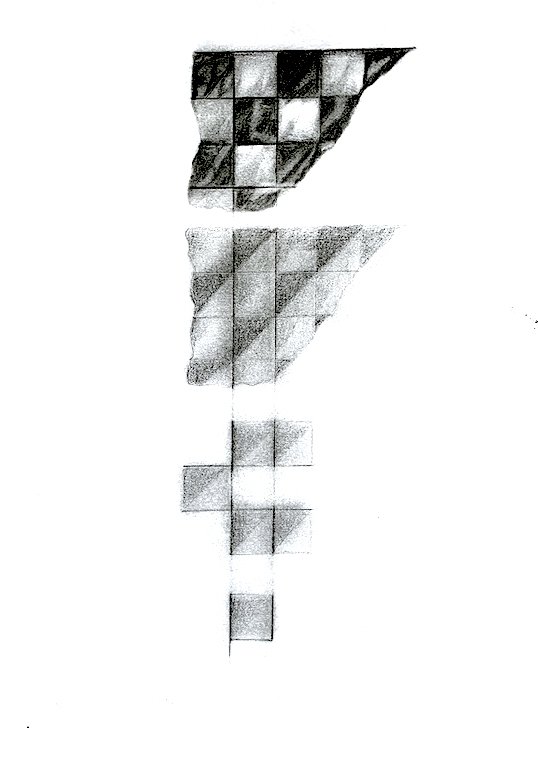
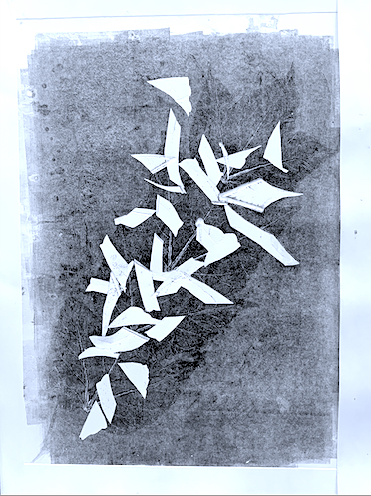
The difference between my drawing and my found map is that I drew linear rising landforms, because I wished to convert the map into a landscape from a bird’s eye view. In my above drawing there are no mapping grids. Separating the square grids and drawing the map lines became my next Palimpsest step in this drawing investigation (see below).
Chosen part to reproduce (from my Map drawing)
Next Palimpsest Step in Workbook: Graphite Abstracted Map Grids : 17.05.21.
Instead of enlarging, I then thought I could miniaturize my map by drawing the landscape parts and my invented square shapes onto an A4 mathematical gridded paper. I could further extend this drawing by separating the square grids, and rearranging them in different alignments, angles and directions to make a more abstracted artwork.
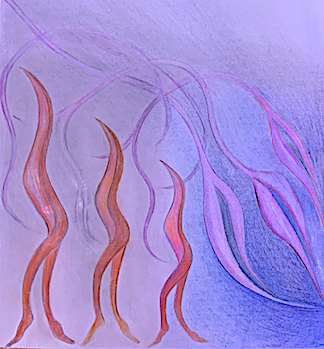
Graphite and Coloured Pencil Drawings – 17.05.21. (Next step: Squares have changed to rectangles with triangles within).
Vertical Rectangles: 17.05.21.
I find drawing very enjoyable, and I realised my map idea could provide endless possibilities to make marks. For example, if this abstracted map grid became a coloured paper/card collage or a coloured print, the introduction of colour would create new patterns, lines and shapes. I had already created new shapes such as triangles within my gridded squares (above), and then I extended the squares to rectangles (as above), and thus my drawing was becoming unrecognisable from the original map (a Palimpsest concept).
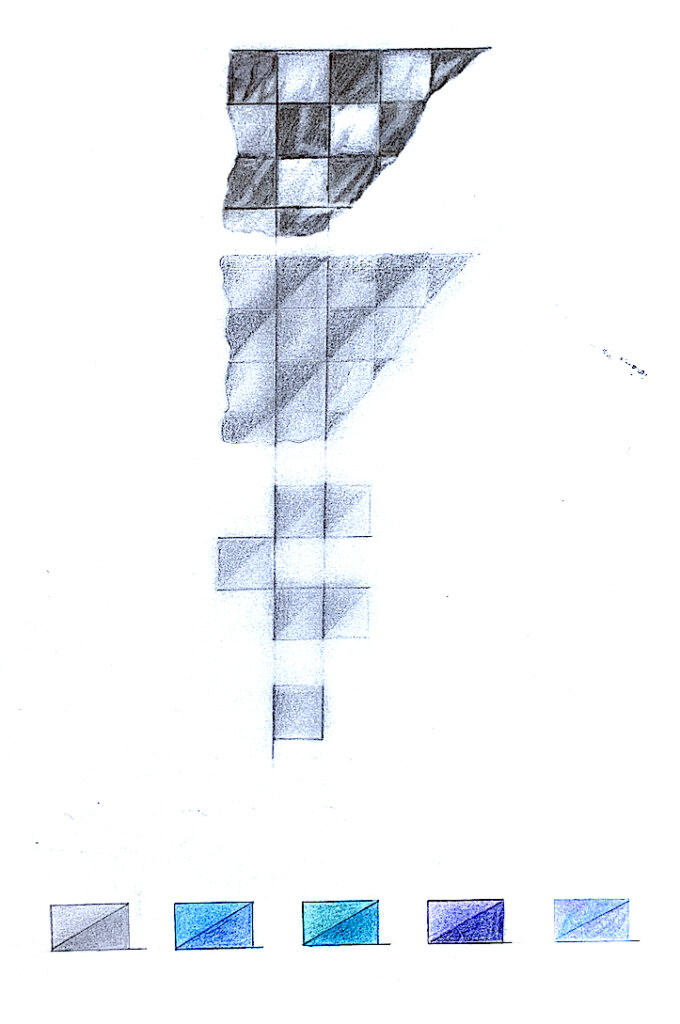
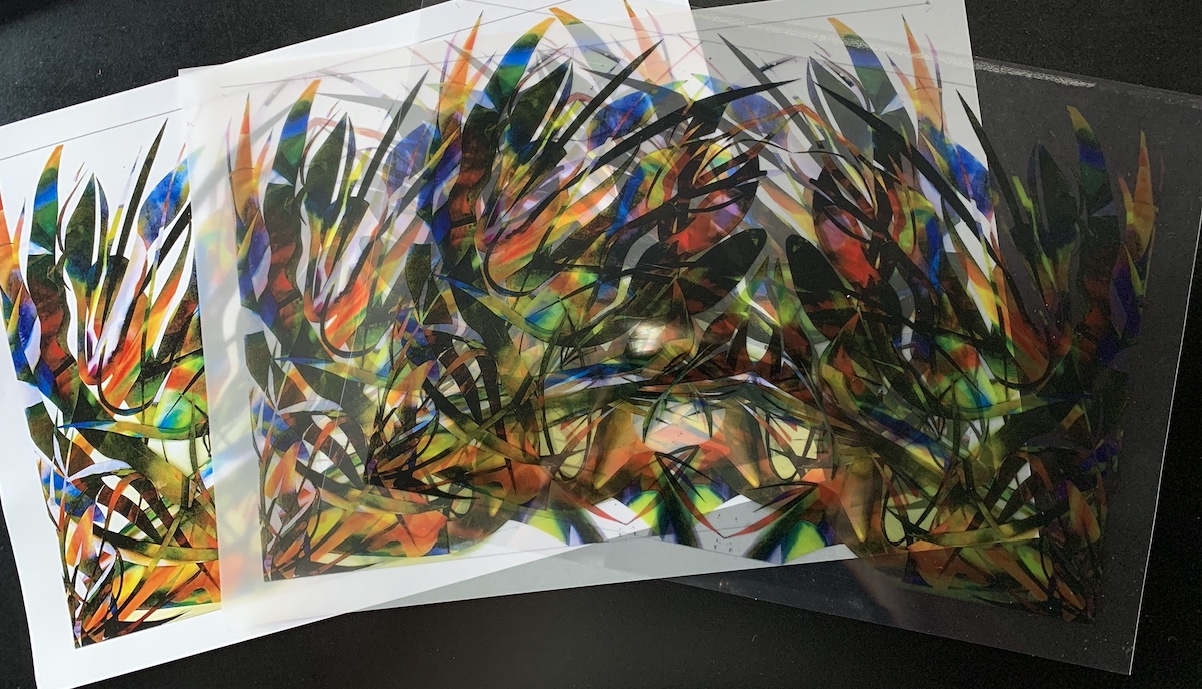
Next Palimpsest Step: 20.05.21. Return to the Printmaking Lab to continue to explore coloured mono prints. (Revisit my above design – rectangular and triangular colour shapes).
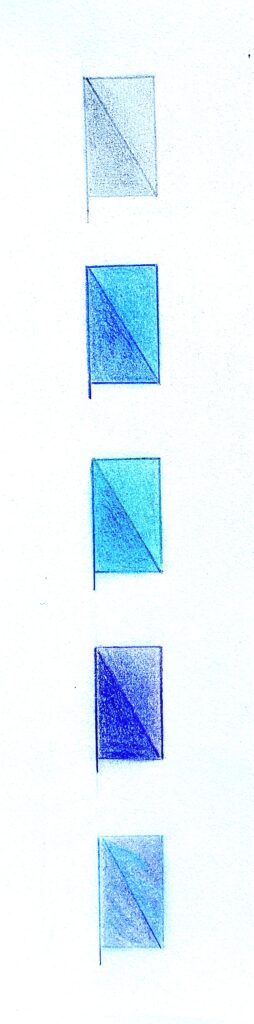
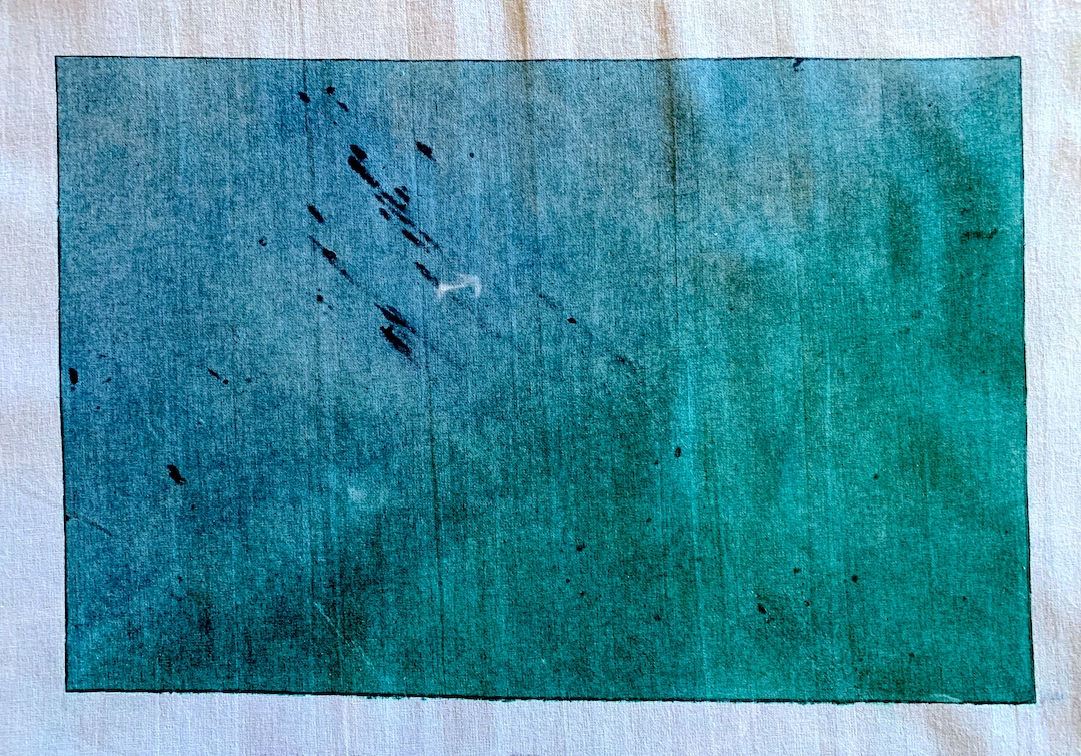
Blue Green Diagonal Line – Rectangle Triangles. 20.05.21. Calico Fabric Mono Print.
Palimpsest Change: My SUBJECT MATTER continues to change… from plant matter to animal and organic matter such as SEASHELLS.
After creating tonal three-dimensional SEASHELL DRAWINGS (see above and below), I used scissors and glue to handmade SEASHELL COLLAGES with transparent papers and photocopies, and then I invented SEASHELL DIGITAL COLLAGES using my handmade collages.
Plant inspired WORKBOOK DRAWINGS after my first Palimpsest concept of COLLAGE.
Palimpsest Concept of Subtraction – To create a new composition when drawing, I chose to subtract some of the cut-out shapes from the original collage (below).
First Palimpsest Concept: Created a Collage from found object. 12.05.2021.
Plant inspired Shapes: I simplified my above collage and made tonal drawings.
Workbook Graphite Drawing. 14.05.2021.
By using the strategy of subtraction, I was able to gain new negative (empty) space shapes set in between my plant leaf shapes.
Workbook Colour Pencil Drawing. 14.05.2021.
I lightly shaded in the negative spaces (see below).
Workbook Graphite Drawing. 14.05.2021.
To add interest, and to further extend my Palimpsest drawing, I created a textured layer over the smooth white plant-inspired empty spaces. Instead of getting rid of my rubbed out material, (I reused it – Palimpsest style), and left the remnants of this rubber fibre on the page.
Workbook Graphite Drawing with Rubber Fibre. 14.05.2021.
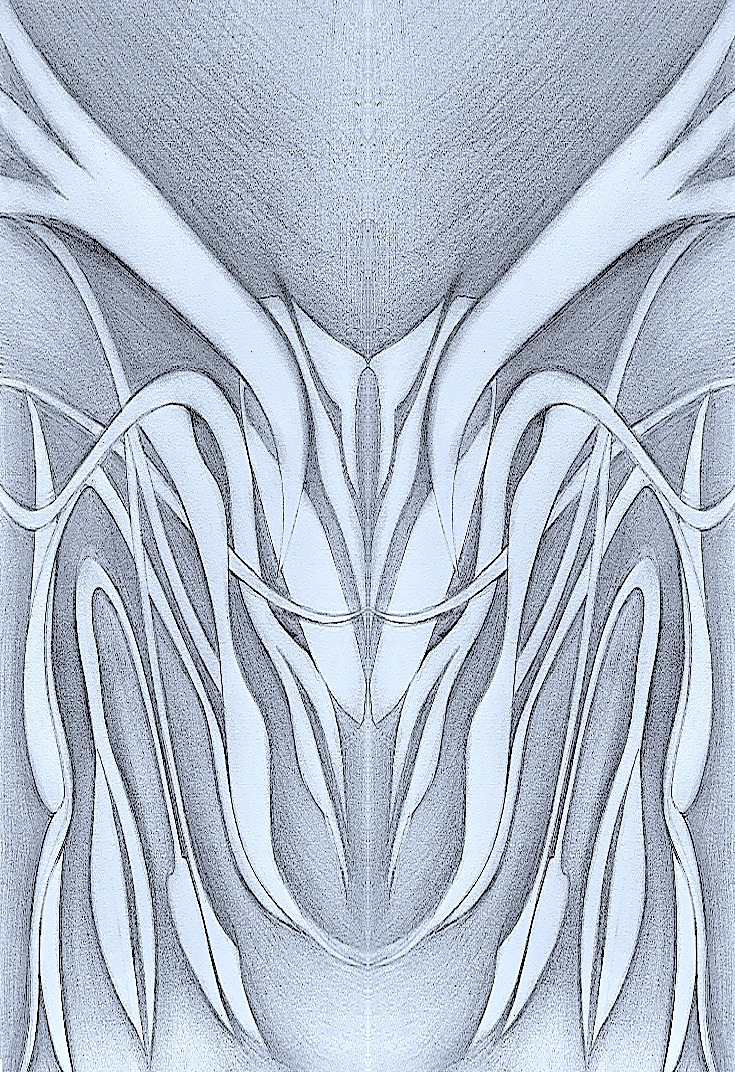
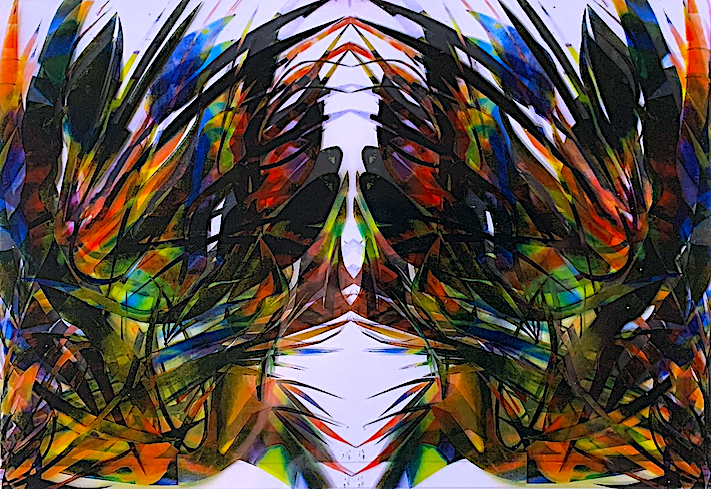
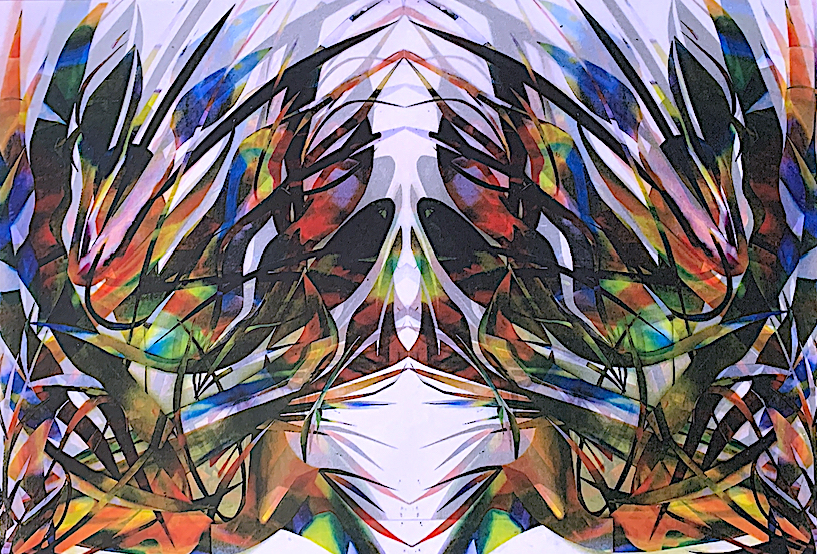
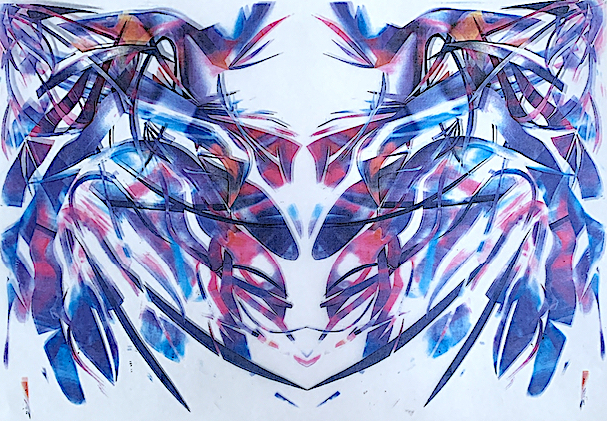
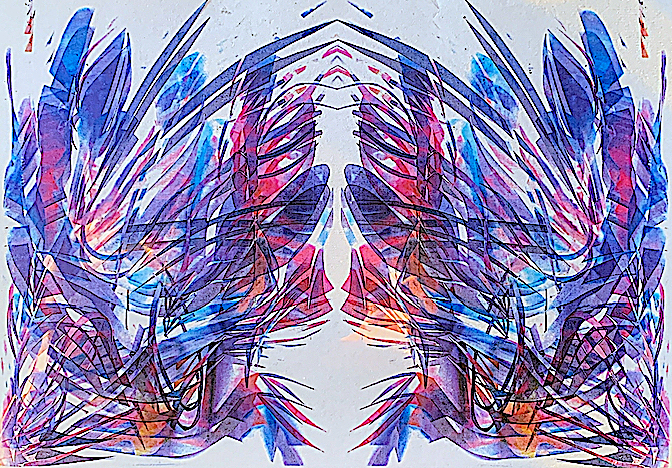
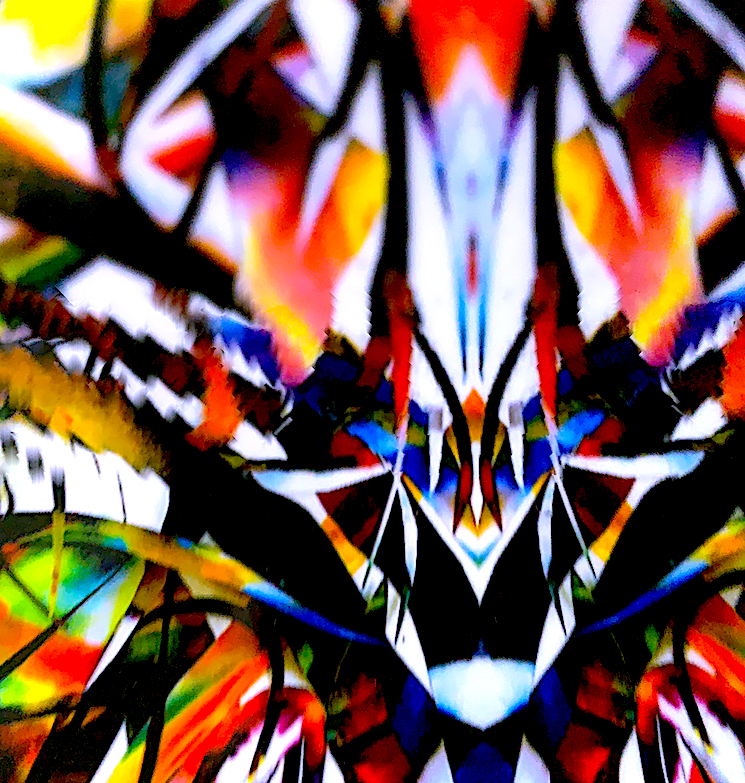
To extend my Palimpsest drawing concept again, I converted my graphite drawing into a mirrored digital image.
Workbook Graphite Drawing Mirrored and Digitised. 14.05.2021.
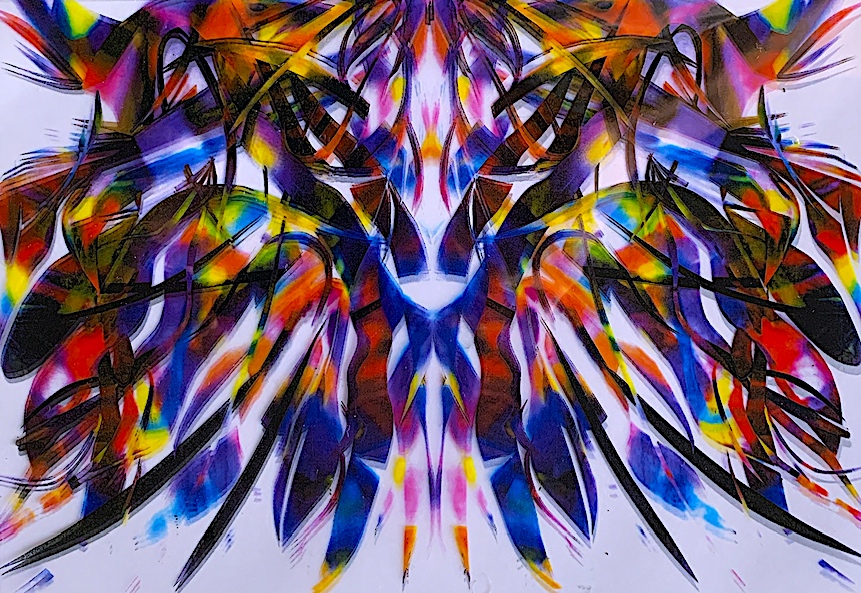
Continuing to change and use a range of Palimpsest strategies such as subtraction (i.e., taking away shapes), repetition (i.e., repeating two chosen shapes three times) and changing the size of shapes, I have created a new composition (see drawing below).
During Day 3, I continued with photocopying and printing my first Palimpsest collages (ranging from dark to light colour tones). I used a range of different materials, such fabric, and ribbons, and see through tracing paper and laminated paper. I also used cartridge paper from my A3 art folder.
Firstly, I introduced fabric and ribbons. I was attracted to the curves and thin arching shapes that I was cutting and arranging on my first collage, and immediately thought of outstretched flying ribbons, and then using fabric.
So on Thursday, I bought in some found scrap objects, (red chiffon, and felt, and ribbons) to repurpose. The red chiffon fabric, and ribbons had been used for student costumes that I had designed and sewed for a Chinese Fan Dance. Instantly, I felt the vibrant red would connect to my collage colours, and the sheerness of the material could be a possibility as a reusable Palimpsest product. I imagined altering the assemblage by glueing and layering the ribbons and fabric pieces to my collage.
First, I tried threading the ribbons and fabric through my first collage and draped the offcut pieces around the pins that held up my photocopies. Then, I photocopied them arranged on the machine. It came apparent to me that I did not like the flatness of the photocopied ribbons, even though I spent time cutting them out and playing with their shapes. This led me to a desire to find other printing forms and paper. So, I changed from the photocopier paper that I was printing onto, to… the transparent tracing and laminating papers, and cartridge paper from my art folder. These gave me a totally different effect.
My first attempt at Palimpsest – using the Collage Process and Strategies.
Above: Collage Process – Cutting, Glueing / Strategies: Repetition, Addition, Overlaying, Reprocessing (through the photocopier). Three layers of my collage: 1. A resized A4 Medium Tone Photocopy of my A3 College / 2. A4 Tracing Paper / 3. A4 Transparent Paper.
Visual Art Strategies: Collage, Repetition, Addition, Overlay, Reprocessing. Below are new reprocessed A4 images of my collage. Yet, the visual imagery of them has changed from the original. This time, I experimented by overlaying on top of the darker or lighter image one or two layers of see through laminated paper, or a translucent tracing paper. Therefore I was using the strategies of repetition, adding, and overlayering, yet also I was reprocessing the repeated image on top to create a more 3 dimensional effect.
A photocopy of the original Collage (Colour Tone) with translucent layers.
Movement: Shifting the photograph of the photocopy of the original Collage (Colour Tone) with translucent layers.
1st photocopy Collage with translucent layers.
2nd Photocopy Collage with translucent layers.
3rd Photocopy of Collage with translucent layers.
3rd Photocopy of Collage with many translucent layers.
3rd Photocopy of Collage with translucent layers.
4th Photocopy of collage with a translucent layer.
4th Photocopy of Collage with a translucent layer. This image has a number a layers, therefore it seems to have depth, and move like a 3 dimensional form.
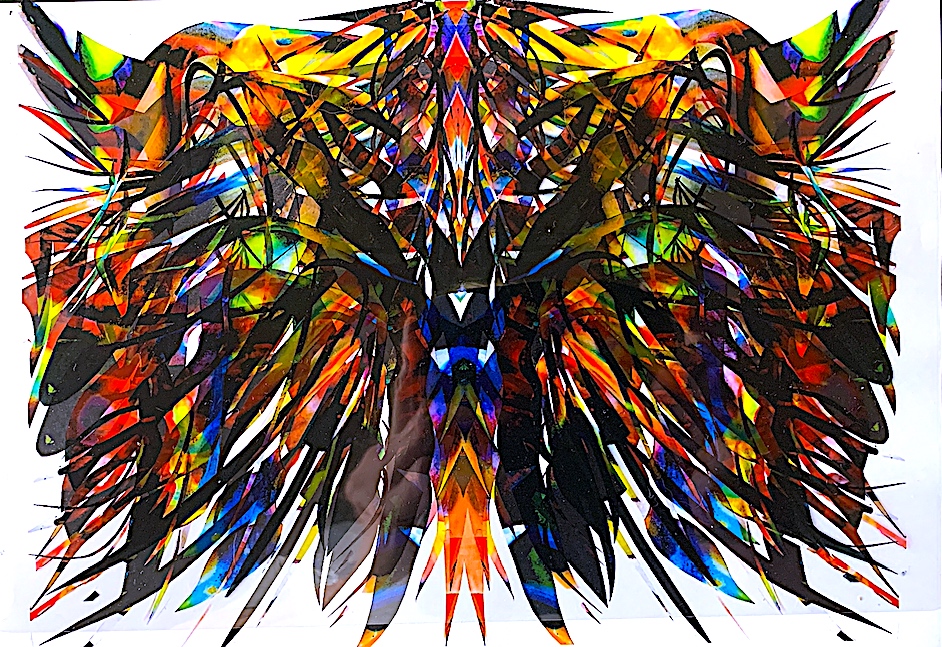
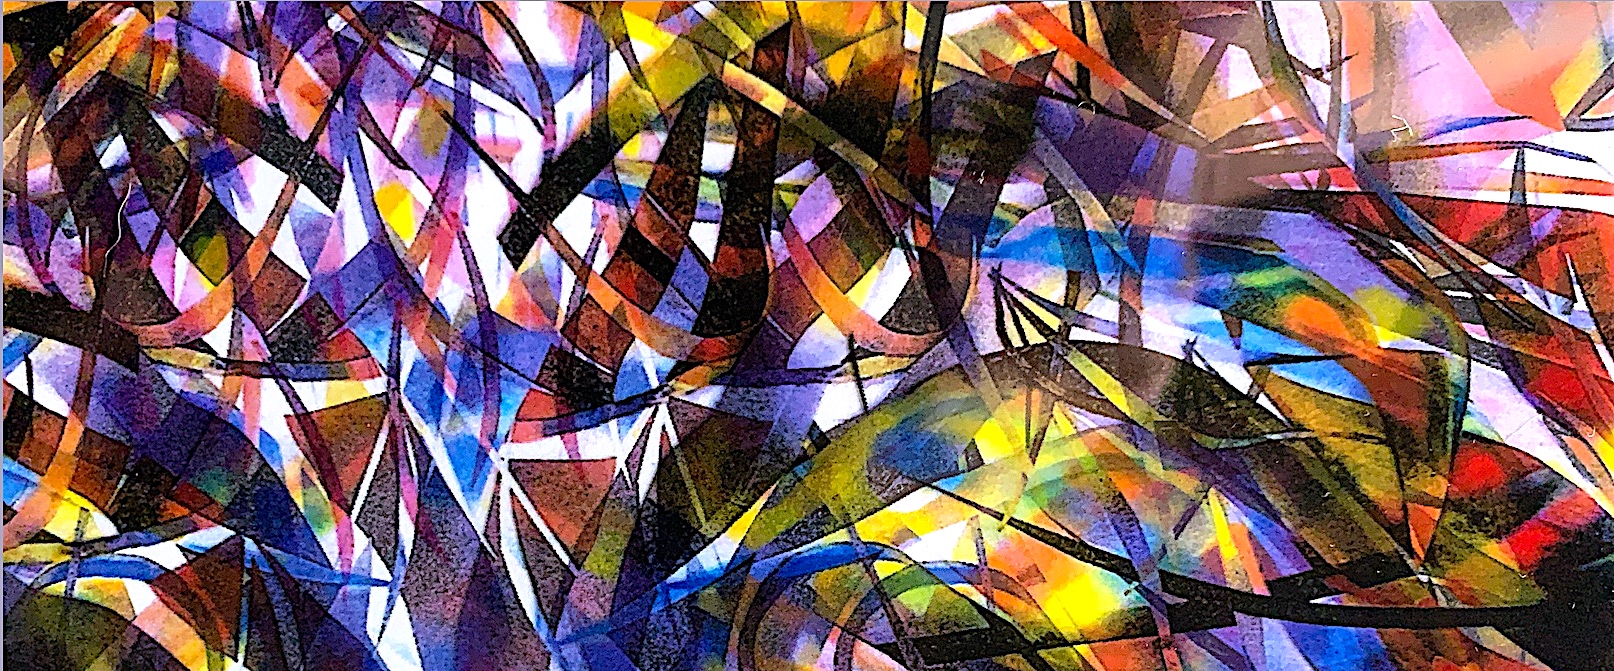
A close-up area of a print leads to abstraction.
This close up print image (above), I like very much because it has become a painterly abstraction. This is a direction that I would like to explore, because I enjoy finding line, shape and colour that moves, shifts and creates depth on a flat plane surface.
Experimenting with movement and shifting the image as I print it.
Shifting the image sideways or up and down on the photocopier, as above, also gave the work more repeated lines and shapes, making the image blur, and almost move.
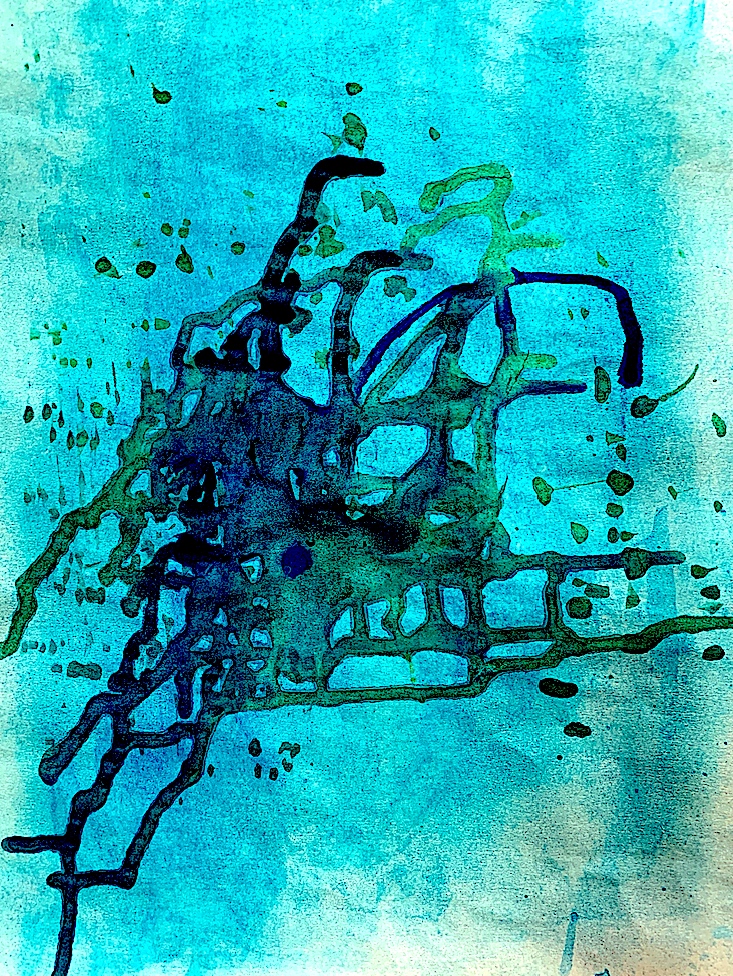
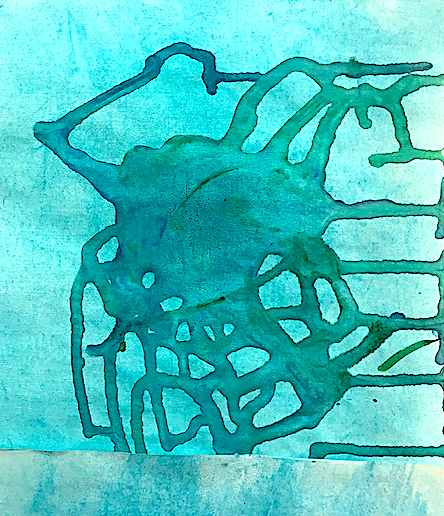
My next step was to introduce and use the addition strategy of adding found object shapes. I am interested in nature, and how time, and the elements can erode natural objects such as sea shells. I have added photocopies (see below). I like how the 3 dimensional forms create a more rounded form. They are layered under and over my transparent collages, and the original (Light coloured) collage sits at the bottom as a base.
Volcano Hits Sky: Collage Print
My next strategy step is use addition, (and perhaps subtraction) by drawing.
For Day 2 of the ‘Palimpsest Brief’, I started with the media process of COLLAGE (cutting and glueing), which is both fun and relaxing. I then spent time using the process of photocopying and printing my collage.
After hunting, then gathering some interesting texts and images, my printed matter collection included an old book, National Geographic magazines, photocopies, receipts, laminated 2D shapes, newsprint, wallpaper, thin coloured card, Art Gallery pamphlets, catalogues, brochures, cards, ticket, receipts, brown paper bag, carbon paper, baking paper, tracing paper, laminate paper, and graph paper, etc.
First, I chose to cut up a very colourful artwork image (an A3 Art Gallery brochure on newsprint). I decided to glue my curve shape cuts onto an A3 art folder paper, instead of pinning to the wall. The reason for this, was that I wished to play around printing my collage on the photocopier machine, and because I wanted to cut fine, thin, curving strips, which would not be pinnable. Before I glued, I played around by shifting the cutouts, and by focusing on the negative versus the positive shapes to rearrange the assemblage. I added height and texture for a 3 dimensional effect by not gluing all the shapes flat, but lifting parts off the page, and linking shapes under, over, in, out and around.
Palimpsest Diagonal Wall Display: This is the original collage: (Cut and Glue). 12.05.2021.
Palimpsest Diagonal Wall Display: 1st Photocopy – Dark Colour
Palimpsest Diagonal Wall Display: 2nd Photocopy – Medium Colour
Palimpsest Diagonal Wall Display: Left: 1. Original Collage: Cut and Glue / 2. Photocopy – Dark Colour / 3. Photocopy – Medium Colour / 4. Photocopy – Light Colour.
Palimpsest Wall Display: Original Collage: Cut and Glue, then MIRROR REFLECTION.Palimpsest Wall Display: 1st Photocopy – Dark Colour, REVERSE MIRROR REFLECTION Palimpsest Wall Display: 2nd Photocopy – Medium Colour, and UPSIDE DOWN MIRROR REFLECTION.Palimpsest Wall Display: 3rd Photocopy – Light Colour, and REVERSE, UPSIDE DOWN MIRROR REFLECTION.
I chose the image below to create my first Palimpsest (the above collage and prints).
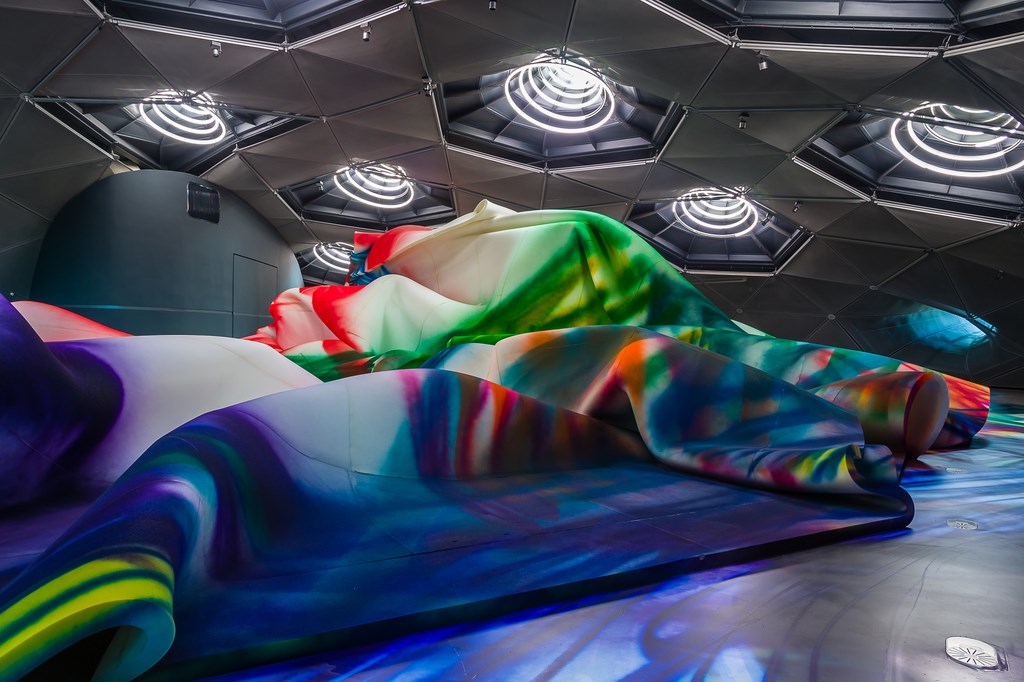
Katharina Grosse, Wunderbild, 2018, National Gallery in Prague, Acrylic on fabric, 1,455 x 5,620 x 670 cm.
Katharina Grosse is an international artist from Germany, yet also has representation in New Zealand at Gow Langsford Art Gallery. I find her work very inspirational, because of her strong use of colour, clever concepts, and the extraordinary scale of her work. A conceptual artist, she creates work specific to the site, and uses an industrial spray gun method that envelops massive spaces, inside, outside and across buildings, and over landscapes.
Wunderbild is spray painted with acrylic, and displays a painterly, gestural and energetic quality. Her striking colour arrangement is juxtaposed against areas of unpainted stencil shapes, creating a spatial tension between the moving currents of colour and the flat white. The painting was completed in Grosse’s studio, and now hangs as metres of smooth, suspended fabric on both sides of the Grand Hall, at the National Gallery in Prague, Czech Republic.
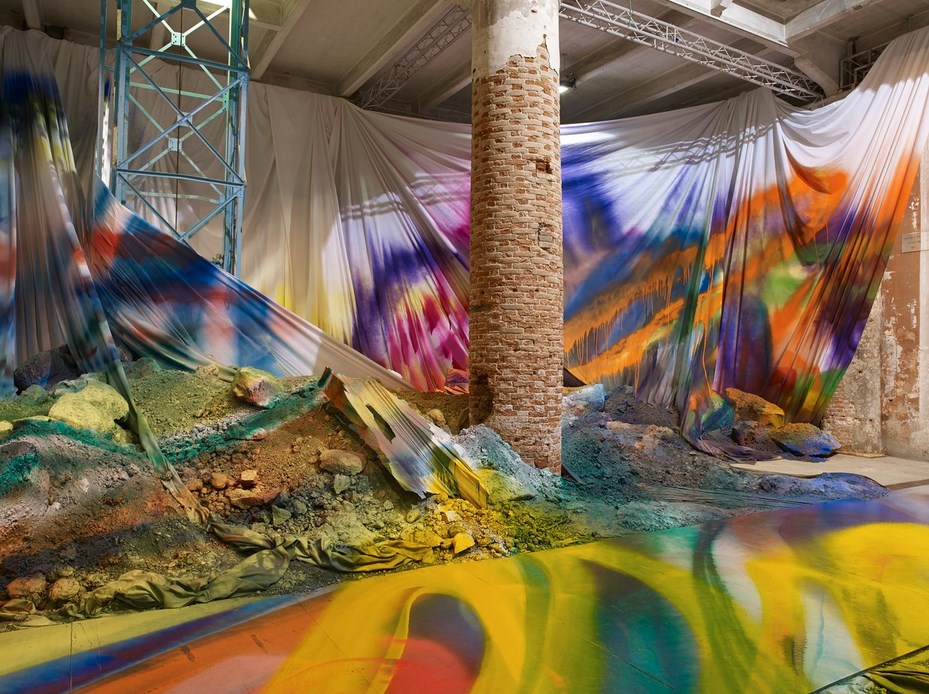
Grosse’s site installations below are spray painted with bold colour, and also utilise fabric, and natural materials like soil grass, and rocks.
Right Image: Katharina Grosse. Untitled Trumpet,Installation at the 56th Art Biennale, La Biennale di Venezia, All the World’s Futures. Photography by Nic Tenwiggenhorn.
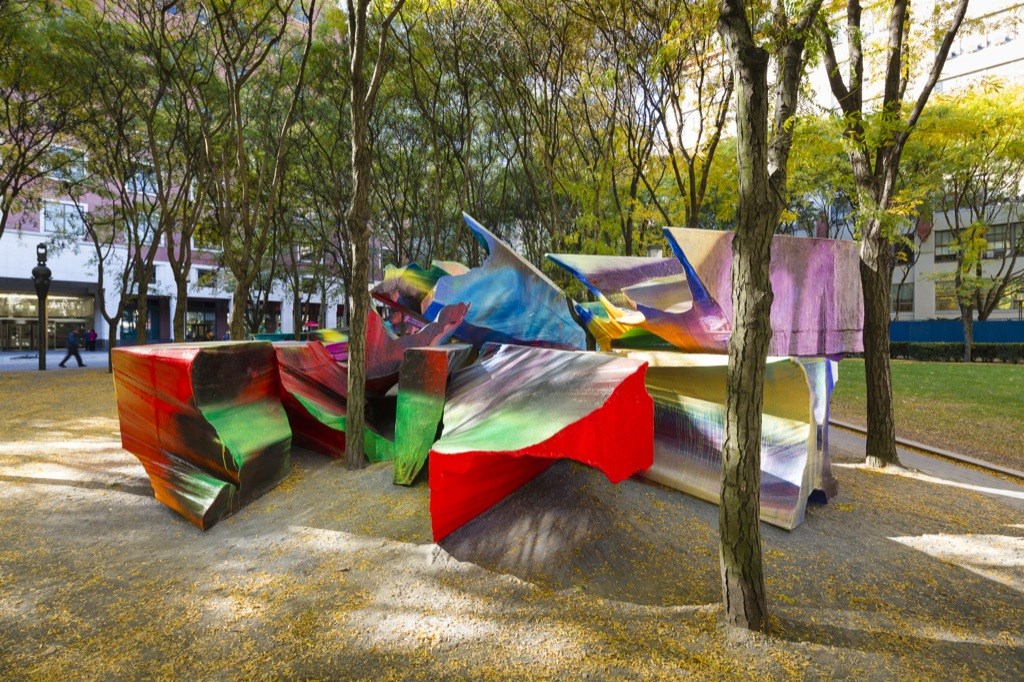
Left Image: Katharina Grosse. Just Two Of Us, Installation Sculpture, 2013, Public Art Fund, Metrotech Plaza, Brooklyn, New York.
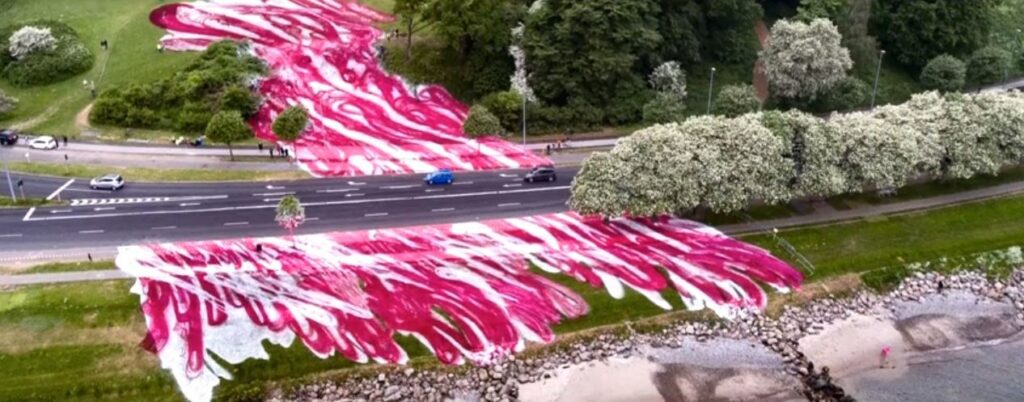
Right Image: Katharina Grosse. Colorizing Nature in Pink, 2017, ARoS Triennial in Denmark.
Left Image: Katharina Grosse. Picture Park, (Installation View) Acrylic on Mixed Media, Queensland Art Gallery, Australia.
Right Image: Katharina Grosse, Untitled Trumpet,(Close-up) Acrylic on wall, floor, and various objects, 2015, 6600 x 21000 x 13000 mm. Installation at the 56th Art Biennale, La Biennale di Venezia, All the World’s Futures. Photography by Nic Tenwiggenhorn.
Today, I started a new visual art brief titled: ‘Palimpsest’. I will learn to understand the meaning of this wordas I proceed to draw, rub out, cut, print, fax and use, and reuse found materials to create a range of diverse layers, or aspects beneath a surface. By responding to the artwork, its media, strategy or its idea, I will be lead in another direction to either extend, or start another idea or artwork, and so on. This continuation of constructing and deconstructing layers to create Palimpsest artworks may be cyclic, my ideas may take me back to the start where I began, or may end in another place altogether.
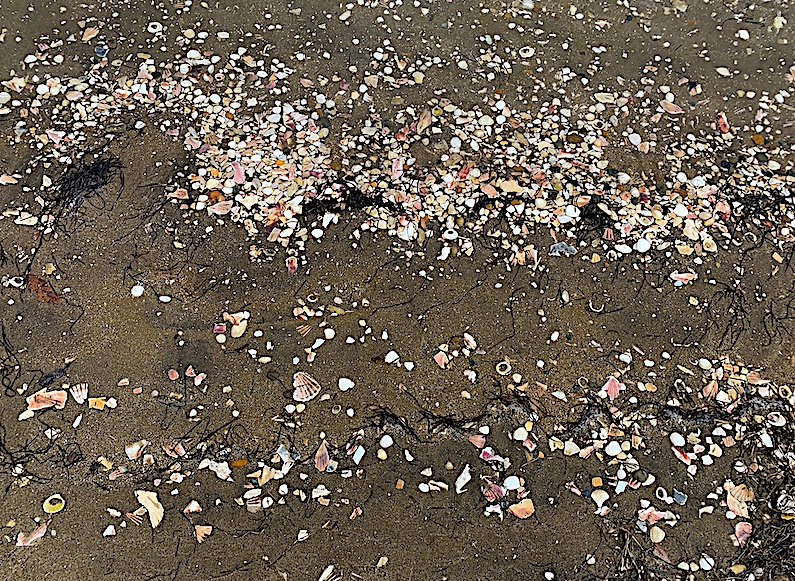
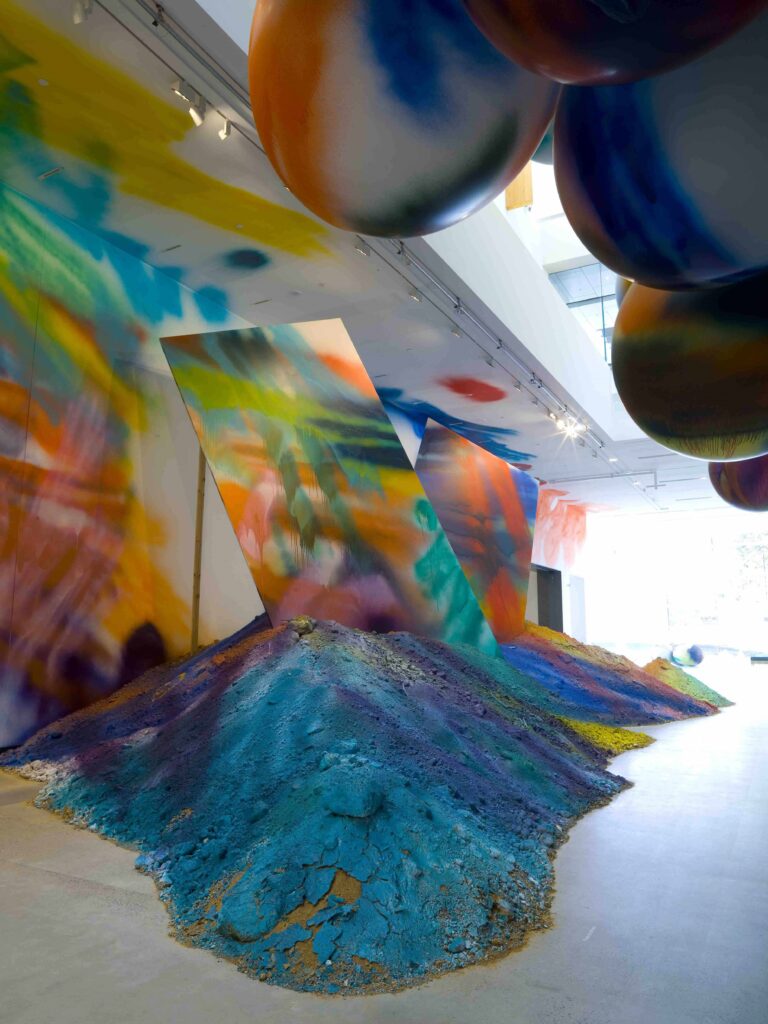
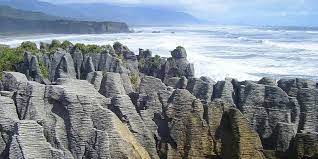
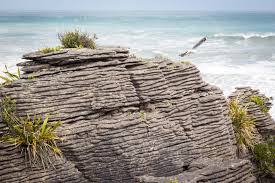
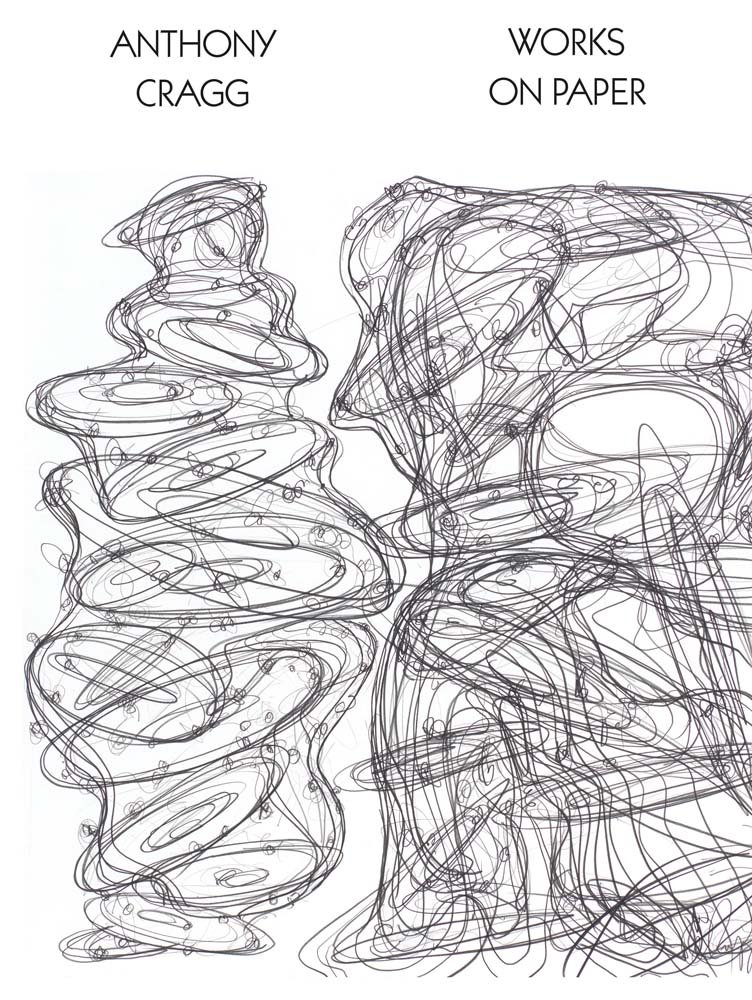
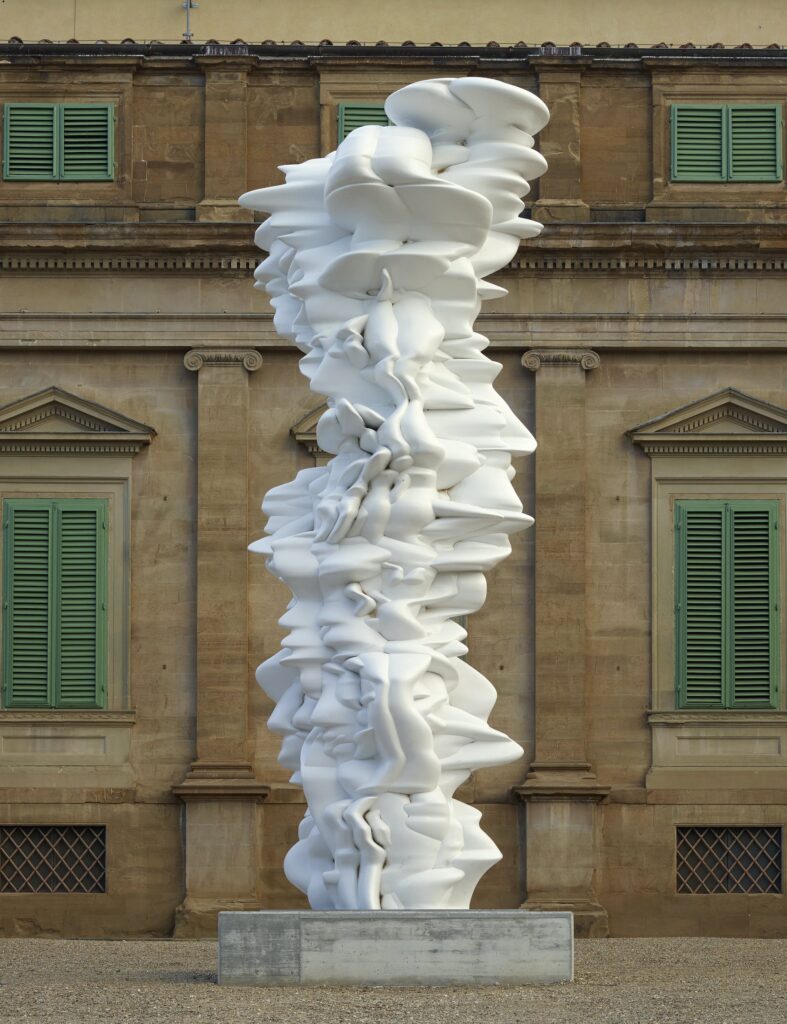
I am excited about this Palimpsest brief, because I seem to notice layers all around me, and have a rapport with layers. Autumn and Spring months mean layering my clothes, and I am always building and arranging natural material layers such as fresh flowers in a vase, a green salad on a dinner plate, Autumn leaves, a firewood pile outside, then inside on a fire, river stones in a garden, or shells on the sand. I have great admiration for the layers of nature such as the Punakaiki (Pancake rocks) on the West coast of the South Island, and the organic layers within the artist Tony Cragg’s drawing and sculptural work.
Punakaiki rock layers are filed down by the sea’s fingers. The Westward facing group of figures stand guard, watching the sun fall.
Anthony (Tony) Cragg: Quote: “I am not a scientist, so I do not know what they know of the complexities behind what I can see, but just looking at and thinking about the development of Nature leaves me, as it does most people, with an enormous sense of amazement and inadequacy. It is no wonder that Nature and our relationship to it, is one of the most important subjects in art”. I too, am in awe of Nature, and in awe of how Cragg uses an elegant form of stacking and numerous layers in his sculpture, and his drawings. As you tilt your head back, Nature’s sublime sparkling lights stare back at you from their velvet blue-black night time bed, and one feels very small and inadequate under this vast, infinite blanket of a sky.
Artist Research
In 1963, Belgian artist Marcel Broodthaers shifted his artform practice, from poetry writing to working as a visual artist. Still using the poetic structural form, he created a type of graphic abstraction art that covered over a poem’s text.
Marcel Broodthaers (Belgian, Brussels 1924–1976 Cologne) Un coup de dés jamais n’abolira le hasard. Image, 1969 Belgian, Artist’s book; 12 13/16 × 9 13/16 in. (32.5 × 25 cm) The Metropolitan Museum of Art, New York, Purchase, Bertha and Isaac Liberman Foundation Gift, 2015 (2015.590) http://www.metmuseum.org/Collections/search-the-collections/701950
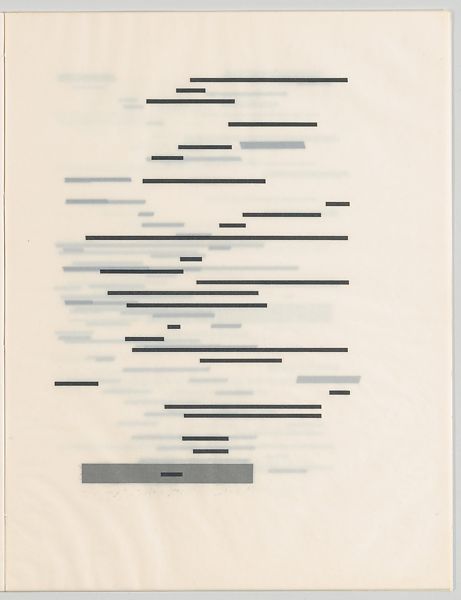
I was drawn to the way that Broodthaers used Palimpsest, by eliminating a poem’s sentences with strong, black bars of lines. By removing the sight of the poem, the reader has no access to the words, due to their disappearance under the black marked layer. Instead, all that is left are simple horizontal lines placed across the page in the order and structure of the poem. The black rectangular lines have instead created a visual pattern.
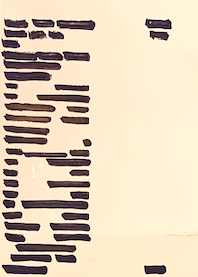
I was inspired to try this with the first ‘found object’ that I noticed next to me. I made simple, rough and messy lines across the writing of a throw-away receipt. Then folded it, and held it up to the light to see the lines, and letters through the black marker. The image and meaning of the receipt ‘found object’ changed, because I was trying Broodthaers’ effect of turning a piece of writing that had a specific use, into a visual artwork. (See my rough, quick sketch below).
Artist Research
Mark Bradford (USA, b. 1961 ) uses a form of Palimpsest by layering paper to create large-scale abstract paintings. He adds water and bleach to change tones of paper, he sands them smooth to change the texture, and utilises glue and string/rope to connect to the paper. He titles these works paintings, but they are mostly made out of paper.
Bradford uses visual art (Palimpsest) strategies of adding, and subtracting by pulling away his paper, and marks or found objects such as rope to reveal his layers.. He uses the strategy of reprocessing by reusing street billboard posters, and builds up layers these found papers.
Some of his works uncover half hidden lettering or words that express the marginalized and objectified layers of society. His works make me think deeply about society’s layers today, and the class systems that have always occurred in every society throughout history. I reflect on the widening gap between the ‘haves’, and the ‘have nots’, locally and internationally. I am interested in politics, and have always felt for the underdog, therefore Bradford’s paper art is important to me, on so many layers.
I like paper (and paint) too. I love the texture within his works. I have used his technique of glueing layers of paper onto canvas, and I have used sandpaper to make paint smooth. I like how he removes, by sanding parts back to reveal hidden layers of shape and colour. I also feel happy seeing his large works because they are so full of colour and energy.
Perhaps I can ADD PAINT to this brief, but also SUBTRACT PAINT (a Palimpsest strategy) by using sandpaper or a sanding machine. This reminds me of my past experiences of removing wallpaper layers, (or interior paint layers) before you add new.
I am interested in different histories of different people and places, and how some societies have come and gone, and yet, their craft and art work may have remained. I also think ahead to the future human societies, and how only some social narratives (positive and negative) change.
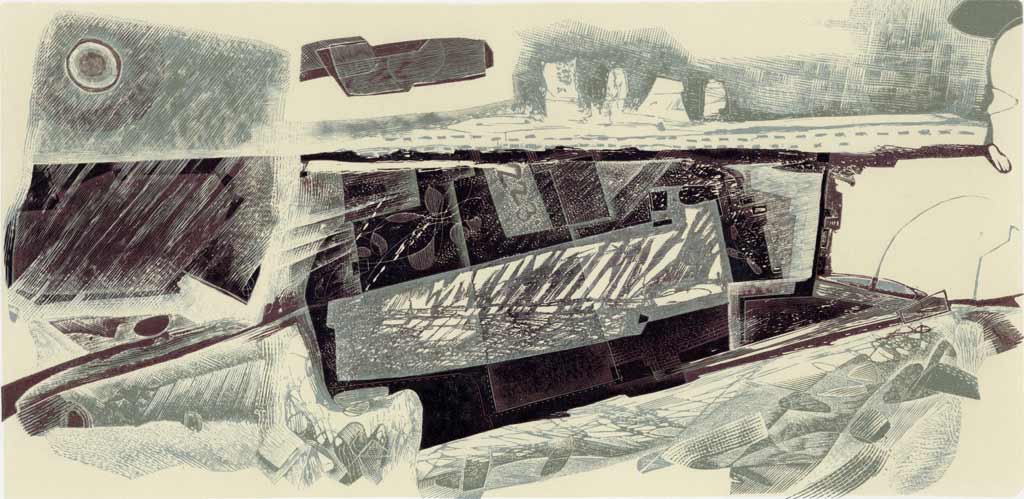
I like the drawing quality, and the layers of objects and shapes angled into different parts. For example, the moon or sun is within a rectangular, titled shape representing the sky. Therefore, the overall composition is not a typical drawn landscape set in thirds, with a horizon line, yet it still seems to have three parts. Instead, the picture has groups of planes, containing a small story within.
This print was shortlisted for the RBSA Print Prize 2018- and gained Highly Commended Winner of the Rachel Reckett Prize 2018.
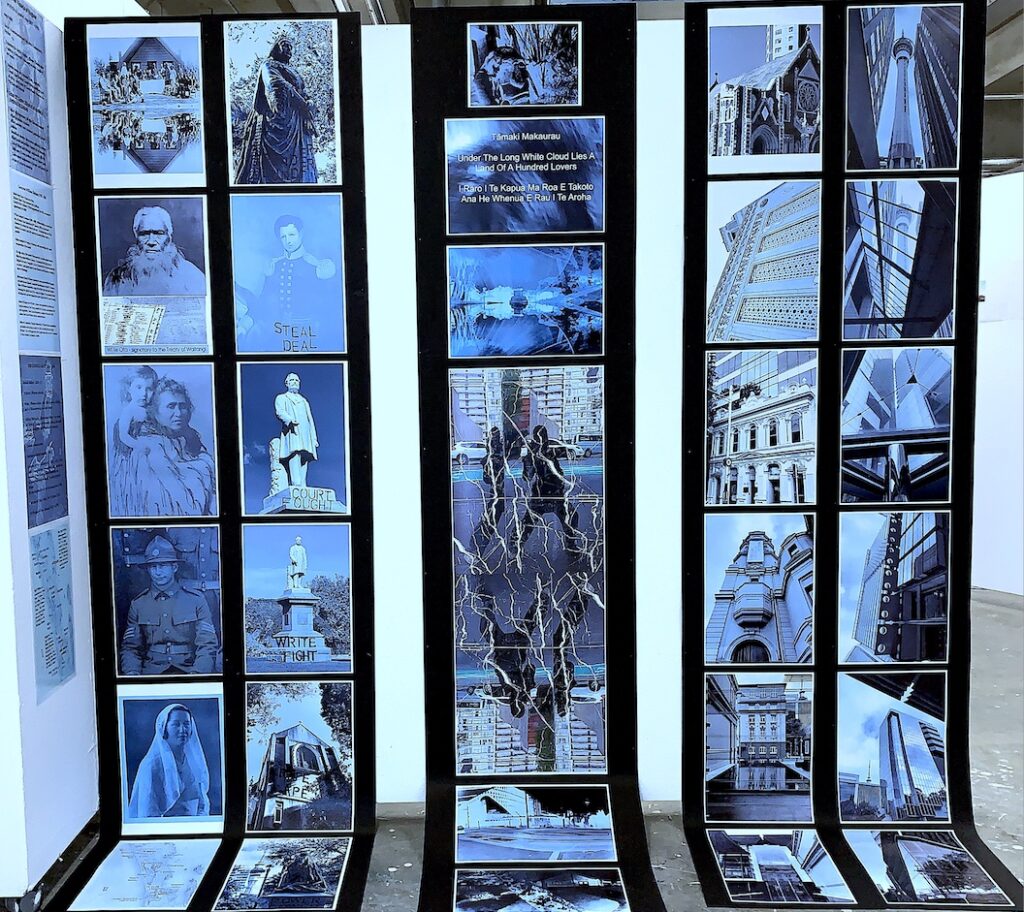
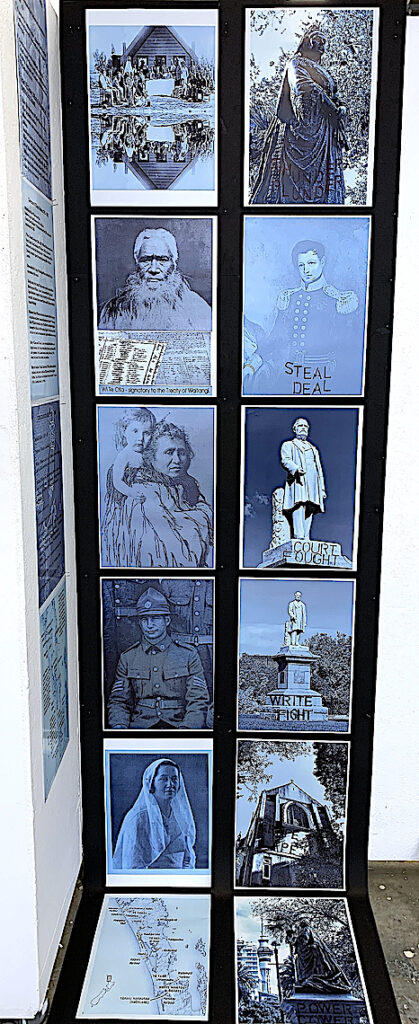
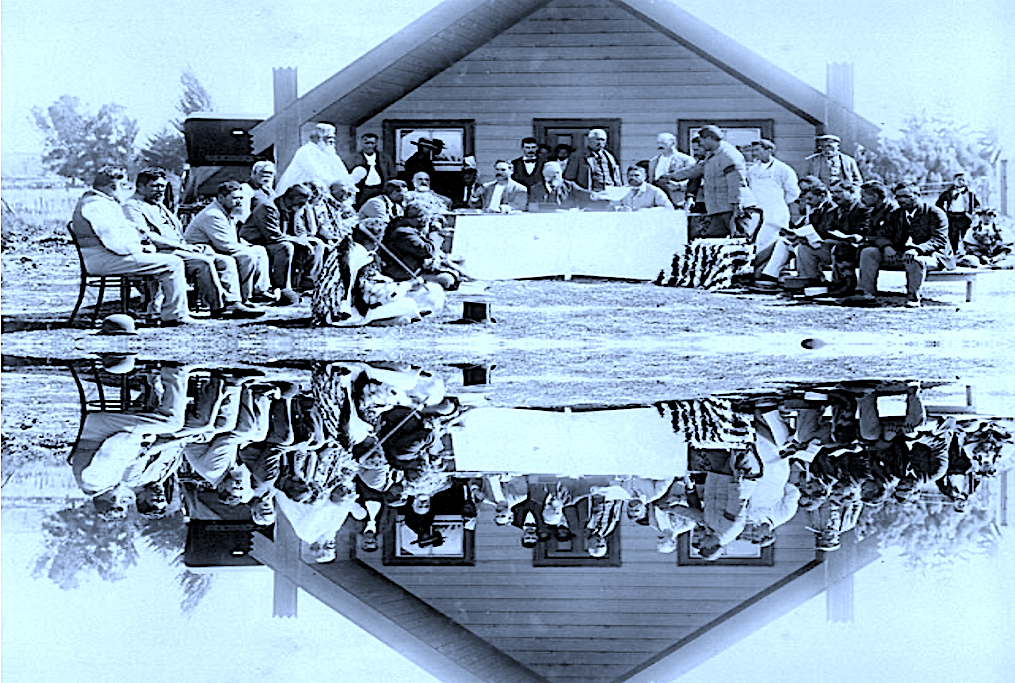
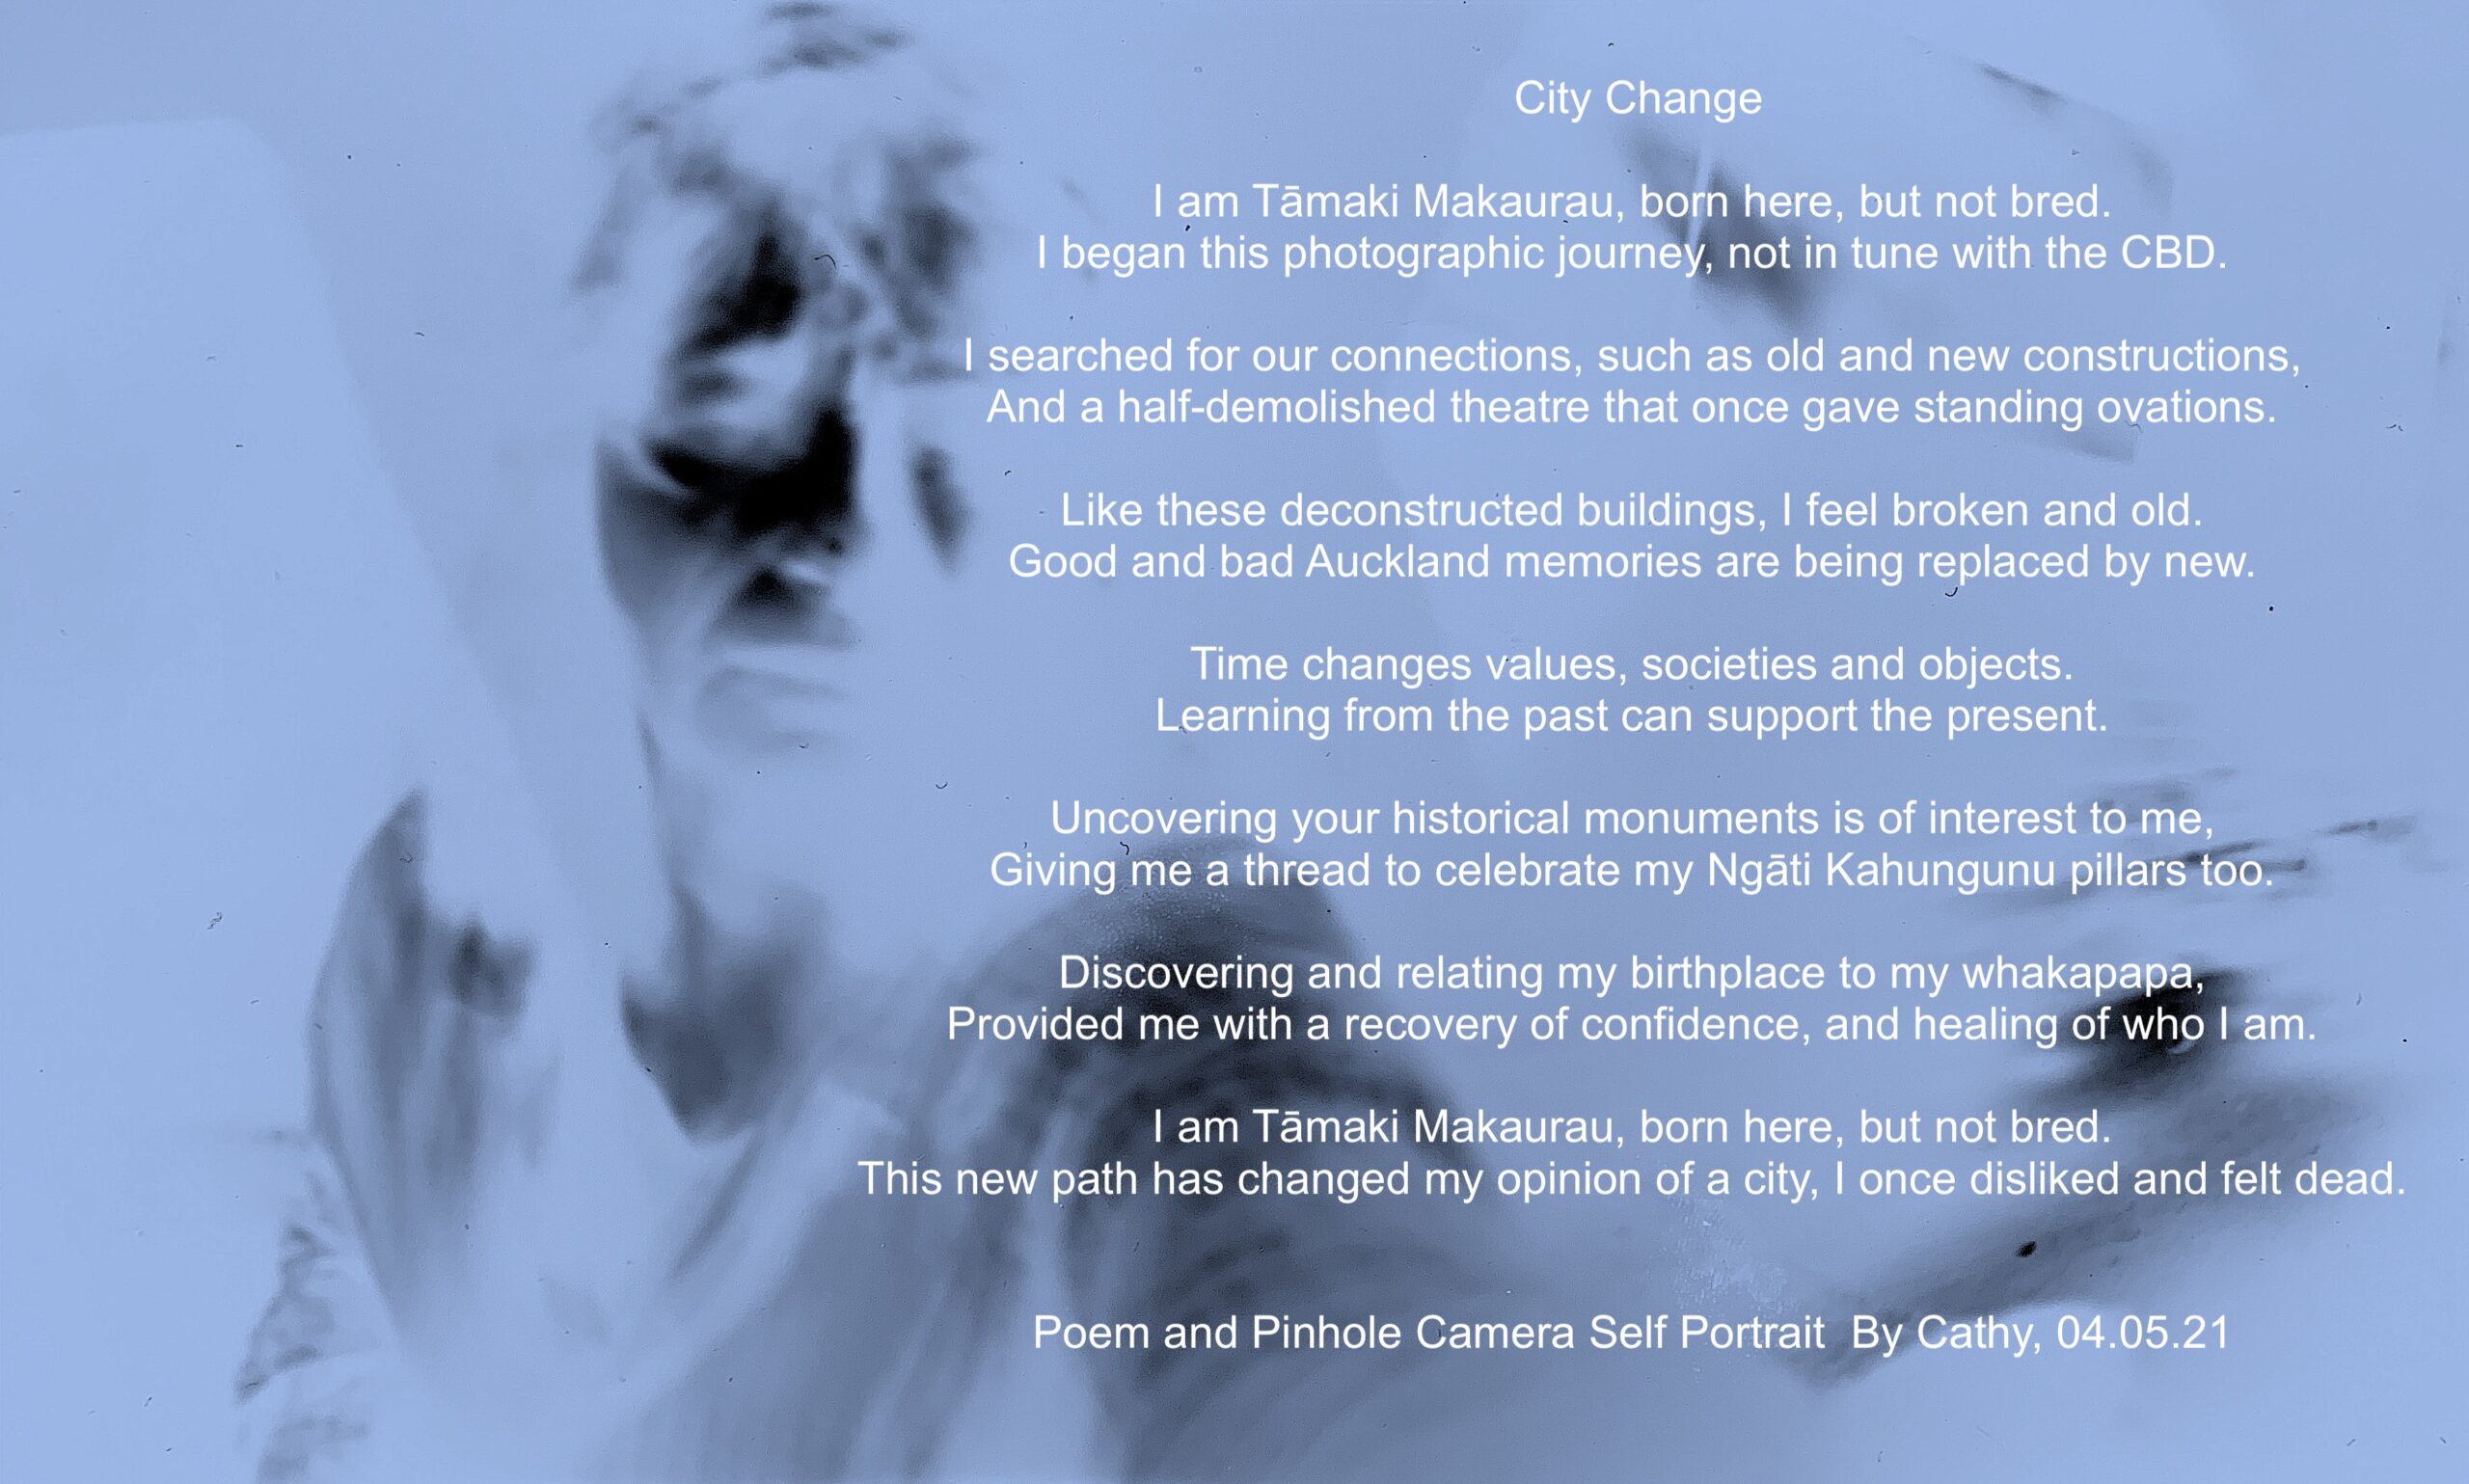
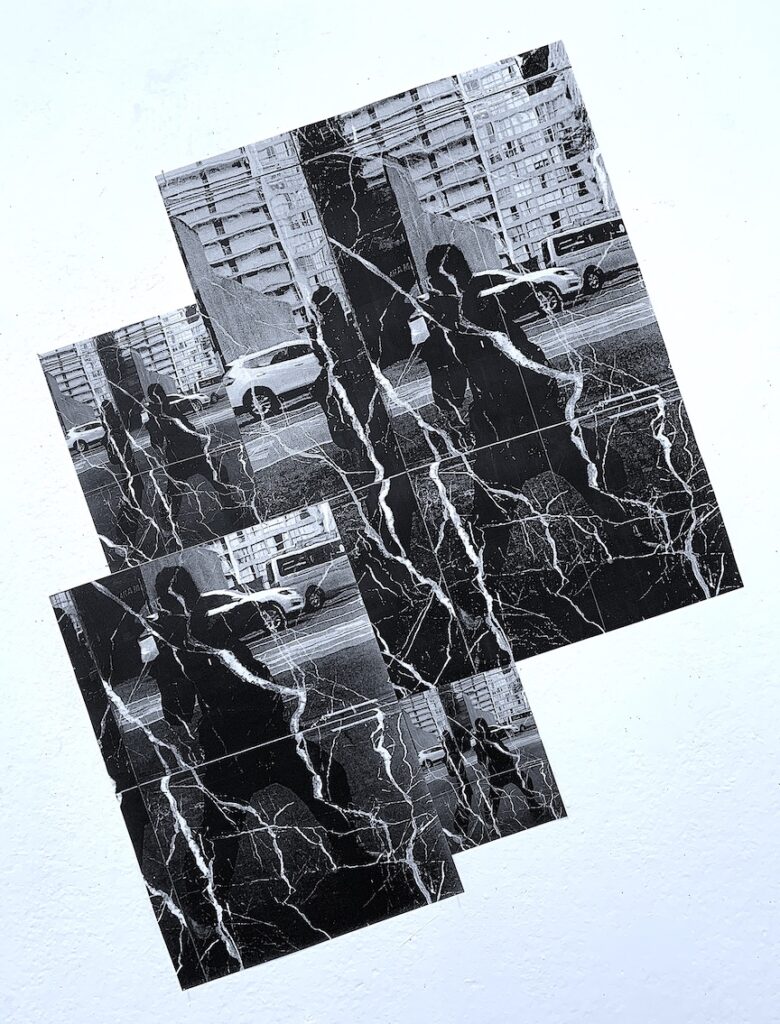
‘RECOVERING MY CITY BY REFLECTING ON THE CONCEPT OF CHANGE’ Titiro whakamuri Kokiri whakamua. Look back and reflect So you can move forward.
‘CHANGE’ Recovering Change Within My City, and Recovering Historical Knowledge Through Research. (My Final Presentation of Photographic work: ‘RECOVERING’ after ‘Discovering and Uncovering’ Studio Wall, 06.05.21. )
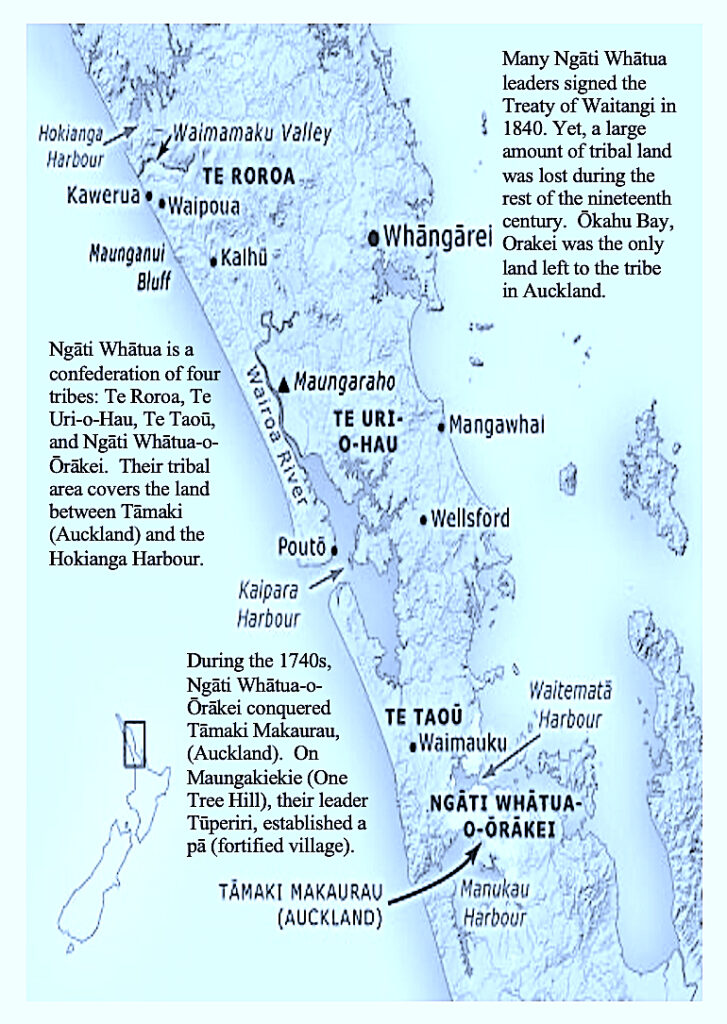
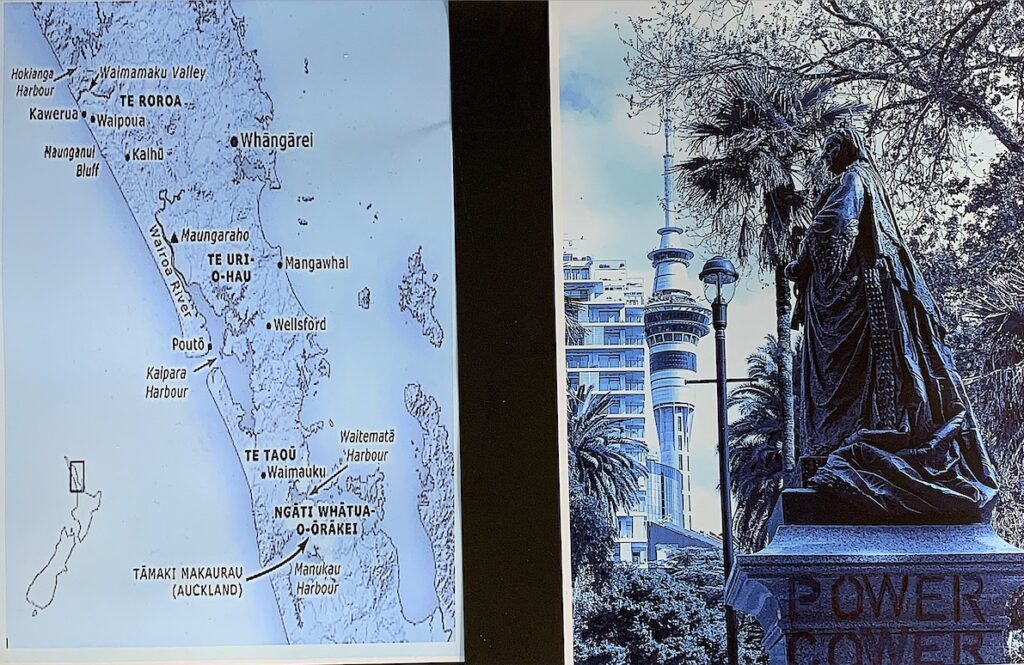
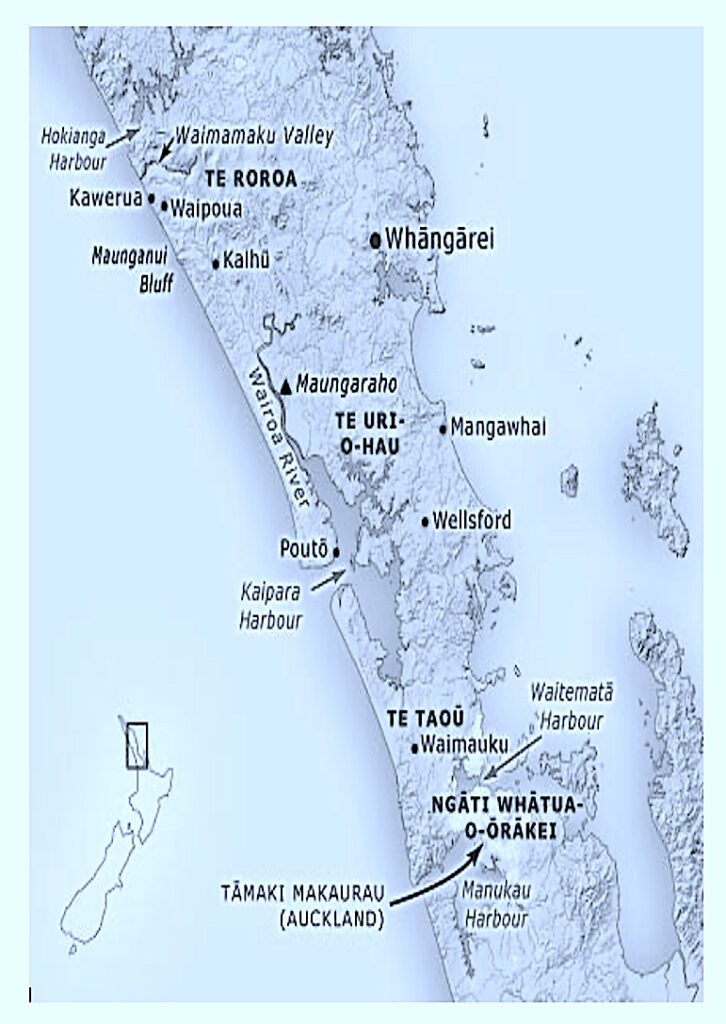
Left Wall Hanging Panels: CHANGING Aotearoa during the 19th/20th Centuries = Society, People, Values, Culture, Art – Sculptural Monuments and Statues in Auckland. / 21st Century Map of Tāmaki Makaurau Māori Tribal areas.
Right Wall Hanging Panels: CHANGING City Construction and Architecture – OLD BUILDINGS, (19th century Victorian Era, and 20th centuries) versus NEW BUILDINGS, (20th, 21st Centuries).
Central Wall Hanging: CHANGING Me (Reflections) in Auckland, and CHANGING negatives via Pinhole Camera Photography.
Far Left: CHANGE research about monument figures, and an Auckland Map.
‘CHANGE’ Recovering Change Within My City. My Final Presentation of Photographic work in the Studio Wall, 06.05.21.
Recovering: Close view.
Photography Studio Wall Display on right: OLD (left) & NEW (right) CBD CONSTRUCTIONS.
Right Wall Hanging: As I walked alone on my ‘Uncovering’ journey of the brief, I felt free, liberated and so happy to pound the pavements of the CBD. Not only was I uncovering my confidence and belief in myself as an artist, and documentary photographer, I was also uncovering a multitude of visual imagery that surrounded me, both high and low to see.
There was an enormous amount of rowdy, raucous CLUTTER, and CONSTRUCTIONAL CHANGE occurring on pavements, roads, underground networks and high rise building sites in Auckland city. I found the traffic, noise and pollution quite overwhelming, and far greater than in the early 1990s, when I attended The University of Auckland. I noticed many CHANGES that have since occurred.
I was attracted to, thus made connections to, both the OLD architectural style buildings (from the 19th century Victorian Era, and 20th century) and the NEW architectural style buildings (from the late 20th and early 21st centuries). The last photograph (above, on the bottom left) shows my CHANGE & CONNECTION thematic focus with the OLD & NEW CONSTRUCTIONS. I photographed this part of the Auckland Art Gallery’s extension because it was an architectural collaboration of OLD and NEW. The front attachment of the new Art Gallery building connects by merging into the original old Art Gallery’s frontal facade in a beautiful, and seamless way.
On the left, (second photograph from the top) is a photograph I took of the outside of the Civic Theatre on Queen Street. I wished to photograph the inner beauty of this theatre, in particular the art deco elements, staircase and decorative ceiling. Originally, I wanted to focus on this theatre and its history as a theme to study, and photograph. Yet, I was unable to enter, because it was not open to the public.
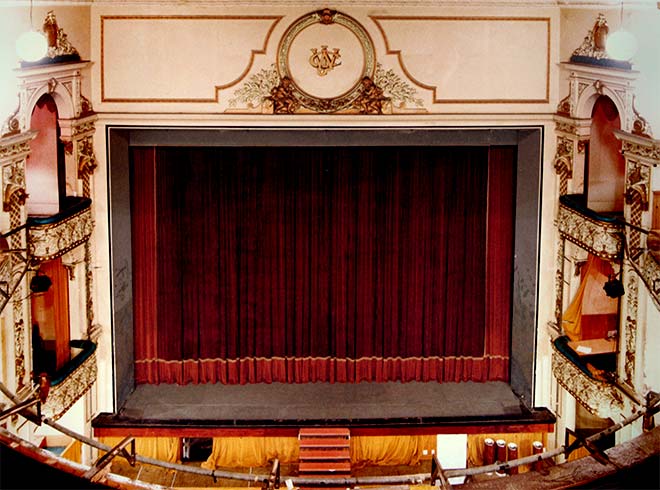
Making a trip to observe the two demolished Queen Street theatre places, (spaces that I have performed in) evoked very happy memories of living the theatre life, and performing on the stage. I wandered down memory lane, recovering significant Auckland momento images from my past, such as the theatre’s stage, decorations, front of house, backstage, dressing rooms, and the story of the ghost that haunted His Majesty’s Theatre.
His Majesty’s Theatre (1902-1987). https://timespanner.blogspot.com/2015/10/aucklands-theatre-on-haymarket-his.html.
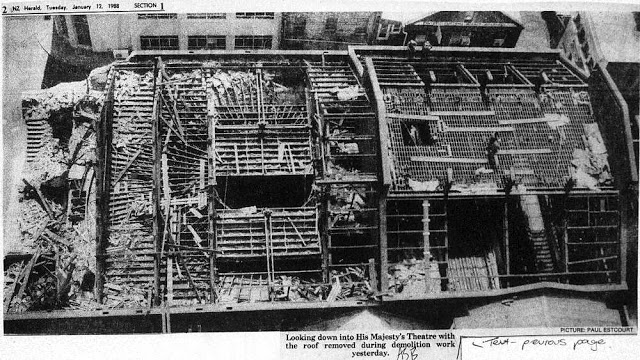
CHANGE: DEMOLITION – Bird’s Eye View of His Majesty’s Theatre. https://timespanner.blogspot.com/2015/10/aucklands-theatre-on-haymarket-his.html.
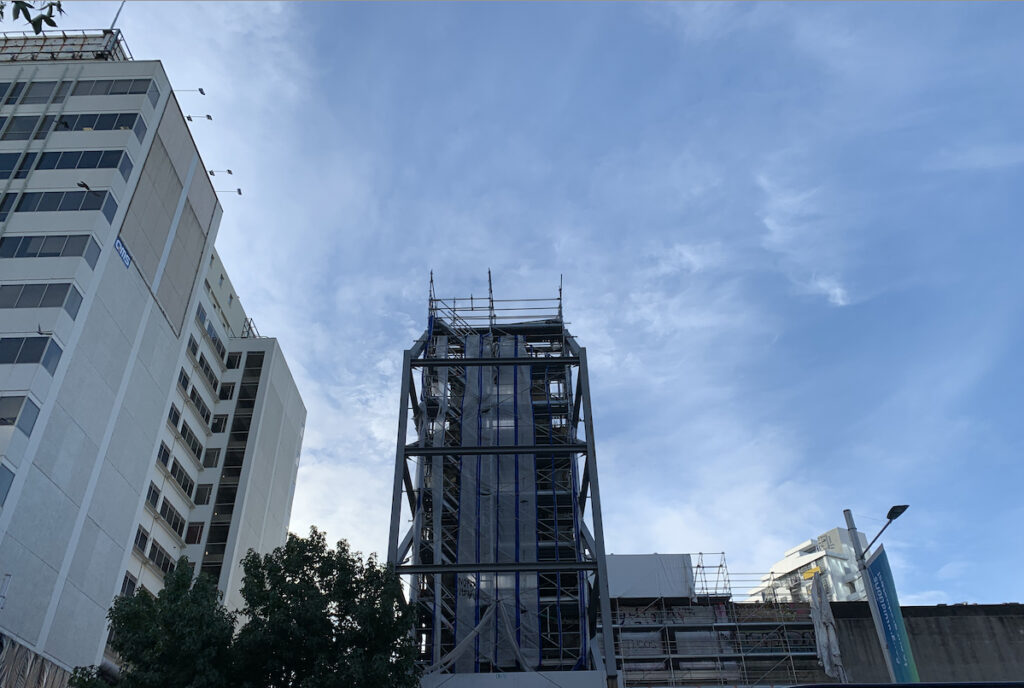
CHANGE: This building above was DECONSTRUCTED, and then replaced. The other theatre, the St. James (see below) was also sadly demolished, and it has remained an empty, boarded up demolition site for years.
Empty St James Theatre site on Queen Street.
Photography Studio Wall Display on left: Making timeline parallels – (i.e., Māori and Pakeha / Victorian Era Monuments, and old buildings that represent Christianity).
Left Wall Hanging: Above, I created a timeline displaying vertical historical parallels between eras, and people (Māori and Pakeha). Across in a horizontal format I have matched photographs, to create connections between the history, (and stories) of my whakapapa with the Auckland Victorian monuments, and Ngāti Whātua (the tangata whenua of Tāmaki Makaurau).
As part of my recovery process, some photographs received a layer of handwritten text (rhyming words), to outwardly express my feelings concerning the impact of colonisation on Aotearoa’s indigenous population, such as:
Power, Cower: (Bow and cower to the power of the colonial British Empire.)
Plunder, Thunder: (Military might: The New Zealand Wars – Taranaki and Waikato, 1845 – 1872. / Musket gun and cannon noise.)
Steal, Deal: (Land stolen, and confiscated. The New Zealand Company started in 1825, then merged in 1837, and up until 1858 it resold land that it didn’t own. / Treaty (deal) of Waitangi – Māori Chiefs signed a Māori version in good faith.)
Court, Fought: (The Native Land Court / Fighting occurred between British Soldiers, Settlers, and Māori such as the New Zealand Wars. / Intertribal conflict.)
Write, Fight: (Scholar Sir Governor Grey paid respect to Māori by writing about their traditional myth beliefs. / There were many 19th century skirmishes and disputes over land, which escalated into battles with military intervention. Peaceful protesters at Parihaka (1870s – 1880s) were attacked and treated poorly.)
Rape, Ape:(Rape is about power over another – Rape of the land, Rape of people. / Missionary power, Clergy and Church power, Church gaining power through land ownership. Thus, I am questioning who is the APE here?)
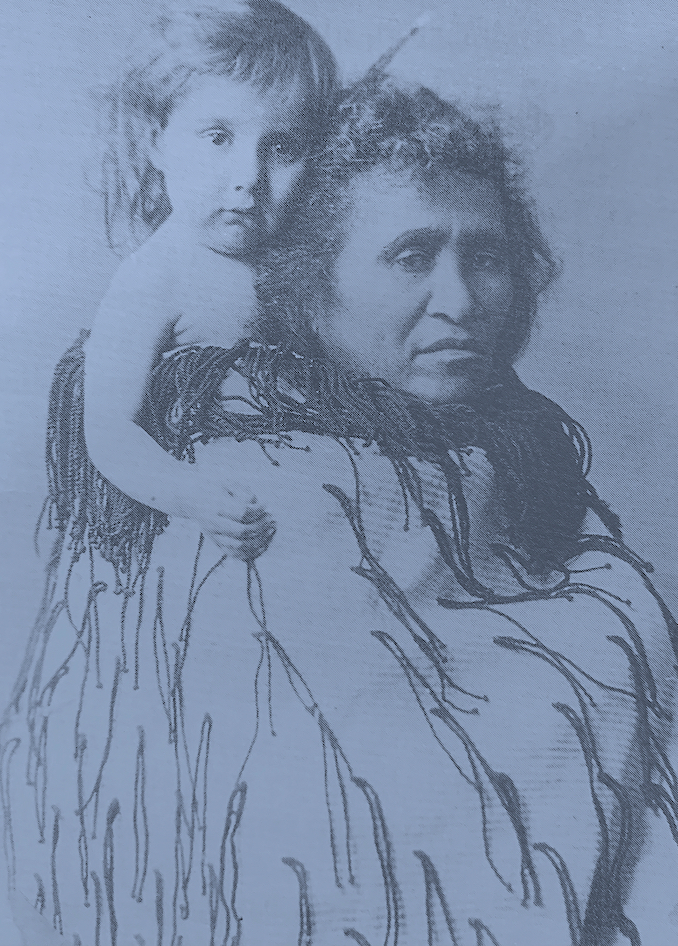
Chief Wi Te Ota stands on the left with his patu at a land meeting.
My maternal whakapapa line: My Great, Great, Great Grandfather: Wi (Wiremu) Te Ota.
He Whakamaharatanga Wiremu Te Ota, a chief of the Ngāti Te Upokoiri and Ngāti Hinemanu sub-tribes lived at Omahu until the turbulent times of the 1820’s when the people of Heretaunga went into exile.
Wi Te Ota followed the Ngāti Te Upokoiri to Manawatu where they were to reside until the repatriation of the 1850s. It was there he and his brother signed the Treaty of Waitangi.
He died in 1884 and is buried beside his wife, Ruta Te Wharehaehae, on Te Rae o Tahumata.
My maternal whakapapa line: My Great, Great Grandmother Keita Ruta (daughter of Wi Te Ota), and her grandson (my grandmother Dorothy’s cousin).
Keita Ruta, as a chief’s daughter owned land. The increase of settlers in the 19th century, meant a demand for land. Her land was taken, when an 1892 Privy Council decision divided her hapu and ancestral Omahu land into four blocks. She became a grantee of a Crown Grant. Unfortunately, the majority of the Māori grantees’ shares of land were squeezed into one part: Omahu Block 2, and they were awarded equal shares of this land. But with no money, they could not survey the land, nor fence it off for farming. Omahu Block 2 (her hapu land) was again partitioned again in 1897.
My maternal whakapapa line: My Great Grandfather John Junior Holden (son of Keita Ruta).
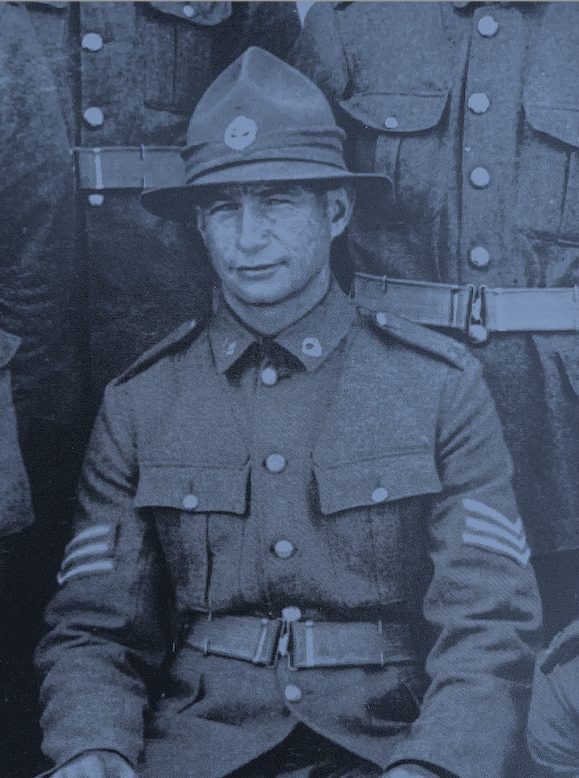
‘FIGHT FOR KING AND COUNTRY’ was a popular slogan in the early 20th century. Māori had different views about fighting for a British Crown in WW1, after many 19th century impacts of disease, war and land confiscation, etc., caused damage.
Some Māori leaders believed signing up to war would strengthen Māori claims for equal status with Pākehā. As a WW1 Sergeant in The Māori Pioneer Battalion: 4th Māori Contingent (2nd Platoon), my Great Grandfather: John Junior Holden’s platoon boarded the ships HMNZT56 Maunganui and HMNZT57 Tahiti on the 26th June, 1916. He was lucky to survive the 1st World War and return to Aotearoa.
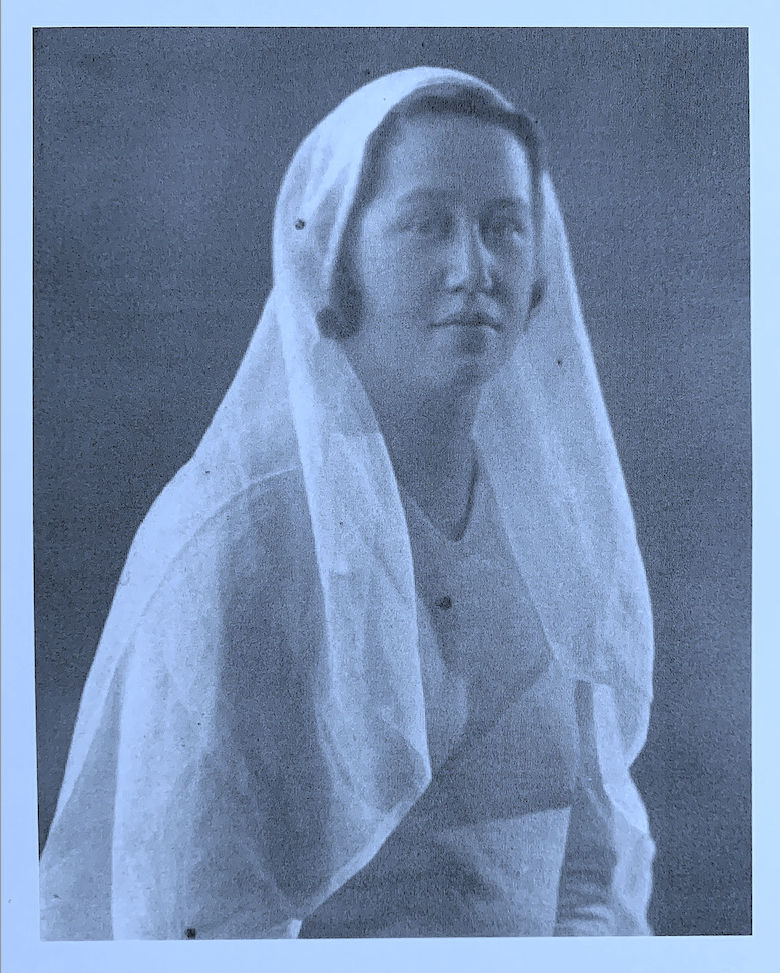
My maternal whakapapa line: My Grandmother Dorothy (daughter of John Junior Holden).
Research Display: UNCOVERING research to RECOVER my understanding of Auckland CBD and to show my personal connections.
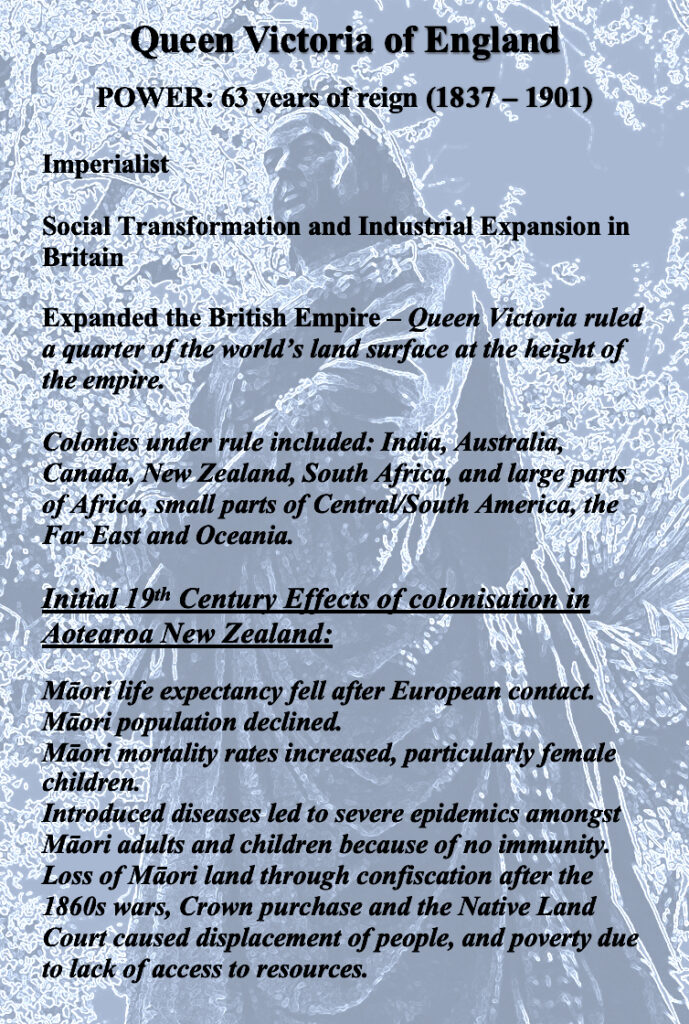
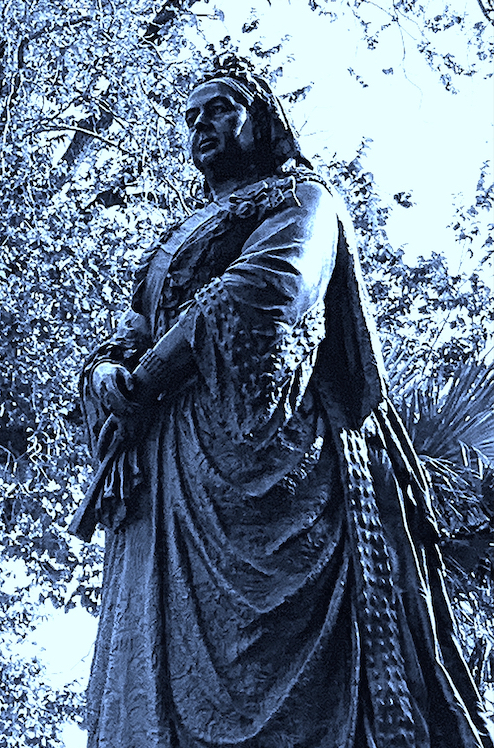
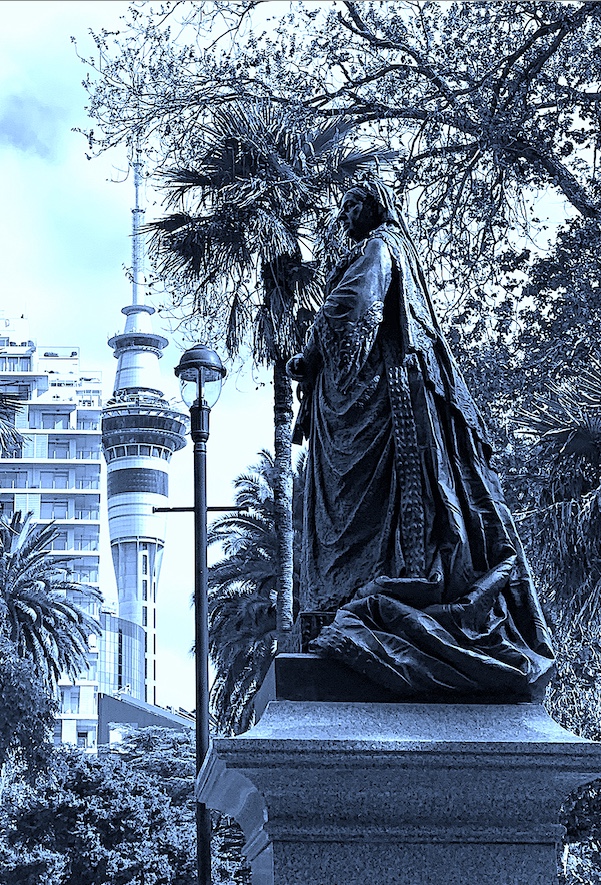
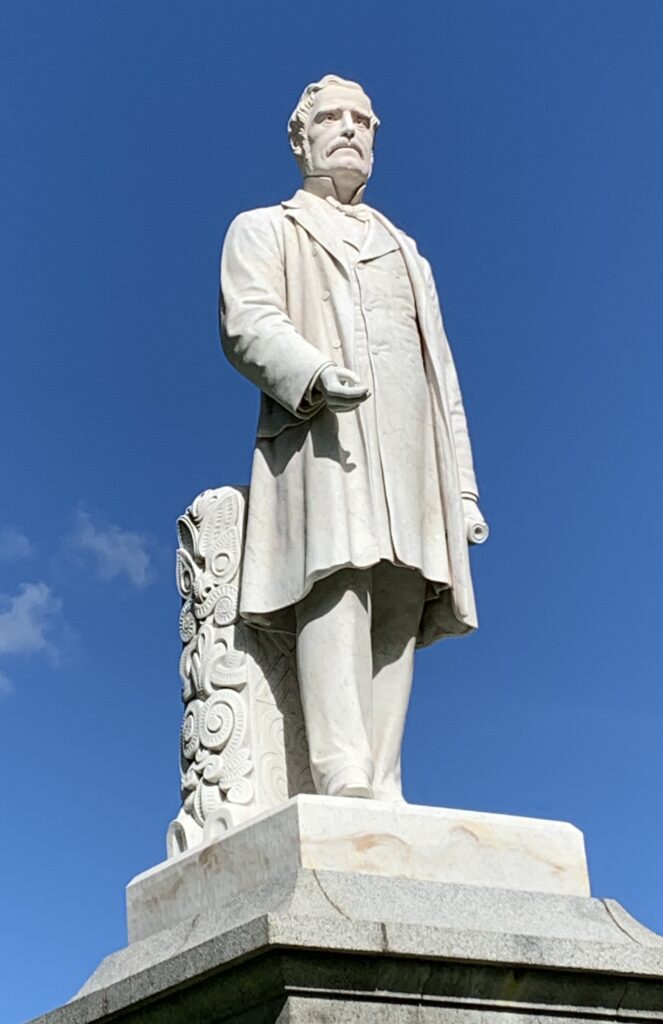
Researching monuments at Albert Park, Auckland City. I recovered historical information by reading, gathering information, writing and photographing the statues of Queen Victoria and Sir Governor Grey.
Queen Victoria: To present my research for Queen Victoria, I recreated one of my original close-up photographs (see below), by using a digital drawing technique on top of the photograph, then layered my text on top.
Final Wall Display: (Left: Map of Auckland, and North to Whangarei).
19th, 20th COLONISATION CHANGE & 21st COLONY CHANGE: On the right, I added a handwritten rhyming text such as ‘POWER, COWER’ to Queen Victoria’s Monument plinth. She stares above, and out across her domain, her POWER, and military might would have made the indigenous populations of her colonies COWER. Yet, her Aotearoa dominion has changed over time, and grown up, above and around her, perhaps New Zealand will become independent, and a republic. Therefore in opposition, I placed her photograph horizontally opposite a map representing Aotearoa’s indigenous population, and the mana whenua (the right of a Maori tribe to manage a particular area of land) of Tāmaki Makaurau, and the surrounding area north.
Sir George Grey: To present my research, I recovered a photograph of George Grey and manipulated the image by overlayering my digital drawing and my writing on top.
Albert Park Monument: Sir George Grey, (Close-up Photograph 04.05.2021)
CREATING CHANGE: I am pleased how this above photograph turned out, because the silhouetted creamy-white stone figure is striking against the brilliant blue background. The light falling upon the statue is crisp and clear, and its form is bold. The only digital change I made was to crop a side edge, and centralise the figure. Yet, to keep my connected monotone effect of a black, white, pale greyish-blue colour scheme for my ‘Final Wall Display’, I needed to change this above photograph to a grey white contrast (see below).
CHANGE: I changed the colour tone for my Final Wall Display. Albert Park Monument: Sir George Grey, (Close-up Photograph 04.05.2021)
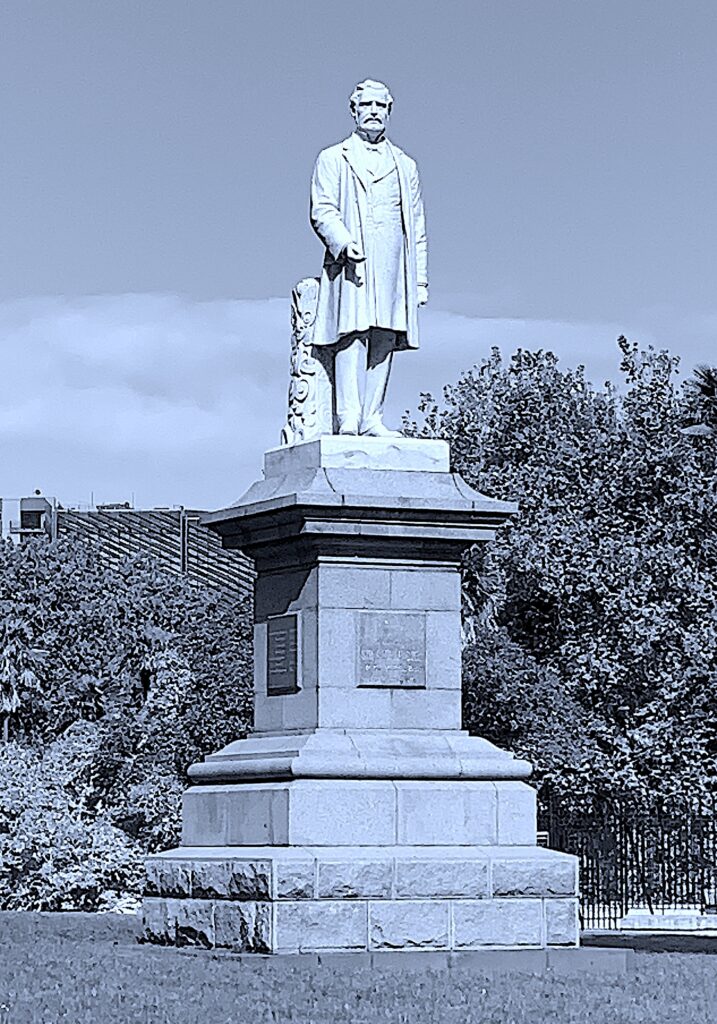
Final Wall Display: Albert Park Monument of Sir George Grey, (Distance Photograph 04.05.2021)
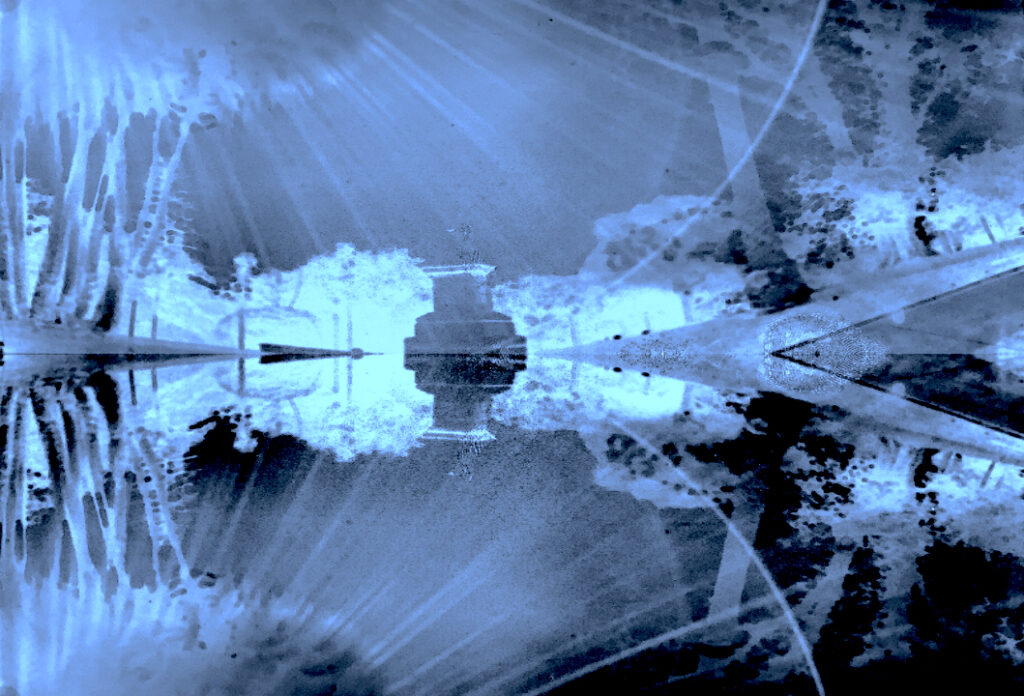
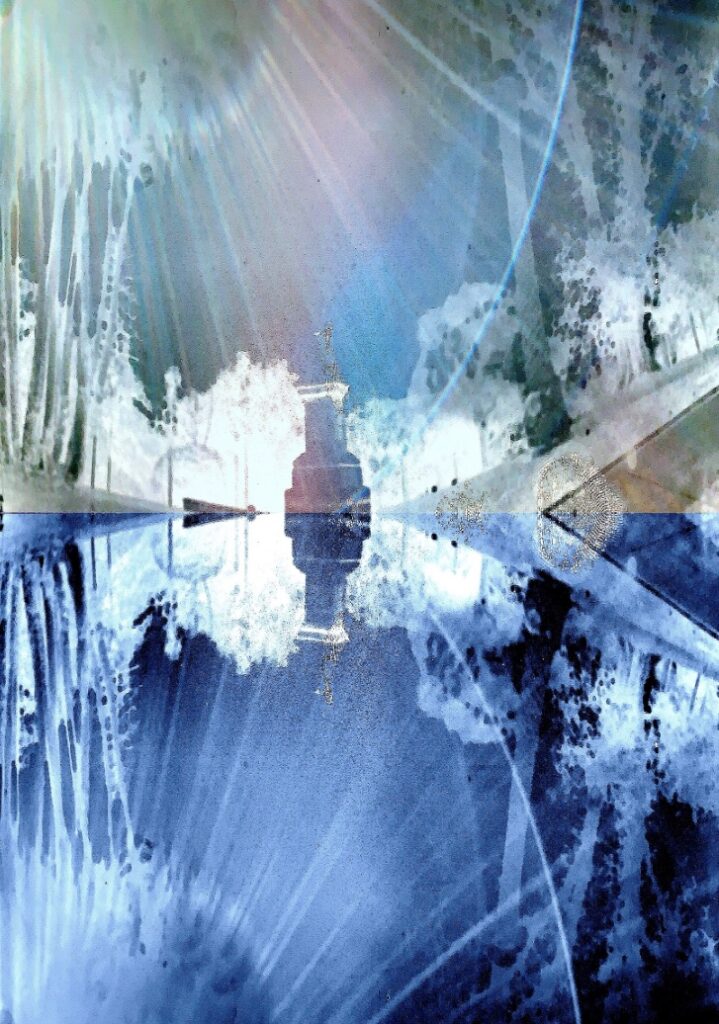
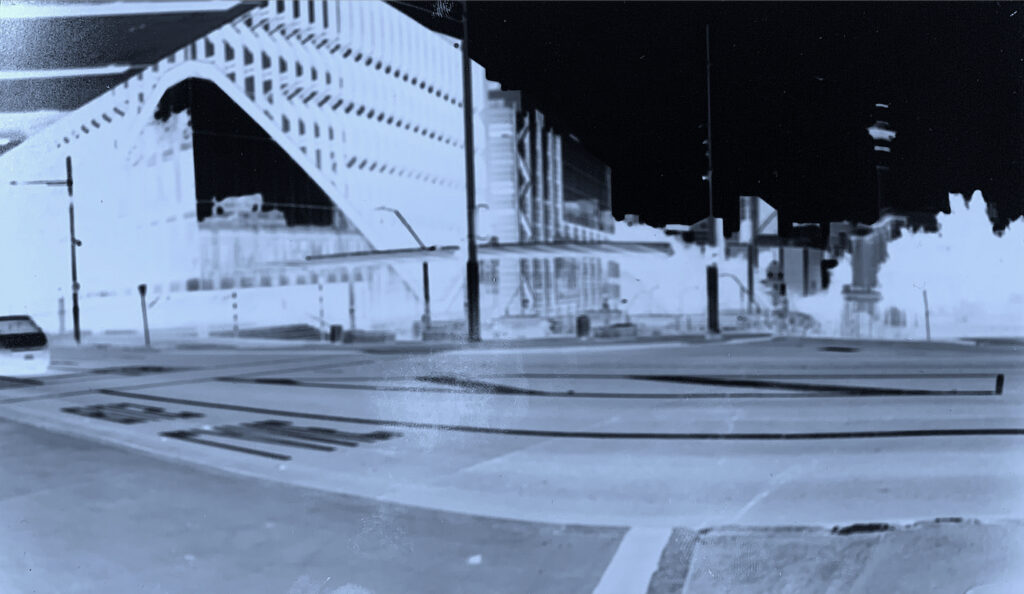
Pinhole Camera Photograph: A Reflection of Sir Governor Grey’s Monument (his statue is hard to see) fading under the light. 04.05.21
CREATING CHANGE: As the above Pinhole negative photograph did not turn out as clearly as I wished, I wondered if I could digitally enhance it. First, I manipulated the original negative by holding it up to the light of a window, and rephotographing it using my digital camera. I enhanced it using colours and tones. Then I created a double exposure, by photographing it again as an upside down image, and adding it to the original negative to make a reflection image. Next, I played around enhancing the original darkly-exposed negative. Once again, I was recovering my past (thus me), as my reflective image above reminds me of a theatrical (white-blue lit) stage backdrop set from the moonlit forest scene of the Ballet Giselle.
Governor Grey’s Monument
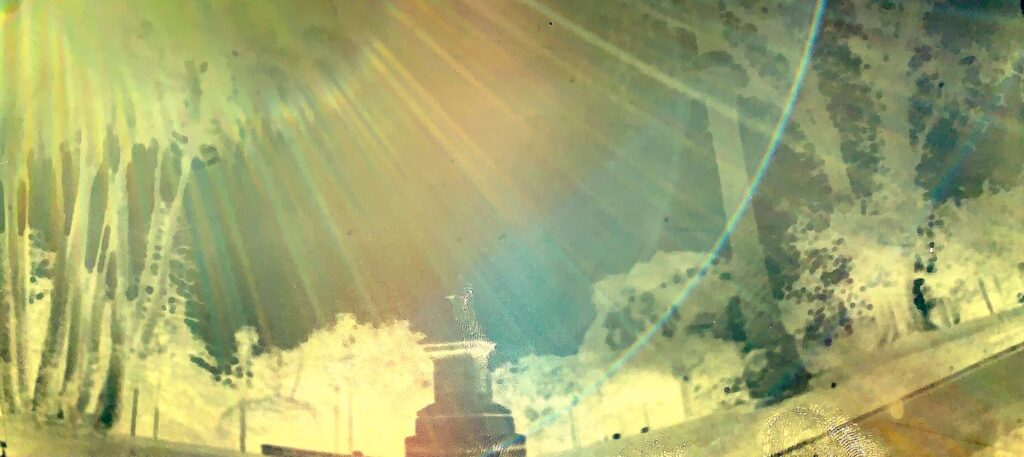
Original Size: ‘Golden Light’ Pinhole Camera Negative of Governor Grey’s Monument at Albert Park.
CHANGE: Here is the original Pinhole image size above. I created a CHANGE by manipulating the light exposure to produce a range of colour tones such as gold and pink to enhance the image.
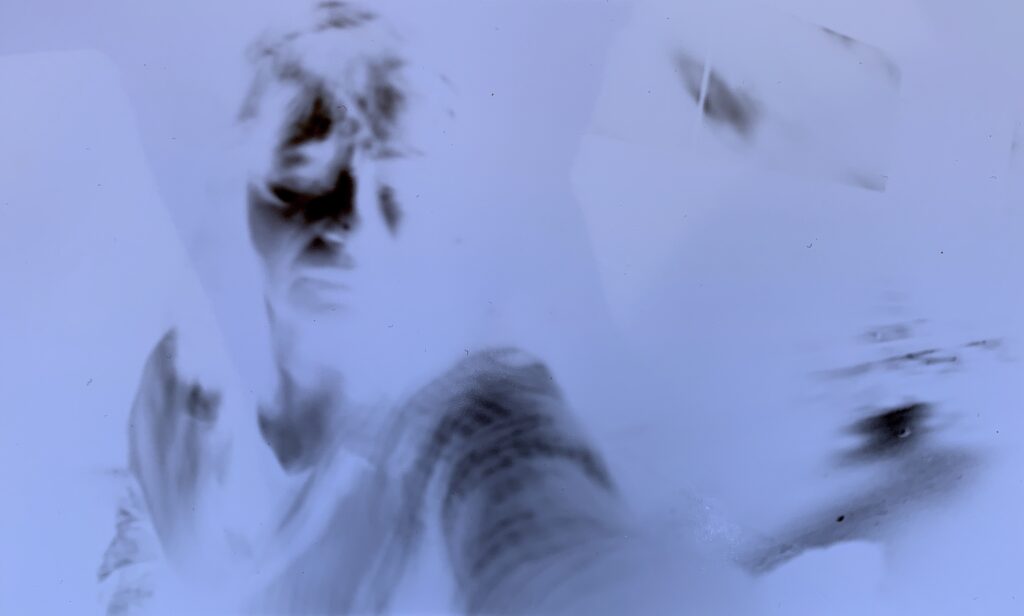
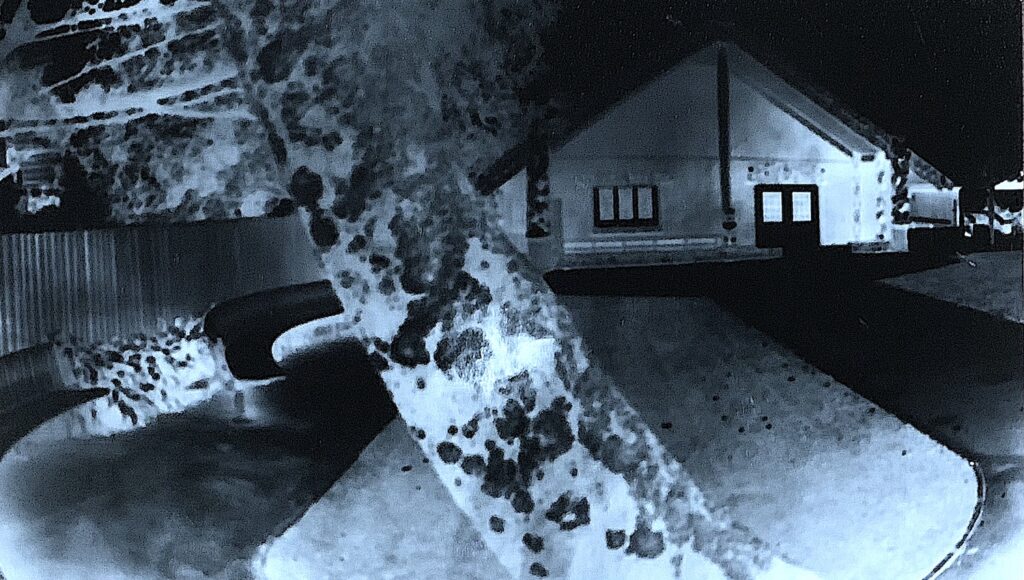
Pinhole Camera Negative: Self Portrait with Pacifica Stone Head Statue, 04.05.2021
Final Wall Display: ‘CHANGING ME’ ‘City Reflection Self Portrait’.
A reflective poem in response to the Photographic Art Journey of ‘Discover, Uncover, Recover’.
In reflection, I have found every part of this photography brief, from the exploring, discovering and uncovering the city’s CBD to my own suburb, very exciting. Daily, the dog takes me for a walk, therefore I have many familiar walking places in my own home patch, and I am always noticing new things that get discussed as a family. Yet, to engage in a leisurely stroll around the CBD has not happened for me since the early 1990s. Of course, I visit certain places (like the theatre or art galleries), yet not many suburban-types walk the CBD city streets if they do not work there.
This was a great learning curve for me, and my confidence, because I have not had any photographic experience apart from the occasional use of my mobile phone camera. AND… I must be the only one in the world who is not interested in clicking selfies, or sharing one’s life on Facebook, etc., etc.
This brief has made me feel incredibly fortunate to be at art school, and to have the opportunity to freely roam and direct a photographic click towards a place, or space, at my own pace. I enthusiastically engaged in the brief’s focus by shooting a huge number of photographs showing life and object details, and displaying a range of colours, textures and patterns in both my suburb and city. I was passionate about discovering and uncovering objects that were a true representation of me, such as nature (plants, rocks, fungi), sculpture (old or new), and human-made architecture (old and new). I explored new photographic ideas at a suburban beach and a local neighbourhood graveyard, and I researched information about these places. It felt satisfying to achieve instant image results with the digital camera, and to achieve some successes with the pinhole camera.
During this brief of ‘Discover, Uncover and Recover’, I have had many new art ideas and subject matter that is of interest to me. These showed linkages that connected Auckland CBD with my suburb. Governor Grey once owned an 1870s house, a few houses away from me in my suburb, thus I started to unravel and recover his story, and his monument in the city. Auckland’s CBD underground springs are a subject matter that connects to my suburb’s underground volcanic caves and a large natural spring. Plus, I realised the connection between the colonial Victorian named street signs from my suburb had been repeated in the CBD. It was another colonial imposition to name streets after places from another country, where there were already Māori place names here. Queen St, Symonds St, and Victoria St were named in my suburb, because it was one of the first settler suburbs in Auckland, and it became a Borough Council. As, I already owned a book revealing the history of my suburb, I re-read it to rediscover. It showed old photographs of my suburb’s original shoreline: a beach. This environment has gone through immense CHANGE, because land was reclaimed from the foreshore, and a motorway and tidal lagoon replaced the beach, just like the CBD’s reclaimed shoreline. Therefore, here was another discovery and connection I had made about my suburb and the CBD city.
A major strength of mine when working, is the ability to focus and concentrate for long periods of time. I clearly see minute details such as shadows upon objects, and have an ability to shut out the noise around me, to consistently focus, and to be in the present. I put my heart and soul into everything I do, therefore I believe my work engaged in the brief totally, and I was constantly focused to learn as much as I could in the studio.
I am incredibly visual and spatial. I have a good eye for noticing and really looking, with a natural ability to see a connection between a line, angle, direction, movement, colour, shape, form, proportion and design. I have a strong sense of spatial awareness (gained as a dancer), and understand my place, my body in space, and the surrounding space. Therefore, I was always trying to improve my digital and pinhole camera photography. The only changes I made to my digital work was to shift the colour tone and crop to balance the proportion of the image. Even when my pinhole negatives looked under or over exposed, I kept pursuing the goal to improve the next one, in order to get an even balance of light and dark objects within the negative space.
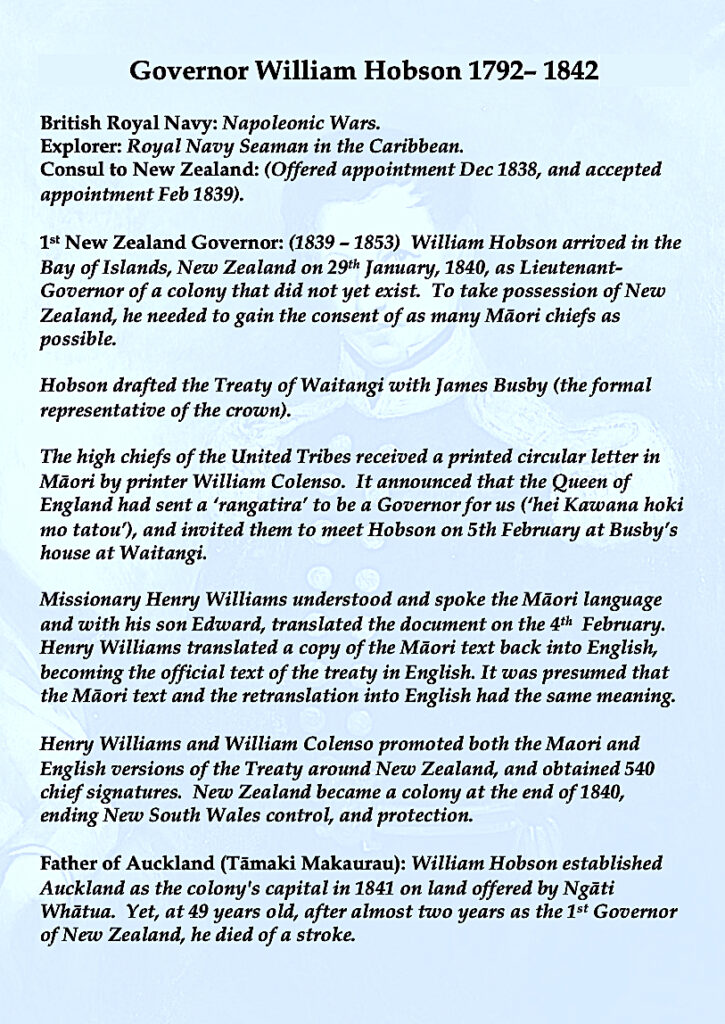
I am interested in history. Therefore, I spent time researching, and carefully considering how to connect and present the historical monuments at Auckland’s Albert Park into my other themes. When I first photographed the monument of Governor Grey, I assumed the worst, that the pou at his feet was like a servant. Yet, after researching, I gained a more educated opinion about the man. I also gained more knowledge about William Hobson, and felt a personal whanau connection, because my Great, Great, Great Grandfather was a Treaty of Waitangi Signatory, not in Waitangi, but on the Kapiti Coast. I questioned why Hobson did not have a statue, if he is considered the father figure of Auckland city? I also questioned, where in Auckland city are the sculptural artworks celebrating Māori leaders?
I utilised size, by up-scaling each photographic work to an A3 size to create a more effective and powerful final display presentation. I purchased the best photographic paper that I could afford. I scaled my centrally placed self-portrait up to an A2 size, which then was doubled, because I added another A2 upside-down reflection under this.
I interpreted the brief project as best as I could in the time allowed. I found many ideas to be exciting, therefore I was able to generate original ideas easily, such as discovering and uncovering a theme of fungi, as I discovered them on my first day’s walk in the city. This motivated me to turn my lens low towards the ground, and it amazed me that I started to see a variety of mushrooms daily for the next four days!!! Selecting one overall concept was quite difficult to do, as I seem to have a river of ideas, but I chose the big concept of CHANGE as an overarching theme, and to support my learning in the brief.
As I find the big picture important, another strength I have is an ability to visualise my end product goal, with the accumulation of my ideas resolved. My first idea was to create three vertical hangings from the ceiling, slightly layered behind each other. My photographs were to be joined together in one flow, with no gaps on grey wallpaper.
My second idea was to create a sculptural construction made from a polystyrene panel (perhaps, building a photographic sculpture at home could be a development that I pursue). This was to represent a high rise building or monument, (part of my Change City theme). I could have easily and efficiently pinned my photographs onto cut out tall, thin, triangular pieces that stood upright, back to back with tape. This sculptural construction would have linked my three thematic concepts (Change of People via Monuments and Whakapapa / Change of Construction via Old and New buildings / Change of Me – exploration of the city, and the pinhole camera), and been more interesting than my final display.
These original ideas above, would have been easier to create, because neither would have involved measuring the space with a ruler around, and in between every photograph to represent a film strip. It was difficult to make a film roll strip as my final display. I cut out some paper squares to add to the side like a film roll, but it just looked wrong, and quite tacky, and cutting inner squares would have taken far too long. To overcome this difficulty, I had to leave the black paper-card sides empty, as adding anything made it look far too cluttered and busy, plus it would have taken the eye away from the actual focus of the photographs. I even thought I could draw in pencil shaded squares on the black card-paper, but I ran out of time. Therefore the final presentation only gives an impression of a film roll. I was a little disappointed with my final product, as it was not how I had envisaged it.
Film Roll Strip example.
I completed each requirement of the brief to my best ability, and I tried not to overly rush. Instead, I have an enormous amount of energy and drive, and I just enjoyed clicking away. I achieved a high volume of output without even knowing, but by the end it enabled me to see my progress, and understand what a good photograph actually looks like. I am inspired by simplicity, yet understand this is hard to achieve. Perhaps, ‘Less is more’, needs to be a goal in my future art making. My ideas are often complicated, and full of connections, and my final product has complicated ideas. I wanted to produce a three-part story that connected my best photographs: (the new architectural buildings with the old). Then, I wanted to connect these older Victorian style city building photographs to the Victorian settler people who made them. This then led me down a path to unravel more stories about the Victorian empire, such as the Victorian monuments, etc. Therefore, if I had time, I would really extend this project to incorporate more colonisation impacts, which are still causing society problems today.
I have gained and learnt new skills after using a paint-can Pinhole camera. It was exciting working in a darkroom, mixing the photographic paper with chemicals to create a negative. I would like to continue to improve on the exposure timing, and further explore to understand the light conditions.
I also spent time improving my 2D and 3D media processing skill-set by working with the photographic and printing technicians to scan a pinhole negative for inversion, plus used the photocopy machine to invert, and using the printing machine to enlarge a digital photograph a number of times (see below).
Enlarging process through the use of a 3D photocopier printing media machine.
1st Trial creating a negative image using a Paint-can Pinhole Camera.
Pinhole Camera Negative: Marae Behind Trees.
I am proud of my progress in photography over the last four weeks. I have been open to learning at every lesson, and have listened hard to discover new ideas to explore. I am interested in uncovering more of the history of the camera, and the use of modern cameras. My next step is to further extend my knowledge of contemporary and past photographers, and their work.
Overall, I have gained enormously in the RECOVERING part of the brief, identifying objects that represent me, and gaining a much thorough understanding of the city where I was born.I feel like I have recovered a happier part of myself too, yet I still need to gain confidence and believe in myself as an artist and as a person.
Interviewing an Object.OBJECTS and THINGS, what do they speak of and what do they say?
How might we consider our relationship with objects? I consider the items I chose below connect to who I am, and have been significant to me during different times of my life.
What do they speak of? My passions, my family, my childhood, my adult life and careers.
Why are they a part of our lives? Each object was presented to me as a gift from my family, therefore I treasure them.
What happens when we photograph them, draw them, trace them, describe them in words, and measure them, etc. The objects evoke memories, distant and new, revealing and uncovering parts of me that I had forgotten about.
In
reflection, I selected many things around the home that I have a relationship
with, and that represent my notion of home, yet, the brief suggested I select
six objects.
Objects that I chose below are written here in order of receiving them throughout my life: A wooden child toy, Clothing: (A Great Grandmother’s Bodice Jacket / A teenager’s skirt), Taxidermied Bird, Glass Art.
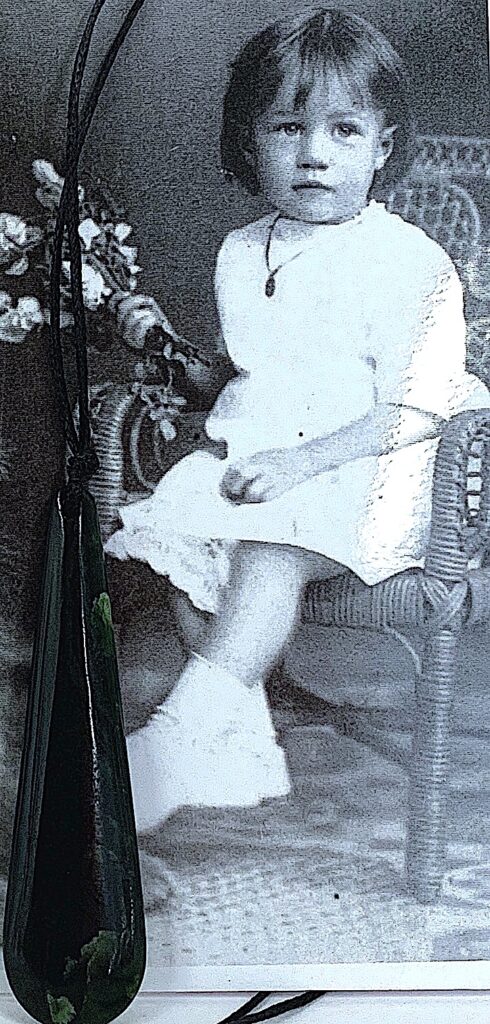
Special Photographs: I selected two photographs of my fraternal and maternal grandmothers as children, photographed in another era. I selected just 1 photograph of my maternal Grandmother to re-photograph digitally. Then I created two different works, a ghostly image, as she died many years ago. Next, I photographed her close up, and placed a gift: a pounamu necklace object in front of her as a three year old. I wished to reveal my tenderness and aroha towards her. We had a special bond as she was talented at dancing, and she supported my dancing career.
There are many things that represent me and home such as the garden, music, and artwork. I feel most content when I relax in a quiet place, looking Westward at the fading light and picture clouds, listening to silence, or music. This is when I saw a special golden light flowing in and out of my rose coloured vases, and was drawn to photograph their sunlit glow, and colours.
Here is my list of chosen pieces that mean something to me that I photographed, but did not include: Special Text Items: Telegram x2, Thank you letters and cards from students and parents, Performance Newspaper Reviews, Performance Theatre Programmes, Old Newspaper articles.
* I
like the use of text in artwork, and have noticed many New Zealand artists use
text within their images such as the artists: Colin McCahon, Nigel Brown, and Mary
Louise Browne. This interests me, and I would like to explore utilising words in
my artwork.
I spent time photographing my wooden toy (that can roll), and remembered the fun times that I had playing with it or just observing its shape. My memory box unravelled and revealed an important childhood memory, a sibling singing – movement game that we played in our youth: “There were 4 in the bed, and the little one said: “Roll over, Roll over”, so they all rolled over, and one fell out”….
In the studio, I considered the light falling on the objects, and the shadows that they made. I shifted the objects from superficial light to natural light to photograph and to see the different effects. I enjoyed photographing the folds of fabric, as both these pieces of clothing bought back warm memories.
UNCOVERING A VALUED OBJECT AND ITS IDENTITY.
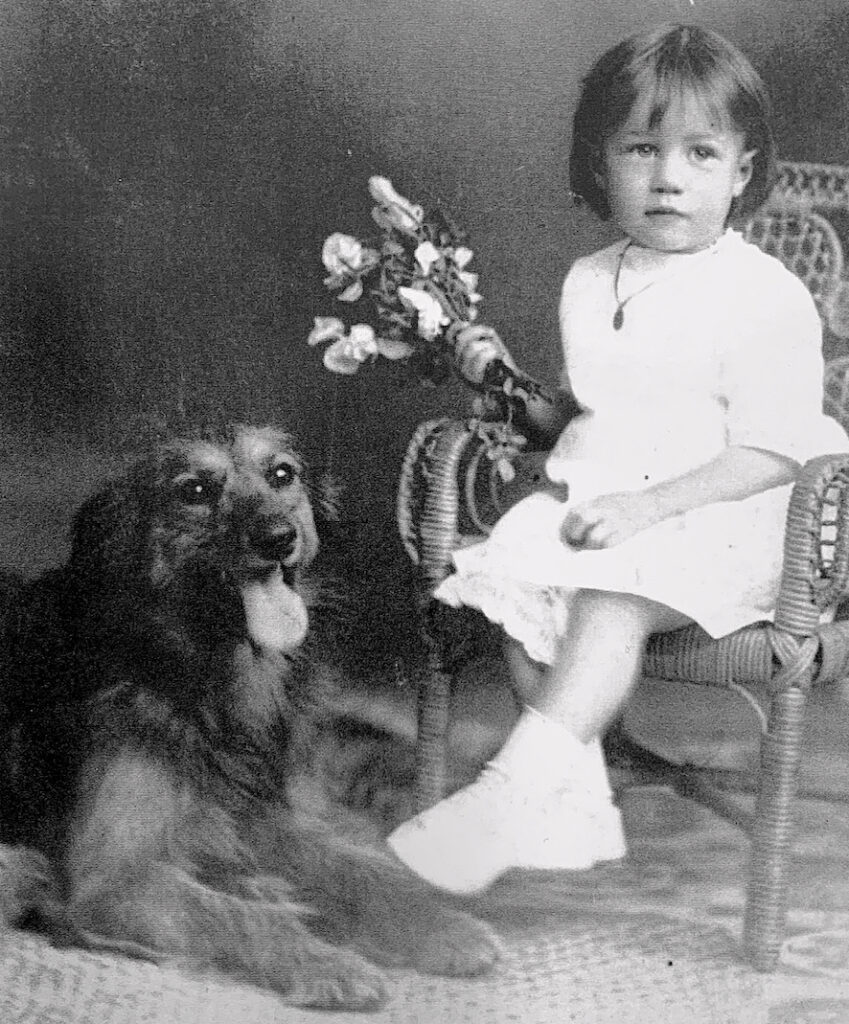
Interview a TAONGA – ‘A Whakapapa PHOTOGRAPH of Dot (Dorothy)‘
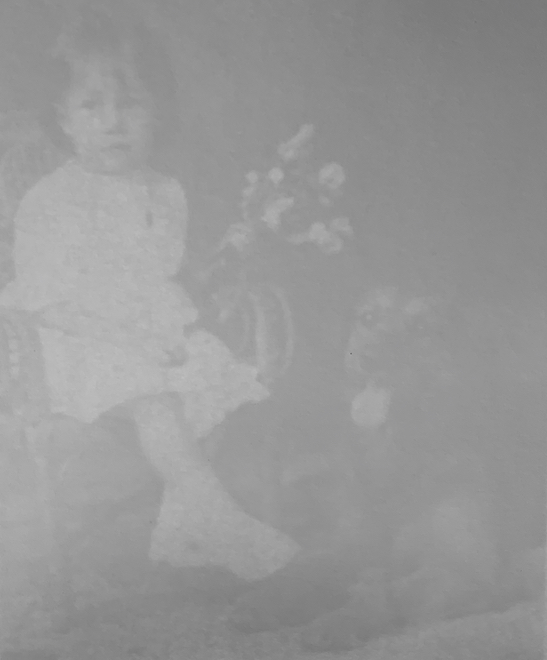
Whakapapa Taonga – ‘Dot with Toto’, 1910.
I have been looking for you. Where have you been photograph? I have been lying face down with other old photographs, inside an envelope. The Rimu chest of drawers keeps me warm and safe, and in the dark. Dot and Toto keep me company, and the flowers too, even though they don’t seem to smell anymore. My light sensitive paper body occasionally gets covered with fingerprint smudges as I get pulled out of the envelope, and flipped and handled.
Whakapapa Taonga – ‘Ghost Dot with Ghost Toto’, 1910.
Yet, you are so special to me! I have bought you outside to see the natural light. What do you think? I like to see the light, but my chemical makeup may fade, as I was created by Samuel Carnell, a Hawkes Bay photographer working last century. He photographed Dot at 3 years old in 1910. Mr Carnell also photographed Dot’s Grandmother and baby cousin, and her Great Grandfather’s portrait in the 1870s.
I am Dot’s granddaughter, and (here above) is a digital camera photograph, a gift from me to you… to keep you company. I have added another precious taonga, a pounamu treasure from my mother, Dot’s eldest daughter. This photograph, dated 2021, will keep you, and your ghost reflection photograph company. Thank you, I am glad that someone cares for us. Please don’t forget to put us back, so we do not fade and disappear, after you have viewed us.
UNCOVERING A VALUED OBJECT AND ITS IDENTITY.
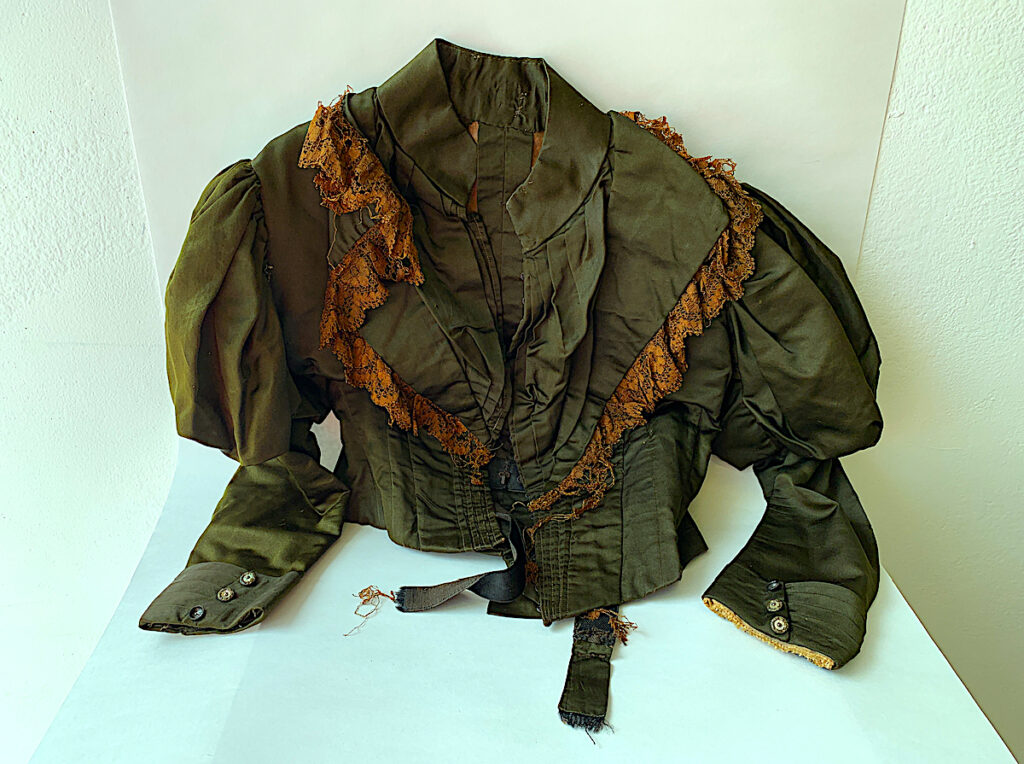
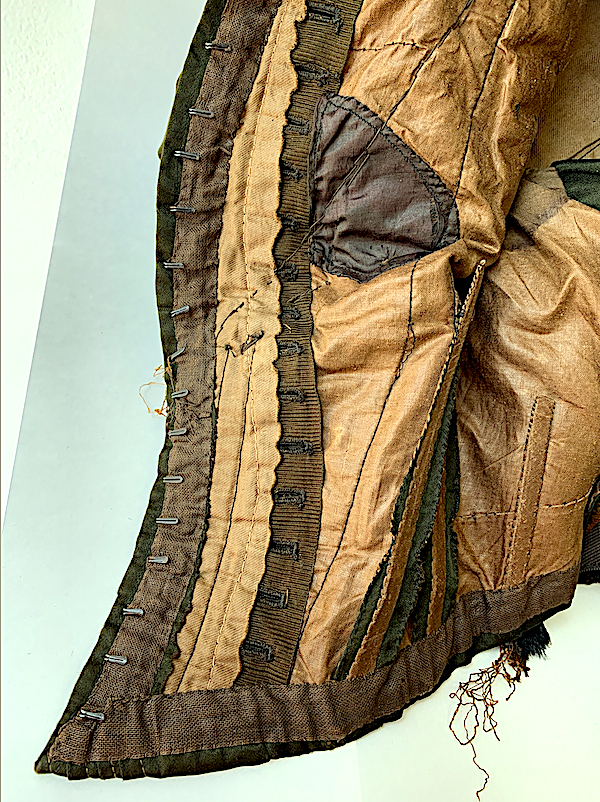
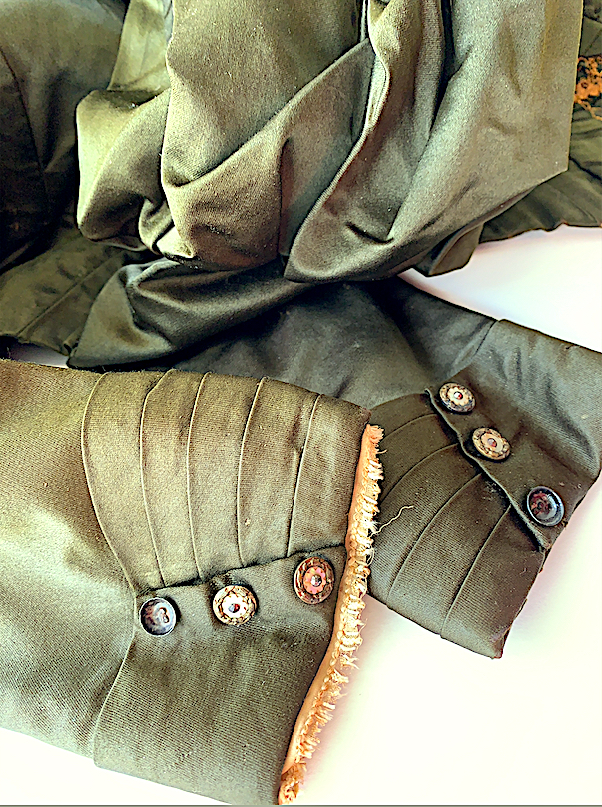
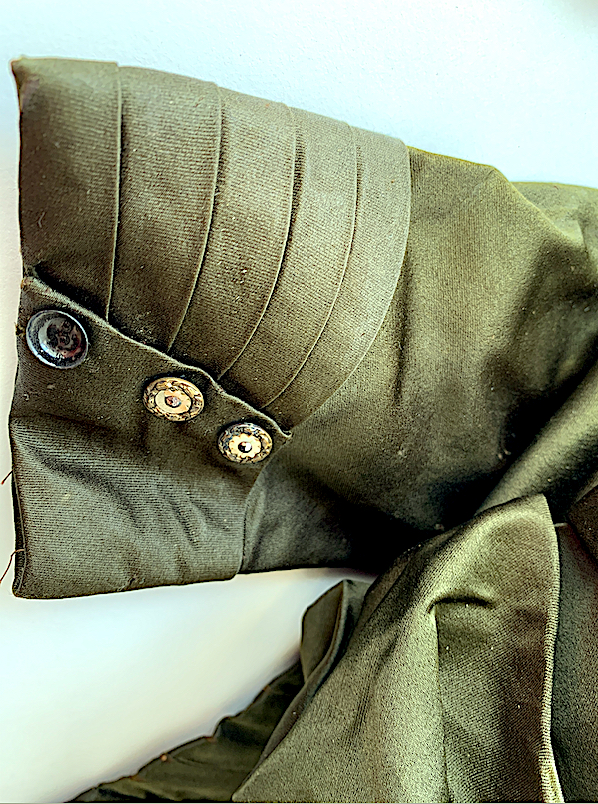
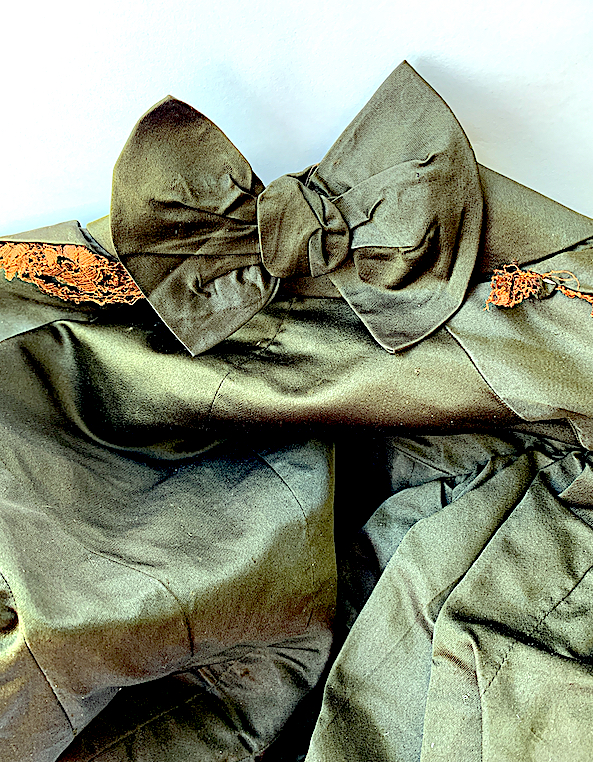
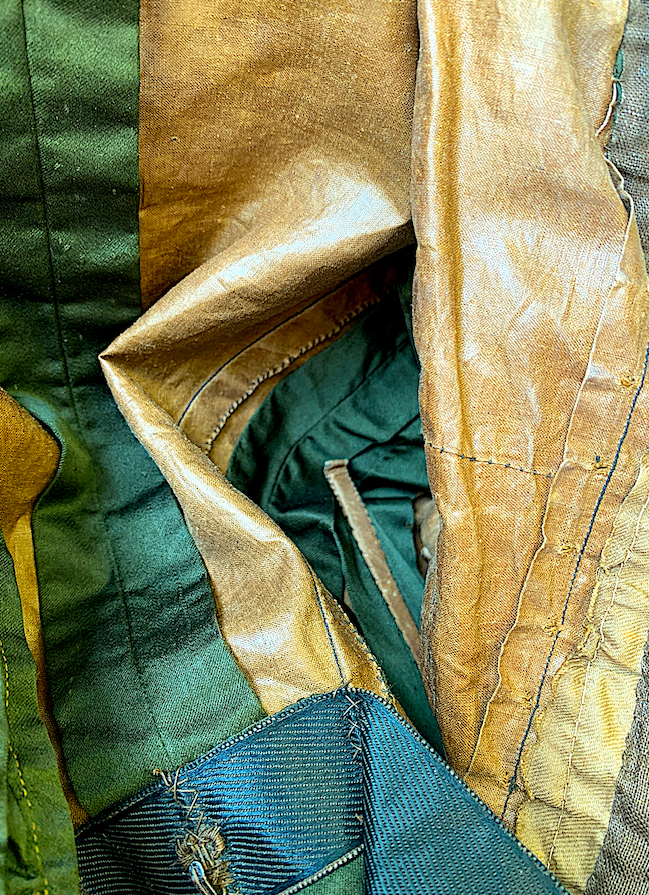
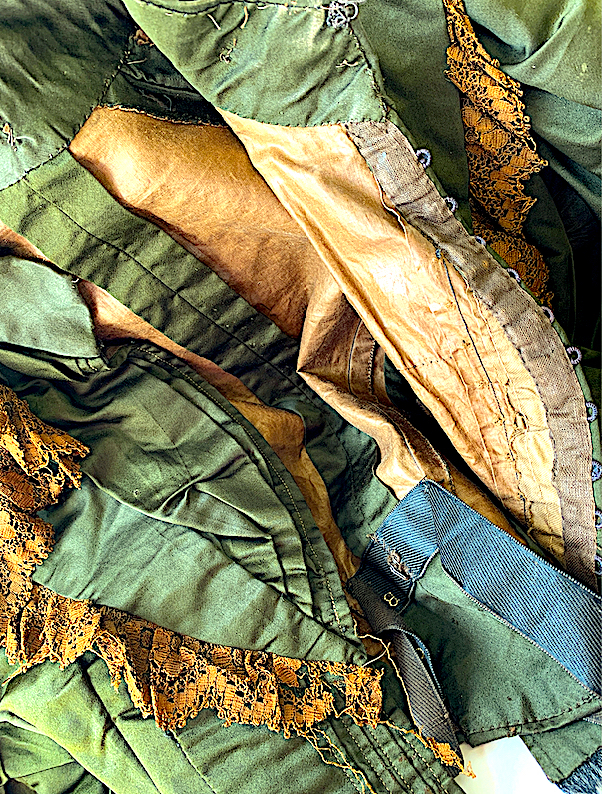
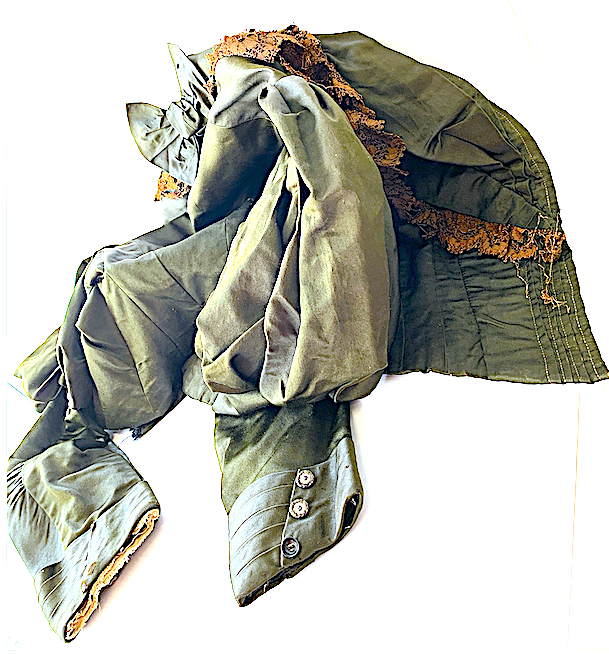
Interview a Taonga: ‘A Late Nineteenth Century Fitted Bodice Jacket.‘ (Circa approximately 1896)
What are you made
of? Satin, lace, cotton, braid,
leather, fasteners, clips, buttons, (and repaired patches of braid and cotton
fabric).
Where, and when were you made? London, England, and approximately 1896.
How were you made? A seamstress woman followed a pattern, stretched out my khaki satin fabric and hand-stitched me together. I have an inner layer and an outer layer, with whale bones, and many elaborate details of lace, a back neck bow, puffed layered sleeves, plus buttons and clips.
Are you heavy to wear or light? I am light to pick up, but have hard, heavier bones that protrude and poke into my owner’s waist and rib cage.
Who owned you? A middle class lady named Emily E owned me. Her mother died when she was born. She left her Father, Stepmother and Stepsisters to voyage alone on a ship from England to New Zealand. I was her pride possession, her most valuable piece of clothing within her wooden chest of belongings.
Were you worn on special occasions? I usually stayed folded in my salty-sea smelling box. I was shifted by horse and wagon around the North Island from Auckland to Taupo, and to Hawke’s Bay. Emily did not often wear me, because she was either working seven days a week as a housemaid or nanny in big houses, or she was searching for work.
I do remember a time when she was excited to dress for an occasion. She wore me whilst visiting the township of Napier, and I could smell, and see the sea again.
Once, I was beautiful, and at the height of fashion. My colouring shone like the New Zealand bush with strong green and brown tones, but now I am faded, patched and ripped, and over a century old! I need someone to repair me, look after me, and take me out occasionally, so I can breathe for another 125 years.
UNCOVERING A VALUED OBJECT AND ITS IDENTITY.
Interview a
Taonga: A Childhood Wooden Toy –
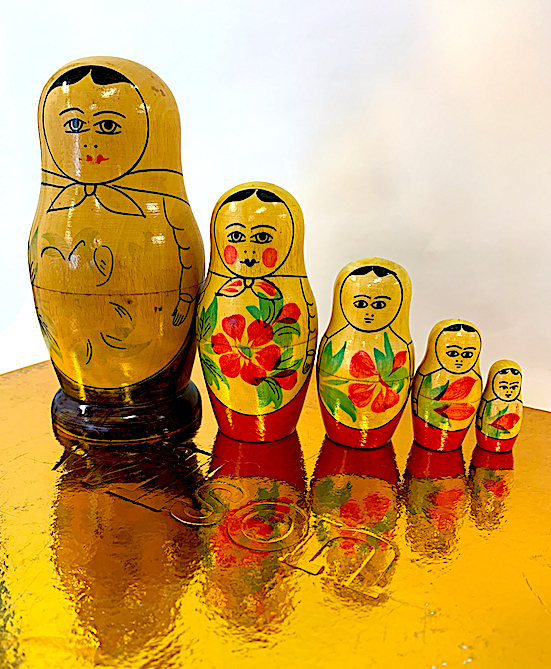
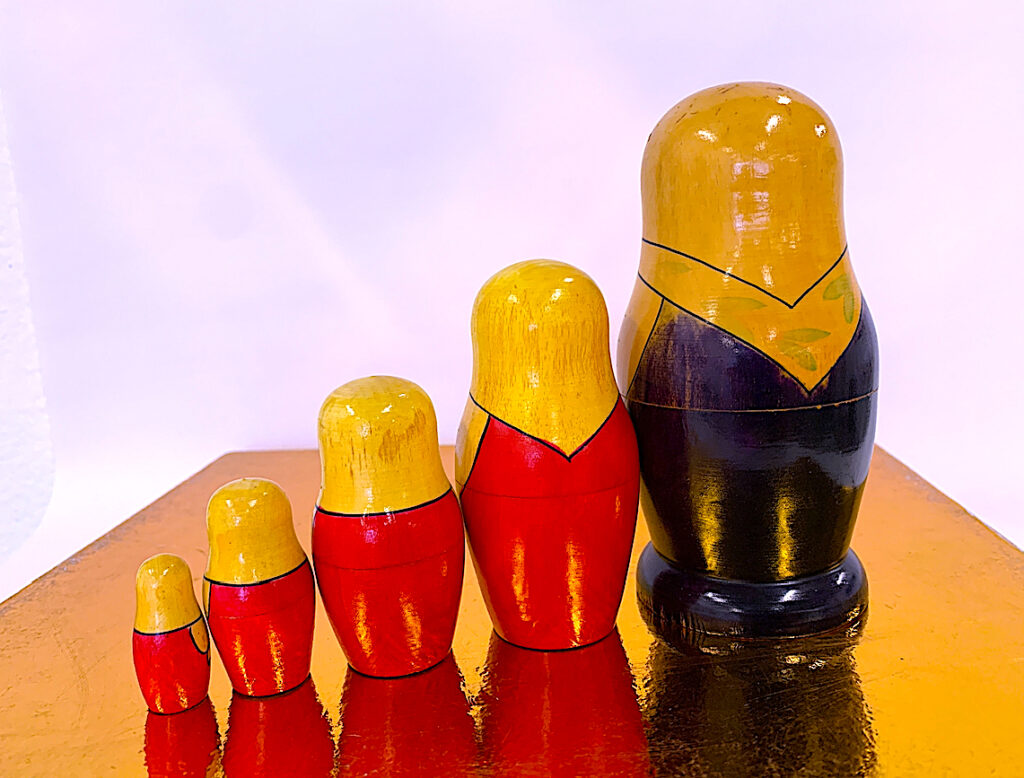
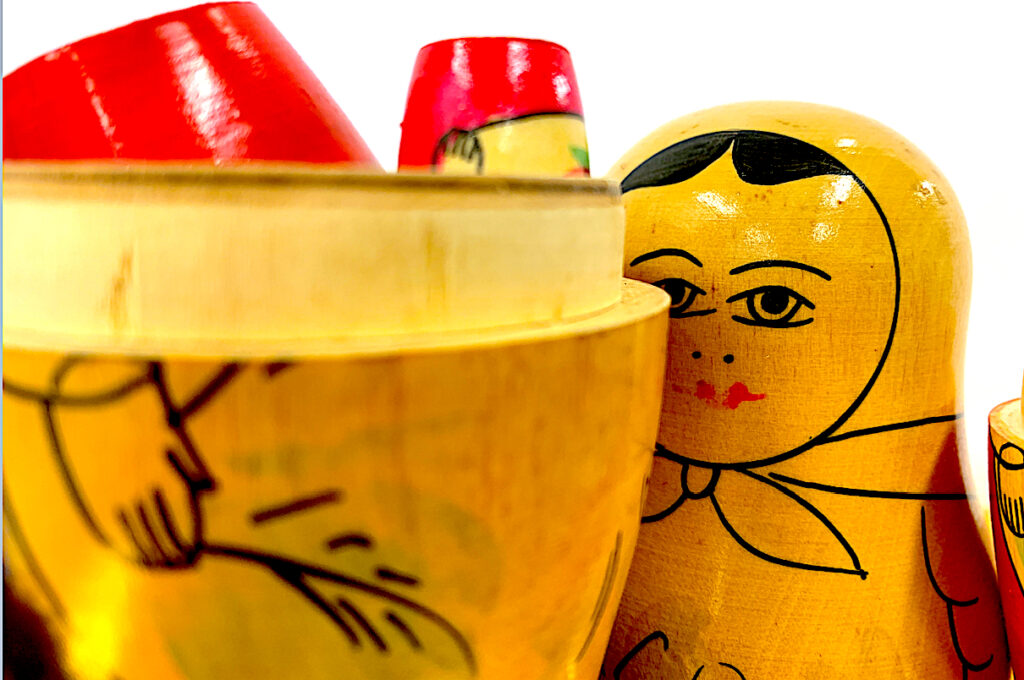
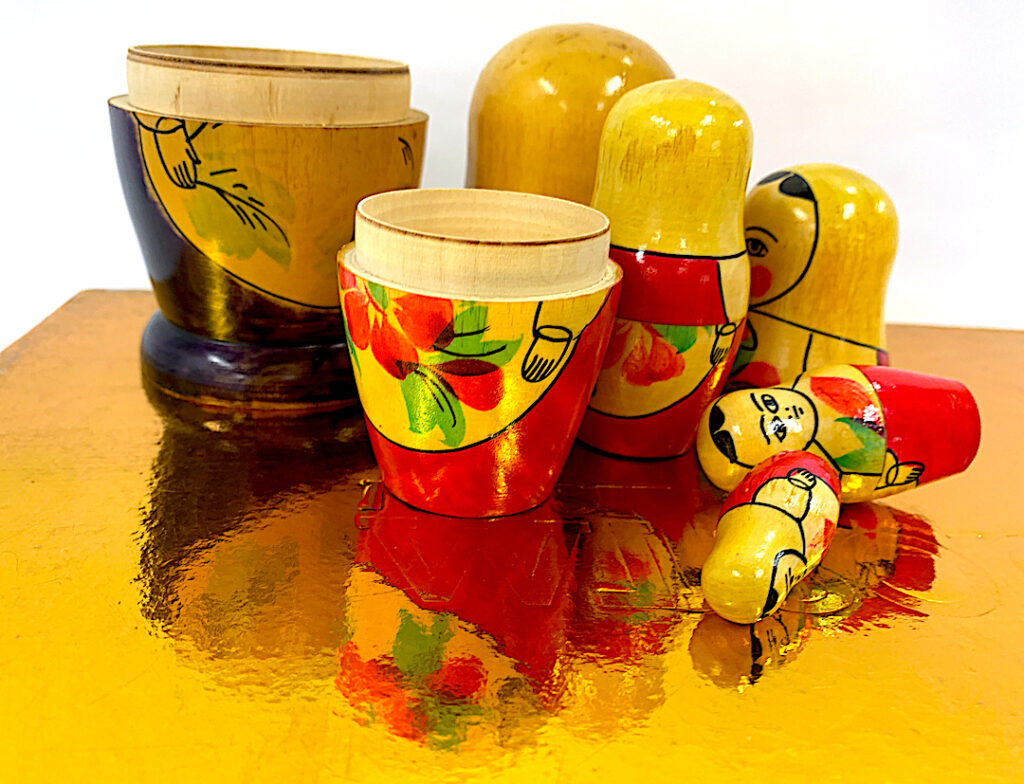
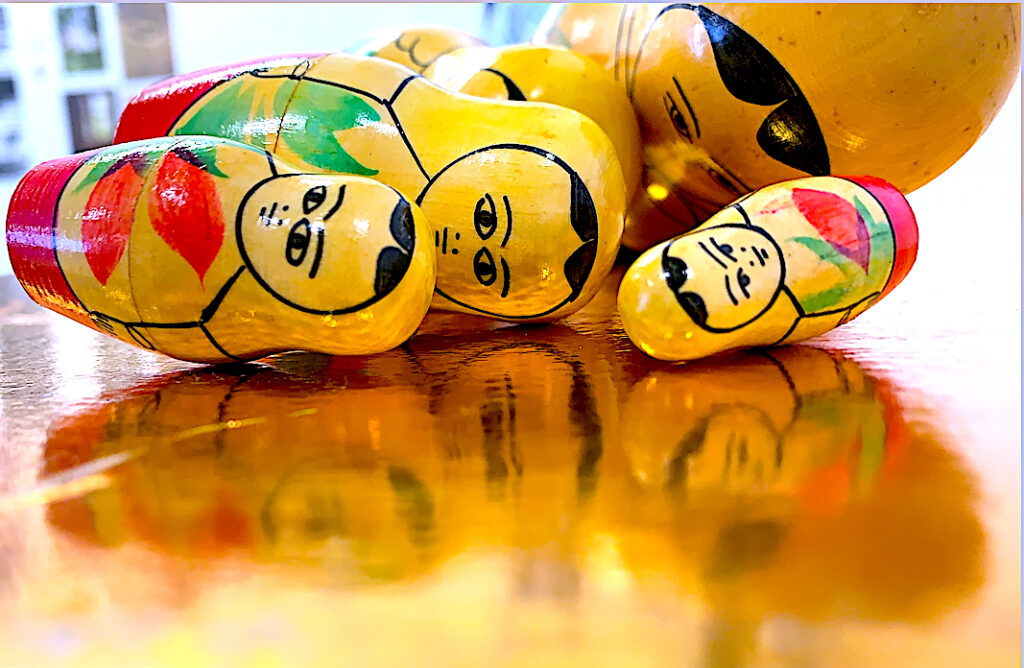
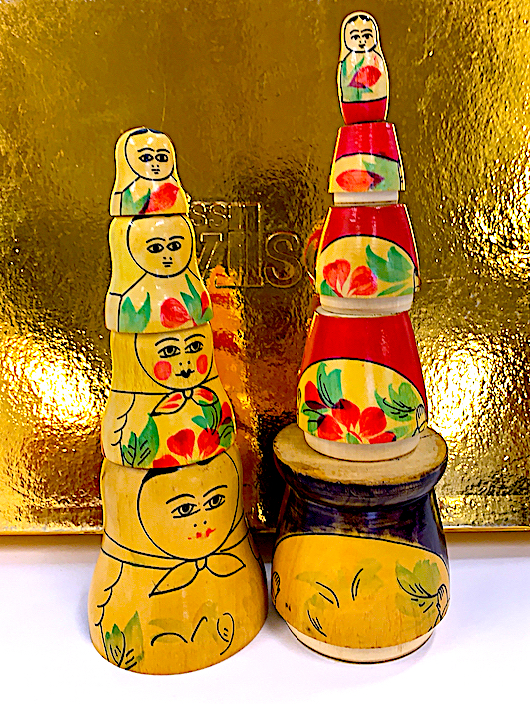
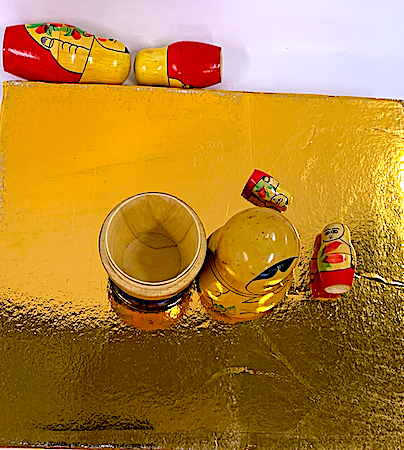
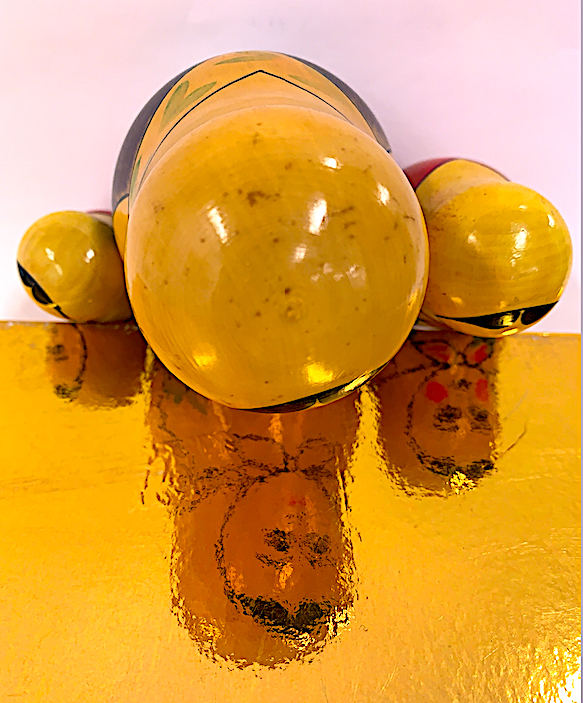
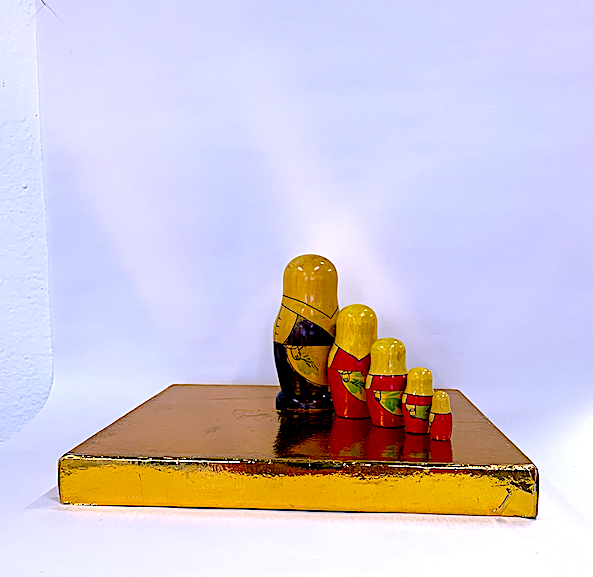
‘RUSSIAN DOLLS’.
What are you? People today say I am an old fashioned toy, one that is painted and crafted by an artist out of wood. I am a set of different sized dolls, ranging from big to small.
How old are you? I have even heard that there are people
making replicas, but I am an original set of Russian Dolls, and am at least
half a century old.
Where do you come from? Originally I came from Russia (U.S.S.R) in Europe. I was wrapped up, and given as a present to a small girl for her fifth birthday on the other side of the world in New Zealand.
What is your
purpose? The purpose of me was to
be a tactile toy, I was to be both engaging, and enjoyable for children to
simply play and manipulate with their hands.
Another one of my purposes was for the player to learn about
mathematical size and scale, and number counting and algebraic patterning
sequences. If one used their
imagination, the player could invent endless possibilities to mix and match me,
and arrange and order my set of dolls together.
Therefore, I am an educational toy, because children in the olden days
(before computerised games and plastic toys), needed to either create their own
fun, and invent games with natural materials such as sticks, or play with
wooden toys.
Nostalgia: What are you worth? Are you valuable? I had a little girl owner who valued and cared for me, and she spent many happy hours playing with me. She gained new skills by opening and closing each of my dolls, and revealing, and uncovering me. My owner swapped my dolls around, lined them up, placed them in a different body, made piles and layered my dolls on top of each other, and then neatly put me away. As she was playing, she learnt puzzle skills, how to concentrate, coordinate and explore, and she learnt to care for an object, such as me. I think I am valuable because I am a learning tool, and I am still as playable today, as I was then.
UNCOVERING A VALUED OBJECT AND ITS IDENTITY.
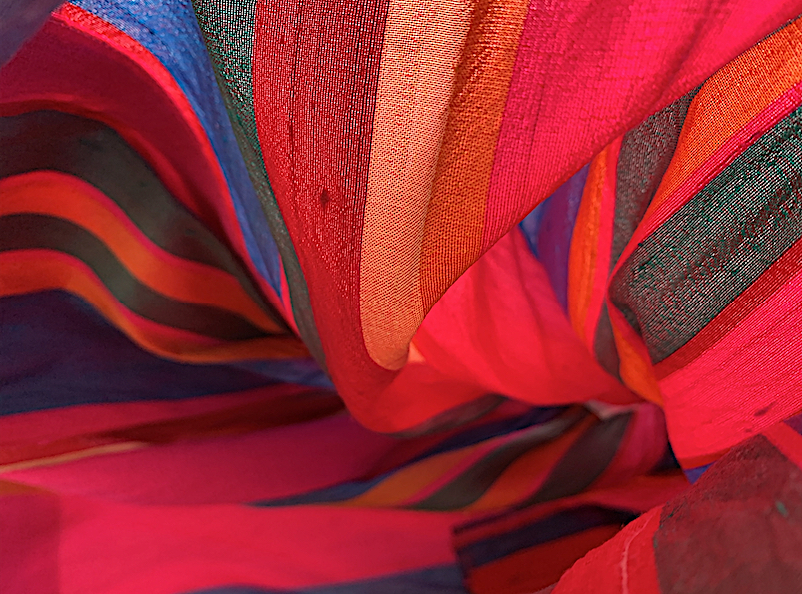
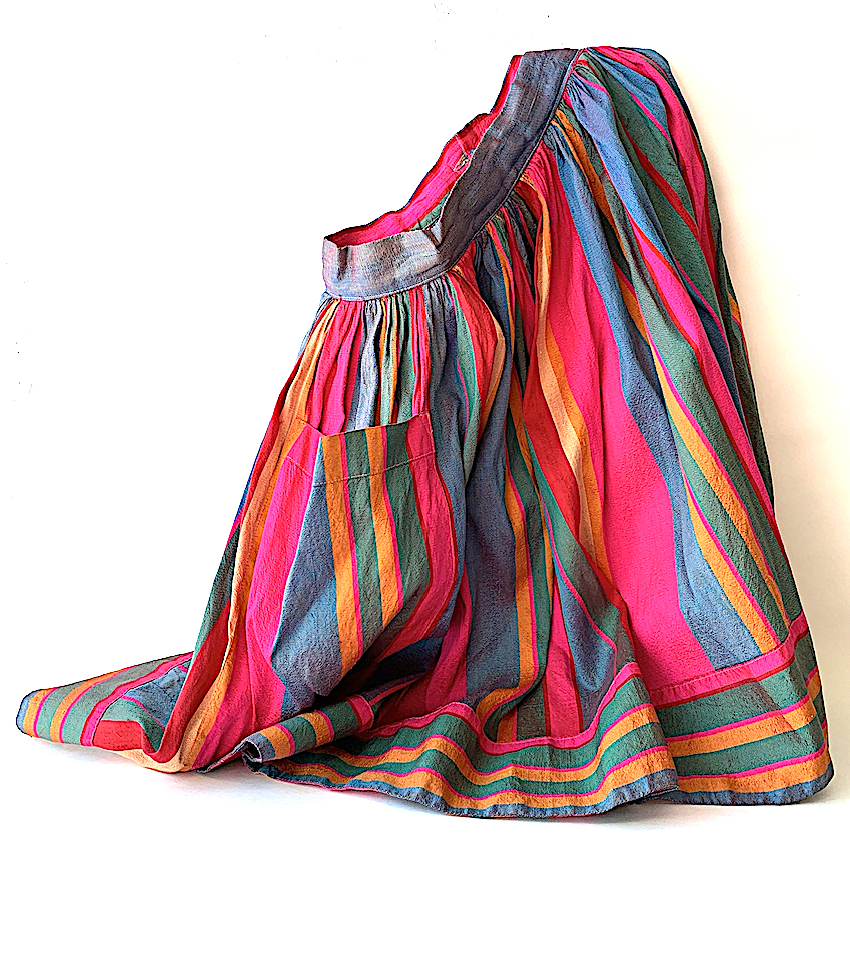
Interview a TAONGA – ‘A 100% SILK MINI SKIRT’
Figure 1: Moving through the tunnel of the ‘Silk Mini Skirt‘
How long have you been living
in that golden box my colourful skirt? I was
originally hanging in a wardrobe back in the 80s and 90s, but fashions come and
go, and change. So now, I do not get to see
the sun, wind or rain, or go to a dance.
I am wrapped like a present, the tissue paper encases my folds, and creases
my colours.
Figure 2: Seeing curving stripes of the ‘Silk Mini Skirt‘
What are you made of? I am made of 100 percent pure silk. My owner had to be careful not to spill
anything on my precious threads. Visiting
the drycleaners was the only option to get washed and cleaned.
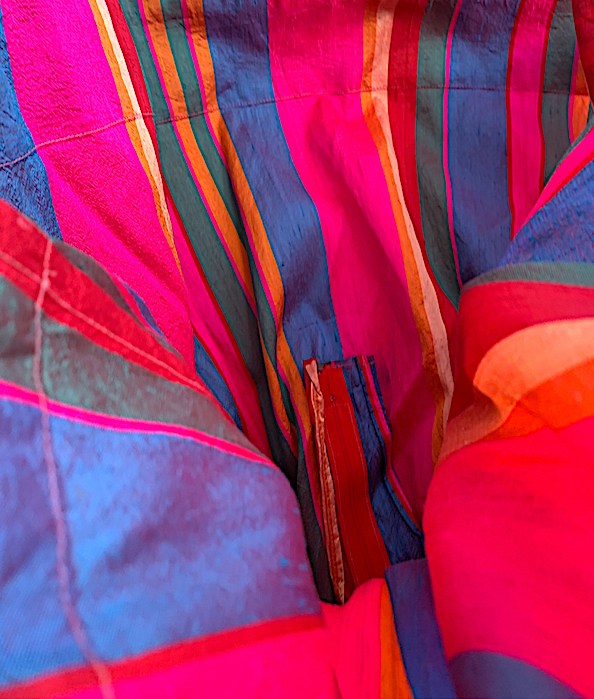
Figure 3: The inner zip of the ‘Silk Mini Skirt‘
Do you remember when you
were young and new? Yes, I
was hanging in a designer shop, after my silkworm thread was dyed a myriad of
colours, and woven into fabric, then cut and sewn. Fortunately, a mid-teen fell in love with me.
I shone like a bright-coloured coral flower,
lightly twirling like a topsy-turvy-top against black stockings, high heels, and
a black shoulder-less top at her first dance.
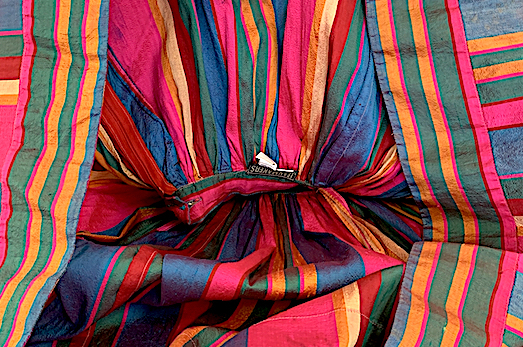
Figure 4: Lift to see the label of the ‘Silk Mini Skirt‘
You are very colourful. Have you faded over the years? Yes, sunlight destroys my material. I need to be kept in a dark wardrobe. If you turn me inside out, I am very bright and
vibrant underneath.
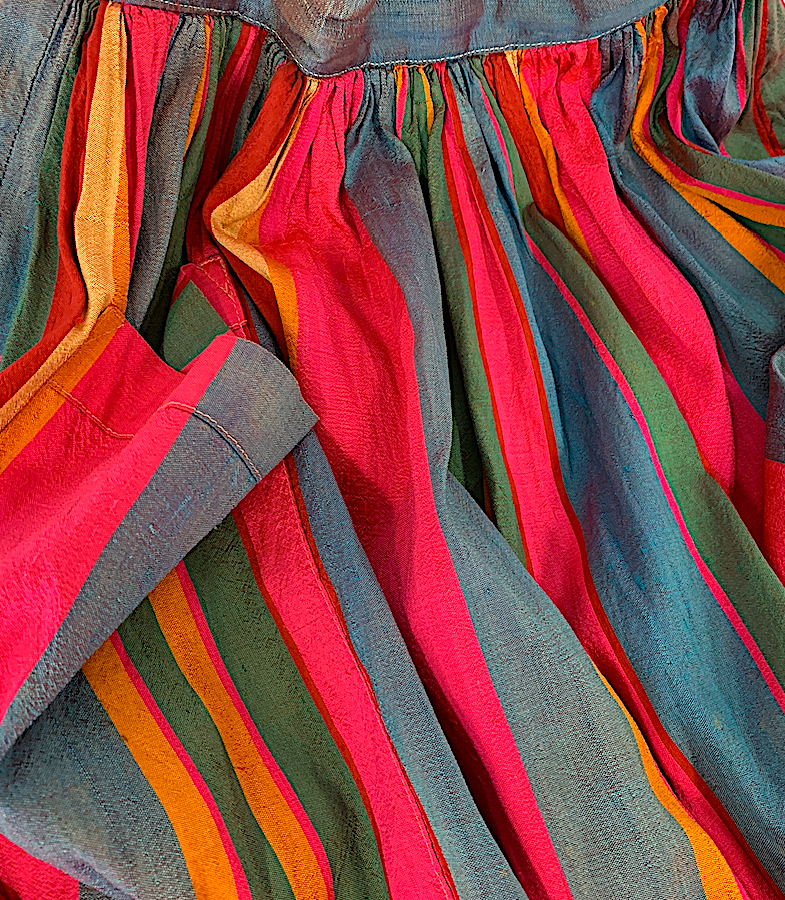
Figure 5: The pleats and the pocket fold from the ‘Silk Mini Skirt‘
Do you wish to go out
again? Yes, but my owner says she cannot fit my
waist anymore. Perhaps she should pass
me on, remodel or remake me into another fashionable statement, so I can once
again breathe life into my silky striking stripes.
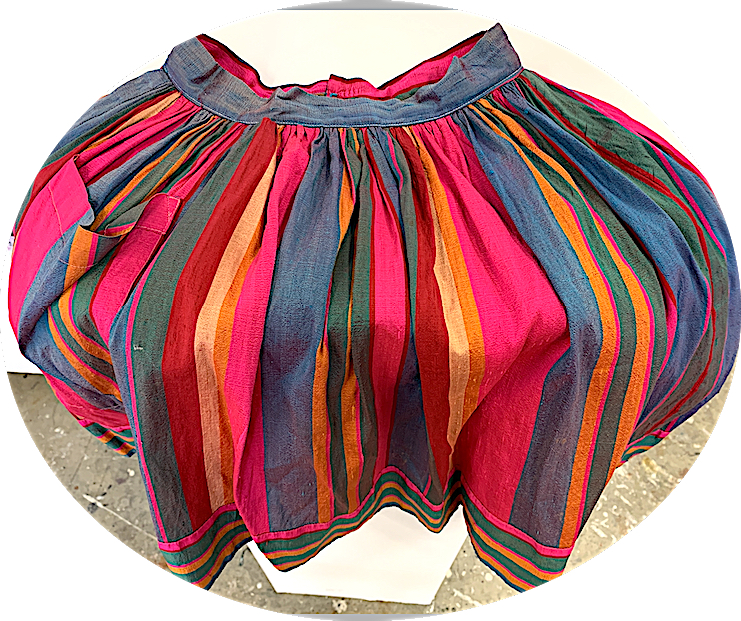
Figure 6: Puffy ‘Silk Mini Skirt‘Figure 7: Fallen ‘Silk Mini Skirt’
Figure 8: Dancing ‘Silk Mini Skirt‘
UNCOVERING A VALUED OBJECT AND ITS IDENTITY.
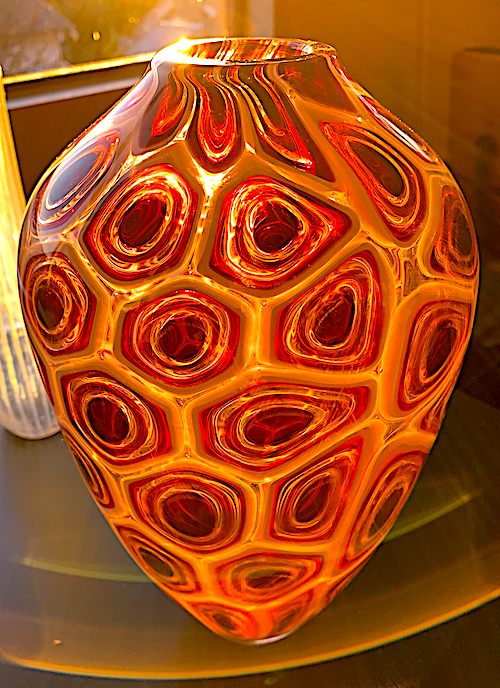
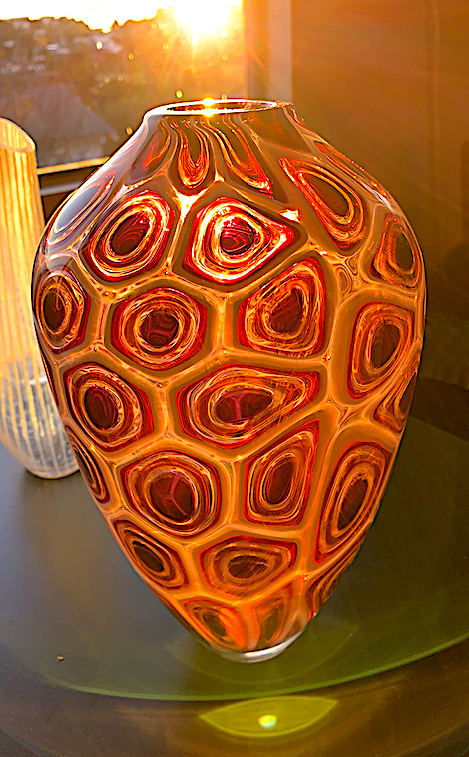
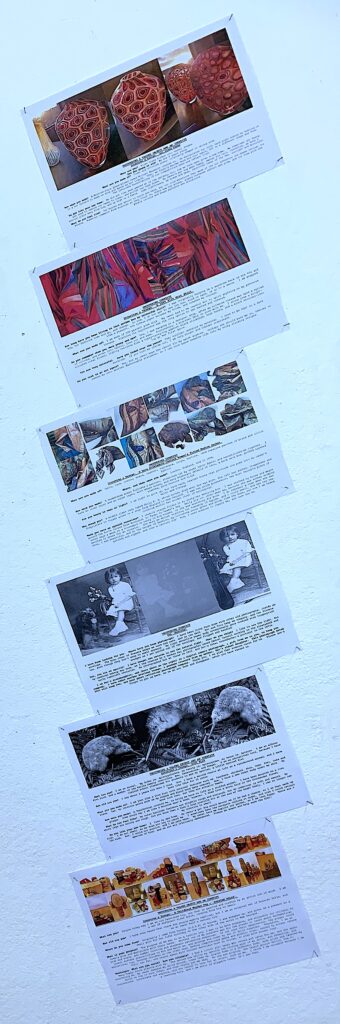
Interview a TAONGA – ‘SUNLIT MURRINE & CANE GLASS ART (3 Vases)’
What are you? Murrine Blown Glass formed into vessel shapes.
Are you young or old? We are 6 years young.
Figure 1: Sunlight radiates in and out of the rose coloured ‘Glass Art’
What are you made of? Clear and coloured glass, originally shaped in oblong rods/canes. Murrine are the patterns, designs or images made from inside a glass cane. When the cane rod is cut into cross-sections, the patterns are uncovered and revealed.
How were you made? A Murrine-style glass-blower named Michael Waysmith created us. He manipulated our cold, hard glass bodies by heating us in a hot furnace to make us sing and dance as hot liquid. Then, we finally become hard and cool again, but in a different shape and form. The intricate tessellations of our compositions bend, distort and reflect light.
Figure 2: A sun reflection shapes an arc under the white, pink, orange and purple tessellation marbling on the ‘Glass Art’
Do you like your new home? We did not like been peered at in the
gallery, but, now we have been given a new home. We sometimes get dusty, and need to remind
our owner to clean, and polish our vase forms.
My owner’s pet dog when happy, swings his tail, therefore, we have a
special place away from him, and up high on a table. Like lighthouses, we gleam and beam, receiving
views of the sea, sunlight and moonlight.
What do you feel like? Our bodies are smooth to touch and hard, but our
cold exteriors feel warm if the hot afternoon sun beams through the window. Numerous comments from visitors as they touch
us, state how our glossy, glassy surfaces reflect and glow, and our rose pink
and purply colours and shape patterns are attractive.
Figure 3: The sun reflections alters the wider ovoid pink and purple coloured ‘Glass Art’
UNCOVERING A VALUED OBJECT AND ITS IDENTITY.
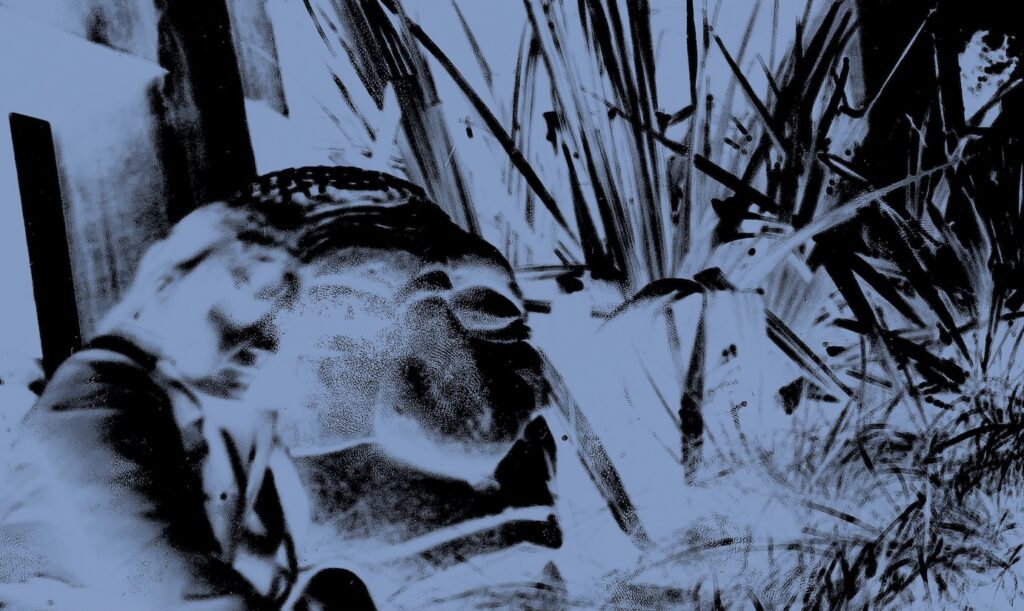
Interview a Taonga: ‘A Kiwi’
What are you? I am an animal.My Order is: Apterygiformes, my Family is: Apterygidae, my Genus is: Apteryx. I am an albino Kiwi bird, and a member of the Ratite Family (Ostriches, Emu, Cassowaries, and Rheas). I am an educational tool, because I have visited school classrooms for students to see my species: a Little Spotted Kiwi.
How old are you? I was about 2 years old when I died. Now, I have a second chance at life as a taxidermied animal, and I have been like this for 25 years.
What are you made of? I am just like a live Kiwi with external features such as: feathers, whiskers, skin, legs, feet, toes and claws. Yet, my interior parts such as my organs and blood have been removed. Now, I have a new inner body under my skin. My eyes look real, but they are actually beads.
How were you made? A Taxidermist created me, to bring me back to life as a stuffed animal. I have been mounted on a rimu plaque. Some would say I am like a mounted deer’s head, however, I was not shot, but died from a stoat bite in the Coromandel forest.
What do you feel like? My outer hairlike feathers are slightly rough and textured, but my undercoat is soft and smooth. My short legs are strong and rough. Did you know that a kiwi’s nose nostrils sit at the end of the beak? Sadly, I can no longer use my nostrils to smell.
Do you like your new home? I like my new home. My owner’s pet dog would devour me if he had a chance, so I am kept safe up high. I do not smell, so he does not try to catch me. I sometimes hear the morepork calling at night, and wish I could revisit the bush. But, I would not survive, and I am safe here. My owner lets me explore her garden, so I am very happy. There are 5 species of Kiwi, and we are all critically endangered. Please be aware and help save the KIWI!