Reflection and Open Studio: Thursday 25 March

A Weight off Your Mind

Reflections

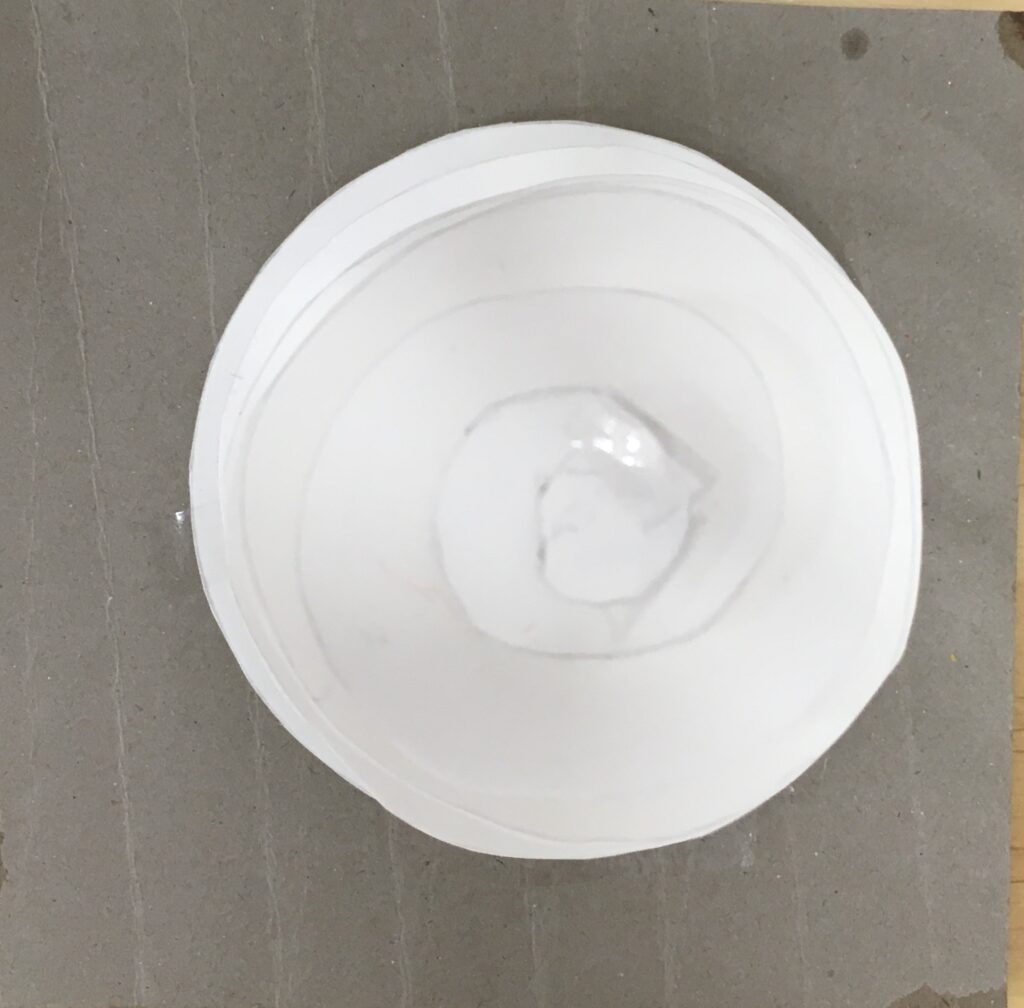
A part of the process that I really enjoyed was making the plaster moulds. I’ve never worked with plaster before so I enjoyed pouring the plaster pouring into the moulds and seeing my 2D shape balloon into a 3D shape. It was also fun to unwrap and tear away the fabric to see how the plaster set and find out how my sculpture came out. It was like opening a lucky dip and was exciting to open up and find out if it was bad or good result. It was also really fun to play with the wire and making really cool curves and shapes.

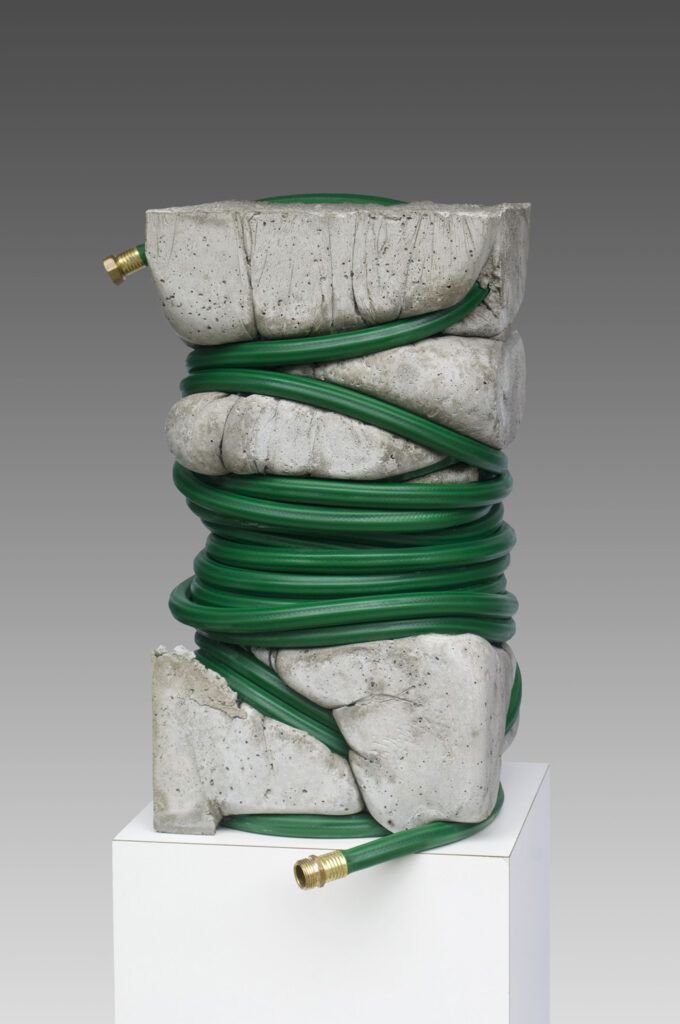
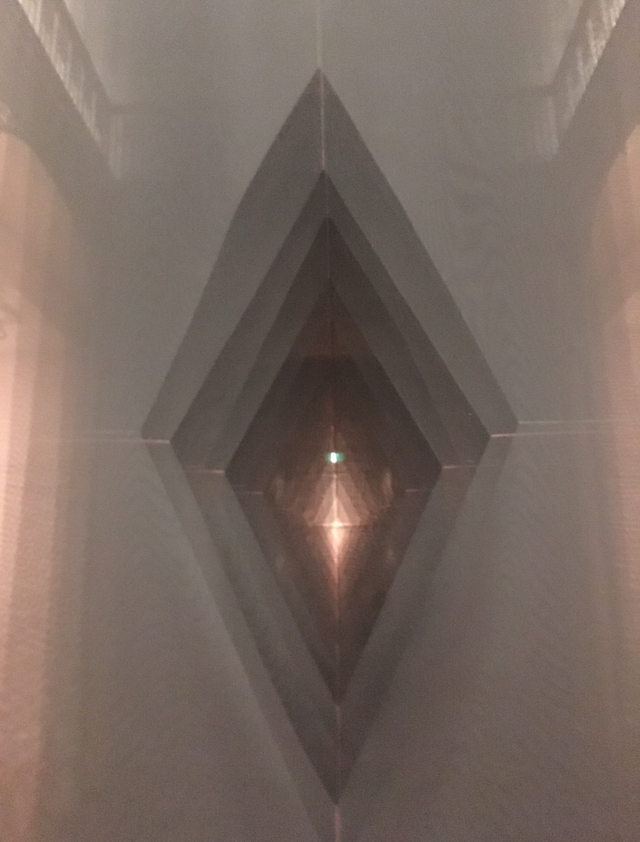
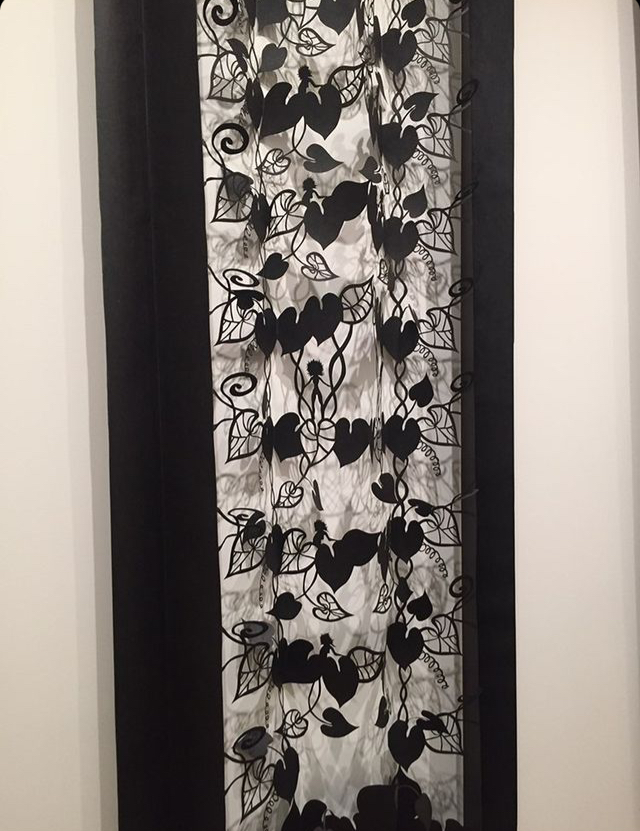
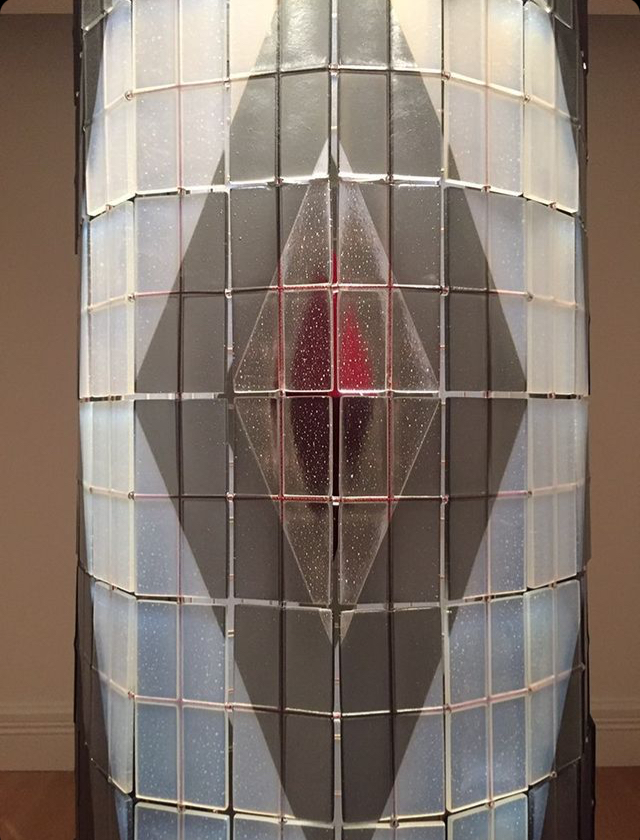
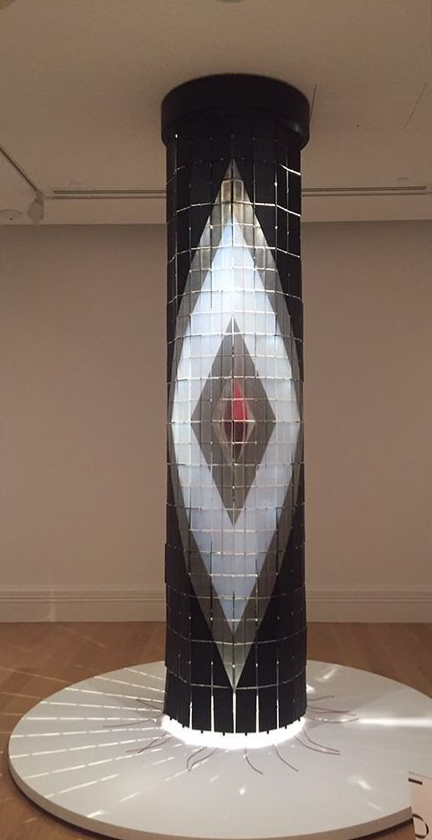
My work engaged with the brief’s focus as I connected all of my sculpture to the key ideas of ‘A Weight off Your Mind’, such as volume, mass, linear planes and 2D planes. As well as this I referenced techniques from artist models that were given as examples/guidelines for my sculptures. With each of my sculptures, I had a general shape that I stuck to, to explore how different materials form volumes and mass. This can be seen in sculpture one, big liquid droops formed by plaster in fabric. In Sculpture 2, the wire with a variant of curves creating a 2D plane contrasting the plaster base which has taken the form of the soft round fabric mould. And in Sculpture 3, the plaster has taken the cushion-like form of the fabric mould and shows it’s weight and volume through the squished impressions made from the wool I wrapped around while it was setting.

A new art idea I explored was creating forms that looked like liquid or like an organic form. It was fun to make such free form objects and I was really happy with the how my sculptures aesthetically turned out. I researched into artists that made work similar to what I was making, such as Ken Price and Laura Soto. I found it really cool how although, Price, Soto and I all have similar forms of ‘goop’ and of substance, all of our work look different. As well as that, I looked at other artists such as Joel Allen, Gregor Kregar and Jeff Muhs to help develop my sculptures and bring in new ideas to my works.

If I had more time, I would have developed my work to look more of a substance in regard to the stands of sculptures. I would try to make the sculpture stand to look more organic or not even have a stand and have my sculptures support itself. I would also like to work bigger. Another thing I would have developed was creating sculptures that would hang-upside down, so it would truly look like a dripping substance. Lastly, I would like to add colour to my work, making them look more vibrant and colourful would add to the aesthetic of liquid or like coral.

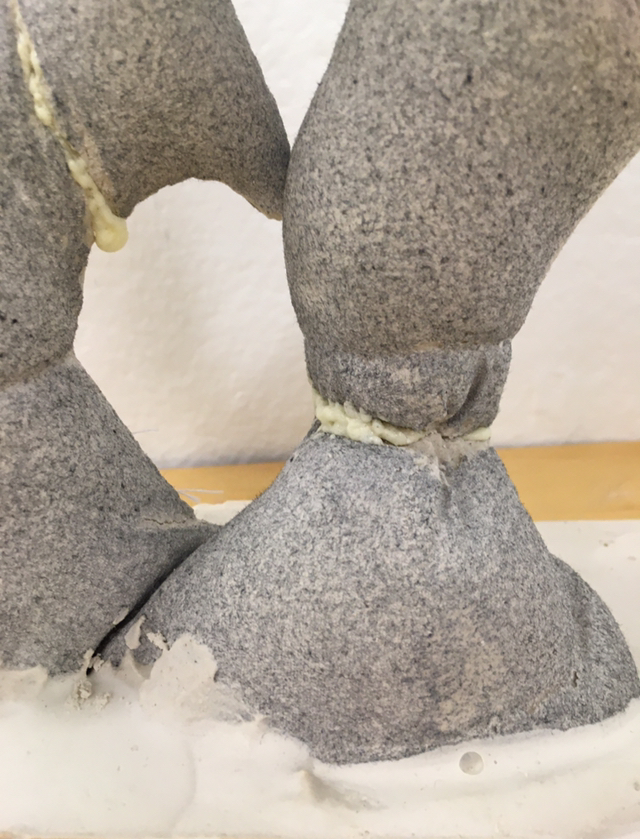
The most difficult thing for me was creating works that would break. I made many plaster sculptures that would break because of the complex shapes I would design. I overcame this by making simpler forms and by also trying to be really slow and patients while removing the mould off of the set plaster. Not only this, but when my sculptures did break, I would stay calm and overcome it by heading down to the wood work shop and gather materials that would fix the broken sculpture. Such as on the last day of workshop, my Third sculpture broke, I went down the workshop, ask for help and was supplied a drill, wire and strong glue.

Substitution and Displacement, Week 3 and 4 (16th- 19th of March)

This week we were to introduce materials that have density and mass into our works, such as plaster and concrete. With these materials, we were to experiment with mass and density in our linear/planar materials.

Before starting any of my plaster sculptures I decided to experiment with making different moulds and forms. After a few experiments, I noticed I could not make complex curves without the plaster breaking. Therefore, if I wanted to continue using curves, I would have to simplify them, potentially loosing the organic look of the sculpture. (OR to continue making complex designs, with the risk of the sculpture breaking.)

With this in mind, For my first sculpture I drew up a draft with a simpler design, and made a mould by sewing the design onto two pieces of fabric and my pouring the plaster into it.

Sculpture 1

Planning in my workbook

After the first plaster, the droops broke, so to fix this, I made a rectangular box as a stand and placed the droops in it.

I liked how it turned out, but to make it more polished, i put more plaster into the base of the droops to make it look more seem-less and sanded the stand for more of a rounded edge, therefore making it look more cohesive with the overall rounded form of the sculpture.

Filled in the gap between the droop and the stand as well as sanded down the harsh edge of the stand.

I did play around with adding wire ontop of the plaster, but it didn’t look right and didn’t seem to add anything. So I scraped the wire, preferring how it looks by itself

Final Sculptue

Sculpture 2

For this sculpture, I wanted to play with wire again, but have it more look like coral and cluster them together. I made the plaster base, by pouring plaster into fabric. The wire was individually made and were connected to the plaster by drilling a hole and inserting it in.

Sculpture 3

For my last sculpture, I wanted to reference another artist in my work.

Jeff Muhs

While using plaster, Muhs wrapped rope/around his plaster/concrete work while setting to make the plaster form around the rope. I would like to use this technique in my last sculpture to show volume and mass.

Fast concrete wordpress https://fastconcrete.wordpress.com/

They sewed a design that expanded around holes in the mould. I would like to use the visual element into my sculpture, sewing a design which contains holes, so the plaster looks like it swelling and protruding

Planning final sculpture

I hung the mould upside down, and while the plaster was setting I wrapped wool around to make an indentation.

Sculpture fresh out of the mould. The black fabric left remains on the sculpture, which was unexpected but i really like how they grey colour makes the plaster look more like coral!

I really loved how it turned out and made a base for it to stand, like with sculpture 2.

The sculpture did break and I had to fix it by drilling a hole, placing a wire in and gluing it together. Surprisingly, I really enjoy the look of the glue and it expanded and foamed, adding more texture to the sculpture.

I was going to add the wire onto the sculpture, but you couldn’t see the impressions made by the string. so i decided to not place it on. Because without the wire, it looks like the form is being restricted by an invisible for or string, seeing the weight bulge out, which I enjoy.

Week 2: Sculpture After Atapō

Brain storming:

Before I developed any new sculptures, I brainstormed some of my spatial sketches and chose one out of the five to create. Out of all of my ideas, I decided to develop and create a sculpture from sketch 4.

Brainstorming ideas from sketch 4 and developing it into my sculpture.

Referencing artists

Joel S. Allen

While brainstorming, I looked at two artists to help develop my work. The first artist I looked at was Joel S. Allen. In his works he used wire to form vessels and different forms. I though it was cool how he used wire to create round or curved forms. The Wire Form (bottom left) is a sculpture I particularly like, specifically how the wire forms looks like tentacles reaching out of the main body of wire. This is something I would like to reference in my sculpture; manipulating the wire to look like a growing form.

Gregor Kregar

Kregar uses clear plastic or cardboard to create flat planes in his sculptures. Using flat planes is something that I want to try in my sculpture to bring in more of a visual language and concept of something bodily is growing. Although Kregar uses straight, lines in his works, I will not reference this in my work, but rather the flat planes to create my sculpture to look like it has ‘weight’.

Final Sculpture

Wire and clear Plastic

This finished sculpture was developed from sketch 4. In sketch 4, I noted a way to improve the sketch was to use a material that could support itself. I decided to use wire that soft enough to bend and create organic curves as well as can support it’s weight. As well as this, I decided to keep in the centre wire, but rather have it just serve as a structure piece-like in my sketch. I twisted the wire to look like stream of liquid or substance was running down, ‘splashing’ onto the ground. By doing this, it’s part of the aesthetic of the sculpture rather than just the structure.

When I first completed the sculpture there was no clear plastic in between the individual ‘branches’. I thought it looked empty and that there needed to be a flat plane inside of the curves of the ‘branches’. Originally, I thought about placing in cardboard, but I didn’t like how the cardboard blocked from viewing the other branches. Therefore, I chose to use clear plastic as it would enable viewers to see through the individual ‘branch’ frames. And as an aesthetic value, the clear plastic mimicked the look of soap suds or a liquid. This influences the sculpture to look bodily, a substance or something organic. which I like.

I really enjoy the look of the sculpture. How the curves of the wire are asymmetrical, it looks like it’s growing- like coral. As well as how the clear plastic adds weight to the sculpture. In my next works, I would like to carry on with the visual language/ general shape, the curves and fluidity.

Implication- After Atapō (3rd & 4th of March)

Brief: Exploring visual language using planar and liner elements. Take a weight off your your mind. Create works that use planar and liner elements to define mass and volume as well as explore how different tensions, collaborations and relationships occur between the forms.

We were to make small simple experiments using materials such as card, paper, wool and wire. We were to make 8-10 of these.

Sketch 1

Cardboard and Masking tape

This was the first experiment that I visually liked. I drew triangles, connected to each other on a piece of card and cut down the lines half way through the card, enabling the card to bend easier. I love how the light and shadow bounces of inside the hallow triangles and the different angles that are created. The variation on light and angles influences some triangles look heavier and others lighter, exploring how light manipulates objects weight/mass. For my next sculpture I wish to experiment more with curves rather than straight, sharp linear lines and planes.

Sketch 2

For this experiment, i wanted to play with curves. In my previous sculpture, the cardboard i was using was too stiff and restricting, I was unable to create seamless curves without it crinkling, creasing, and breaking. So to fix this, I found a thinner card that was more malleable as well as sturdy enough to hold to shape and form. While forming different curves, I also wanted to play with forming a shape/structure that could support itself without using any other materials to stick together.

I really enjoy the juxtaposition of the convex and concave curves as well as the contrast between the two curves and the straight plane that is directly in the centre.

Sketch 3

This sculpture, I wanted to experiment with perspective. From a birds eye view, my sculpture looks like a 2d plane circle. But when you look at it from the side, you can see a spiral that travels upwards. I love how you can see the curves of the spirals, as if its moving forward. For this sculpture to be even better, I would change the material to be wood or acrylic as the sculpture can support itself. I say this because I do not enjoy the wire that I used to hold up the paper card. It does not serve a visual purpose to the sculpture.

Sketch 4

Cardboard, Clear Tape and Wool String.

The cut out curves in this sculpture was inspired by an algae poster I have on my wall. I wanted to experiment with curves without bending the paper, so I cut out the organic curves for more control over the outcome. I then decided I wanted the cut out curves/droops to curve upwards, rather than creasing a harsh line into the paper, I decided to have a support in the centre and pull the curves through the tension of the wool string. Once again, like the last sculpture, this part of the sculpture served no visually elements to the sculpture, there purpose serves only structural purpose rather than visual/aesthetic. To improve this, I would use a material that could support it’s own weight and from.

Sketch 5

Cardboard, Masking tape and Wire.

For this sculpture, I wanted to make curves with cardboard and wire. I placed the two materials opposite each other because I wanted to the two materials to contrast each other and how although having the same ‘s’ form, they look completely different. Only when i had completed the sketch, did i realise that it look similar to a sand glass, which i thought was interesting.

By Implication- After Atapō ( March 9th)

Today we learnt about lines, planes, space and implied concepts. With this new knowledge, we went and visited the Mata aho Collective and Maureen Lander, Atapō(2020) at the Auckland Art Gallery.

Mata Aho Collective & Maureen Lander, Atapō, 2020

When I first looked at the large black mass, I was not sure what I was looking at…it was like looking at a vast void. This inclined my curiosity. I was eager to go closer to and take a better look and understanding of this large piece of work. As I came nearer, only did I realise the sheer scale. I felt like I was getting sucked into a black hole.

After looking all around the sculpture, I was able to identify how it was created. The sculpture is created with black sheets of mesh that are layered and hung diagonally. Hanging the mesh diagonally affects the very thin and transparent mesh to look like a heavy and dense mass. In the lower and top parts of the mesh, diamonds are cut out of the mesh, scaling down in size on each individual layer. Therefore creating the illusion of depth as the negative space allows light to travel through seamlessly, and form a space in the centre. Whereas, the black layered mesh do not; it traps light and creates the illusion that is it a dense black mass.

In regards to our brief, A weight off your mind, It’s really intriguing to see how Maureen Lander used techniques to manipulate the weight and mass of 2D planes. This will benefit me in the future as I have a larger understanding of how different mediums can work together to change, define or manipulate the weight, mass or volume of materials.

Other Works


Work by Lonnie Hutchinson

I like this work because of how detailed it was. The paper has all sorts of different shapes and the paper sticks out in some parts, creating the 2D paper to become 3D. As I examined the work I discovered that there are also little faeries among the leave cutout- I detail that I really enjoyed. This work is challenging because it is busy but not crowded, somehow sitting in that fine line. Another part that is challenging to me is the contrast of using negative space and that paper to create a design that holds together as well as the fragility pop-out. It is an amazing piece of work to stare and admire the complexities and details.

This piece is something that i found really challenging. It used light and different coloured tiles to create coloured diamonds. And inside of the work is red diamond in the centre, like a heart inside the vessel. It’s challenging to me because I would never have thought to use different coloured planes to create a vessel as well as to shine light into it to illuminate a red diamond. I thought it was really cool to have the red diamond in the inside, like something precious.

Entopic Graphomania (03/03/2021)

For this, we had to make our own rules to follow. The bases was to pick something from a book and connect it through lines. I had chosen to circle all of the ‘s’s in a paragraph from a newspaper article. After I had completed that, I connected them with lines, creating a a geometric pattern. I traced this pattern onto a piece of paper. My pen began to run out and I replaced it, giving my pattern a different ink work. I’m still trying to decide if the different ink boldness? Saturation? annoys me or not. If I were to do this again, I would connect the lines using a ruler to give a more clean and precise look, rather that the shaky lines. And maybe do the lines in different coloured pens therefore giving the unpredictability of the pen ink more control and purpose.

I found doing this exercise quite stress relieving as I was having first-day nerves, as everyone does, especially due to the fact that it was online.

Day 1: First Post, Yoko Ono ‘Grapefruit’ Instructions

Task: Choose 3 instructions from Ono’s Grapefruit book.

First Instruction:
Star Talk
The star Uranus is
Blue
Red
Silver
Green
White
Rainbow colour
Process image of “Star Talk“. I used coloured pencils and a compass. I really liked how the colours all swirl together harmoniously as well as the combination of harsh/soft lines and harsh/soft colours. I really enjoyed the aesthetic of this and would like to continue this in the rest of the prompts.
Instruction 2:
Scream
– against the wind
-against the wall
-against the sky
For this i used a compass, coloured pencils and pencil. I chose to draw different forms/auras of what it would look like to yell at the wind, wall, and sky. I don’t think the coloured pencils blended as seamlessly as i would’ve liked them to. Perhaps acrylic paint would work. I do enjoy the vibrance of the colours though.
Instruction 3:
Line talk
A line is a
– sick circle
– billion lines that are cluttered into a narrow space
– unfolded world
– agressive dot
Once again i used coloured pencils and pencil.

Edit: Responding to Feedback

Feedback was to re-visit my prompts and to do them with different mediums

STAR TALK: URANUS IS RAINBOW COLOUR

For the second attempt, i chose watercolour, I absolutely love the saturation of colours as well as the leaks, drips and blur of the different hues, compared to the softer appearance of the coloured pencils. The watercolour makes it feels more alive and exciting.

SCREAM AGAINST THE WIND, WALL, AND SKY

For this, i chose to do with pencil, wanting to see what the drawing would look like without any saturation. It’s very contrasting to the coloured pencil, although i liked the bright colours, I think i prefer the way it turned out in pencil. There’s an ominous tone to the auras. I feel like they’re more mysterious as the absence of colour does not give any indication of what emotion to feel.

A LINE IS A : AGGRESSIVE DOT

Specifically in my feedback, it was suggested to choose a medium that could express aggression. At first i did a harsh splat with a small paint brush using watercolour, using the colour red as the most obvious colour to represent anger. And then i thought of the scene in Mulan where they use calligraphy paintbrush and when the cricket, the dragon, or the man, i can’t remember, was writing and splated the paint brush down intensely. So with this random thought, i thought to do it in black, first in watercolour, with the same small brush. I didn’t achieve the right amount of aggression from the final image, so i opted for a bigger paint brush and to do it with acrylic. With this, you get to seen the impact of the brush more clearer and the aggression of the..aggressive dot. I did it again with red to symbolise the hot flush of anger. I think using acrylic and a bigger brush was able to communicate more emotions, as we see the gesture of the brush impacting the paper, rather than the small coloured pencil scribble that I initially did.