Sculpture Phase 2 – second sculpture

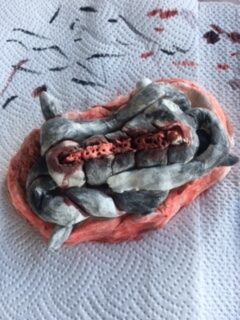
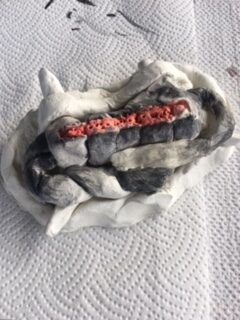
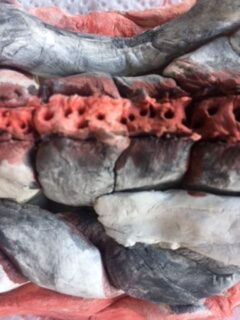
Note: This will be gruesome to some people, so I wanted to put a warning here. The red is not blood it is watercolour.

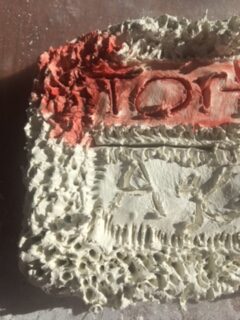
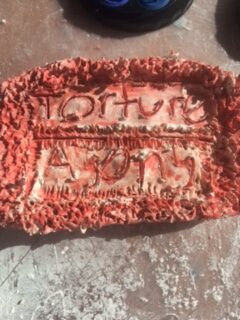
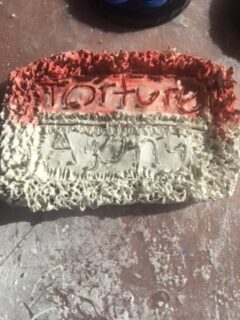
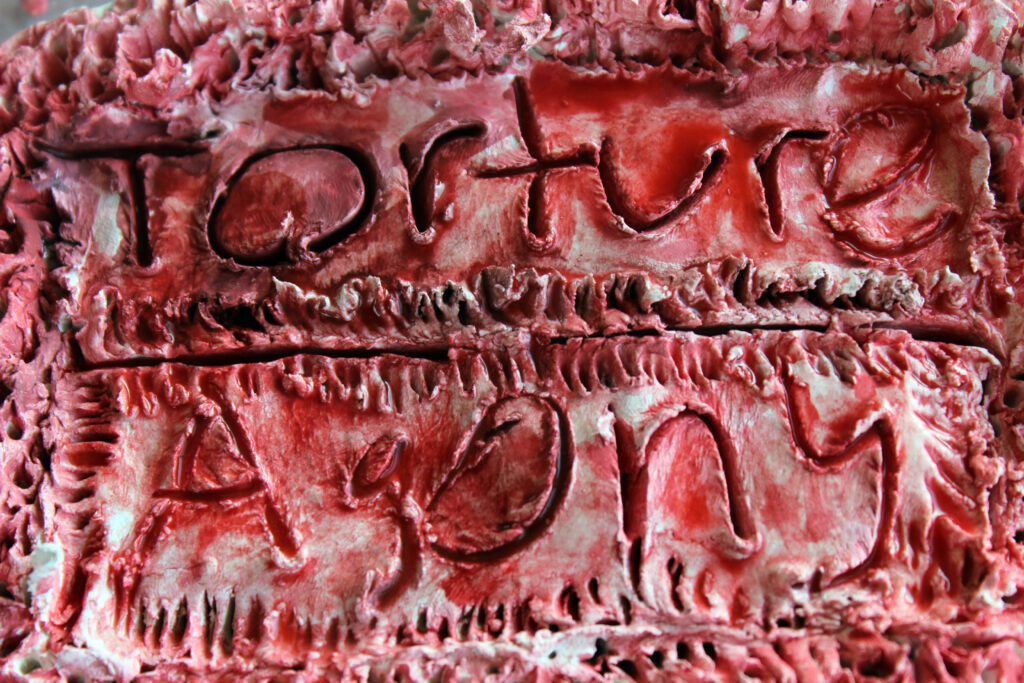
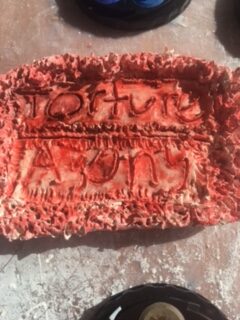
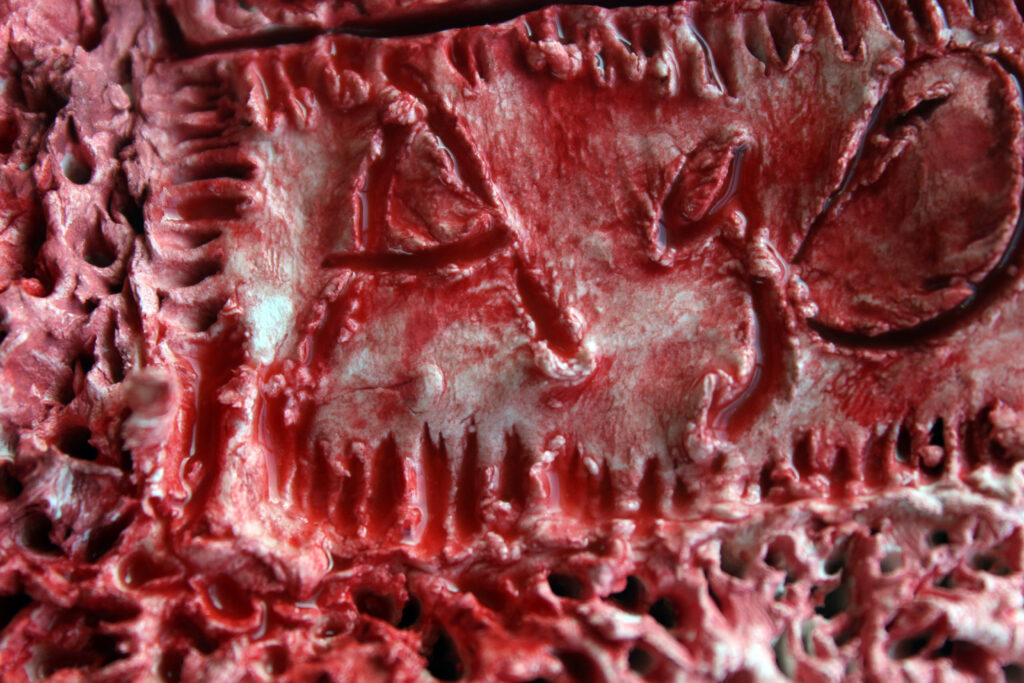
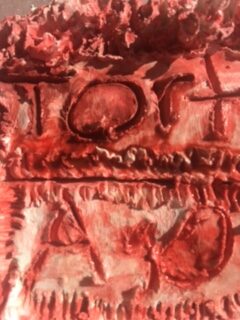
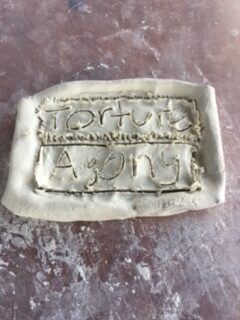
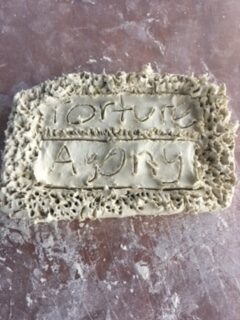
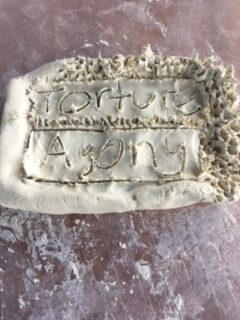
I picked two words that stood out to me as I was reading Anne Frank’s diary. Those words were “Torture and agony”. People who have not experienced war will not fully understand what its like to be tortured and we rely on books and documentaries to try to create a sense of realisation as to how we should feel when looking at the stories of others. When I look at my family’s war albums, I feel saddened, torn apart but also happy. Happy that I now have the job to carry on their legacy and I can show people what war means to me and how I see it. Unfortunately you cannot see the good side of anything without seeing the bad side too, that’s the same when it comes to war. The sculpture is meant to bring up your emotions and make you think how grateful we are to live in a world like this where we have the freedoms of today and not being suppressed. Many countries introduced mandatory conscriptions, including the United States. They did this for World war two and the Vietnam war (just to name some). My great grandfather was 19 when he joined the army, with me turning 19 soon I think of all the horror and the propaganda he was facing to join the war. Being patriotic was a big ideology in the 1940’s and it still is today. One of the main reason he enlisted was because of his love for his country. I’m part American, my ancestors are American and Indian. I would say that i’m pro American, I will show support for that country as to me its like a second home. Choosing to focus on war is one of the ways, I can connect my great grandfathers as I never got to meet them.

Sculpture Phase 2: Site influence

My Site of influence is the Auckland War Memorial. I chose that site because I have a personal connection to World war II. On my mum’s side both my Great Grandfathers fought for different wars and for different countries. My Nan’s side her dad fought for New Zealand and was involved in the Battle of Crete and El Alemein. He survived and left behind a album full of war pictures and documentations of what he saw. He also was included in a book written called ” Silent Casualties” by Allison Parr. Then on my Grandad’s side his father fought for the US Army. He fought against the Nazi’s in Europe and drove Chaffee tanks, went to Auschwitz and rescued the Jews and other minorities. Had a foot lockers full of German uniforms and equipment, he also survived and become a first sergeant. With this connection, It has inspired me to take interest in reading war journals like Anne Frank and Nonna Bannister.

With my verb “to move” I rethought about what I could do and I chose to make a sculpture that is meaningful and moves emotions. Using war and personal understandings of how to showcase this in a respectful way. Last year for my Cambridge A2 Photography assignment we had to choose a controversial topic and I choose “The Holocaust”. I’m so glad that I did that topic, I learnt so much about my American Great Grandfather. My assignment ended up being 56 word pages and 56,000 word count for the whole year. Every word was worth it. So back to my sculpture, I am doing 3 sculptures. Each one is dedicated to something special to me that will make the audience think. I will not just have the clay on it’s own I will also have other things to include.

This sculpture is wrapped Barbed wire to represent the Holocaust and the red is the blood from the many lives lost and wounds that people had suffered. Now that I look at this more closely it also looks like human organs being ripped apart kindoff. Not all sculptures can be fully understood when looking at them in person so I will be adding some writing later on.

This was meant to be a book though I changed my mind. This is to represent pain and the words that are written in most of the journals that I have read. To note, I have some read and seen some very disturbing things through documentaries. In saying that, I’m glad that I have seen that because It means I can expand my knowledge. I can also say that learning history is very important and its only until you see what the past was like then you fully understand the meaning of being grateful. It would be absurd to say that this information hasn’t affected me in some way its made me stronger as a person and I have my great grandfathers to thank.

Sculpture: Critical discussions

I really enjoyed the group discussions, it was really helpful for new ideas as I was quite stuck on what to do. The landscape idea and Weta workshop I really liked as it combines art with clay. I have actually seen some of the landscapes in person when I went to the workshop. Each figure/ area has a thick base to support what is on top and I think that’s what I should explore. I said in my discussion that I liked nature and I was thinking that I could do some animals on a big scale and create an small landscape to play around with the sense of scale. Using textures to influence to outcomes.

My feedback was:

  1. Stacks of disc against gravity
  2. Water colour on clay was an interesting concept
  3. Balance in nature
  4. Puzzle pieces (fitting together)
  5. Game pieces
  6. With the metal wire (revealing the trick behind the magic)
  7. Fitting together yet going against

Sculpture Week 2:

Pinkisyl and Wax outcomes:

PinkiSyl:

Learning about how to make a pinkisyl mould was quite interesting as I didn’t know what pinkisyl was before hand. I was intrigued by how bouncy my outcome turned out. There was a few steps in how to create the mixture and making sure the measures were correct before pouring were crucial to get the bouncy quality. I will use this in the future as it relates to my verb of “to move”. With moving the material in a unique way that the other moulds cannot opens new ideas. However, with my plaster mould the pinkisyl actually leaked through the gaps in the inside and sealed itself. Even though I used the hammer and scraper to try and get it open, It had to be broken. My two piece mould became a three piece. That’s ok, I learnt that I needed to put more clay in the inside.

Wax Mould:

Even though my outcome is suppose to be just a 3d circle, I liked how the wax leaked again to create an interesting shape to look like an 1920’s perfume bottle. It wasn’t my intention however it made it more unique. I also like the lines coming across the circle, I’m not sure how that happened as I did not do lines across. I’m going to assume it was from layering the wax or from the inside of the mould itself. I don’t think I will use wax again but it was nice to try it.

Hotel Sculptures:

During the break I went to Sydney and my hotel that I stayed at had weird looking bunny sculptures. I don’t understand what they are meant to represent however I may be correct with thinking it has something to be with expressiveness.

Sculpture Week 1: Clay/Plaster and Verbs

Verbs:

To move:

The word “move” is quite simple name when first coming across it as a verb. However, how or what someone moves gives a different meaning. I used the coloured paper to demonstrate the outcomes by simply shifting the shapes around.

To bend and shape:

I chose to use blue-tac as it’s easier to manipulate. Thinking about why you do want to bend and what you want people to see when you change the overall structure of a sculpture is quite important. Not only a curved element apart of sculpture in terms of weight distribution but also the qualities that it has. Whether that curve is smooth, rough etc can influence how someone views your work.

To plan:

Planning what we are going to do is important so we know what our goals are. Materials wise, quantity and also doing small thumbnails of how the finished project would look like will reassure that we are organised. Even a small plan can be helpful in some way.

To knot:

I thought of trying “knot” as a verb as I want to try and manipulate clay and plaster in the same way. If it doesn’t work out then that’s fine. I found it interesting on how hard it was to stay up while being twisted. With a knot, the most weight is allocated to the centre while the rest is spread between the two sides. For structural purposes pretending to be the knot helped me to understand how much restriction and tension is built, which will then affect the rest of the piece.

Clay and plaster:

I haven’t done plaster or clay before so this is a new experience for me. I pressed my thumb into the clay plaster mould and moved around the plaster to created the imprints. It was interesting how it turned out. I learned the deeper you sink an object into the plaster the more 3d look it will have on the outcome. I think my first outcome was effective since I went deep into the plaster, It also looks quite abstract. As for the plaster rectangle, I created a rough landscape with just my hand forcing the plaster into different situations. Leaving marks on the surface.

Theory Assignment group.

Hey guys, I don’t have a group for the theory yet and I was wondering if I could join one. I talked to a teacher and they said if there is a group of 5 then it will have to be split into 3 and 2. I tried messaging on teams to the names I remember in the class but offline. So if you don’t mind splitting the group for me to join then please message me on my teams. Sorry for any inconvenience.

Reflection:

After a few technical navigation difficulties I managed to find where my video was. The content of my video is based on what I’m passionate about, I focused heavily on photoshop layering while displaying some art and photos that I have taken. As well as using one image that my Great grandad took at an concentration camp while serving for the United States army during World War two. I really enjoy taking photos and drawing then layering them in photoshop. Every image that is in the video is mine except for one. Learning how to do animation was very interesting as it is a part of photoshop that I have not explored yet. I will continue to build my skills so I can use for my career. I have placed my sunset images next to the video. I was going to have the video playing overtop of them but I found out the images covered the footage.

Artist inspired animation:

Paint and water

Inspired by Lissa Mitchell “Rain” video on Circuit.org.nz.

Lissa Mitchell Rain (1998) | Circuit Artist Moving Image Aotearoa New Zealand

I like how Lissa explored with the coloured water in a creative sense. To me it looks like she used a plastic plate similar to an etching plate to use as the contact surface. Changing the colour so it was visible for the camera. Her video was made up of hundreds of repetitive frames each slightly changing as time went on. I didn’t want to copy exactly what she did so I changed the work space and used the sink as the area where the changes take place. I used the white sink as it was perfect to see the colour and also the bowl shape has the advantages. I did not change the water, though I did water down acrylic paint to mimic the consistency this also helped to blend the colours together. I chose the colours red, blue, green and purple as they are easier to spot the changes compared to more dull colours.

I find the circuit website an extremely valuable resource for ideas and inspirations. I have made a video before but it was using a free platform and then converting it so I could add music. Using photoshop to create videos is exciting to me as I will use it for my career and I enjoy it a lot.

Brief 2: Change it up Animation

First animation:

As this was my first animation that I have done on my own, I used google images to explore what I wanted to do in this video. The first animal that I did, I photoshoped myself using the filter gallery prior to the video. For the actual construction, I worked on individual frames with my brush tool using my Wacom tablet as it was easier for me. The main tools I used were brush tool and mixer tool. Each frame that I duplicated I added colour of before and after to see the transformation. In total animal one had 16 frames. For the second animal, I took inspiration from aboriginal art. The theme for my video was showing my interests and I enjoy doing photoshop and layering as well as doing art. My art style is pen hatching and sometimes pencil. In my next videos I will start to explore how to merge art and video editing to create interesting outcomes that portray who I am and what I am passionate about. I created two videos separately and the merged them together, I had to make the canvas big since the images are different sizes. As I do more videos I will understand to fix the presentation better.

My Second animation:

On Tuesday, I was fascinated with a few artists that were shown in class. The person who I took most interest in was William Kentridge. His video on “Transformation of animation” on circuit.org.nz was unique and exciting as he found a way to merge physical art with the digital world. For this video, I choose to do a short replica of what he did to understand the process. I chose to do a simple landscape to start with. I drew the outline on my desk and then I placed the paper on my wall in studio and I was adding and changing it slightly I took a photo to document. This video has 17 to 21 frames.

Necessary Distractions: Artists and Lab process

Experimenting with the squeegee as to how hard and or soft I need to push down. For this print I used plywood however I did practice with paper and found they yellow to be quite effective.

Artist Reading:

I found the article quite interesting as it deeply analyses the thoughts and concepts each of the artists have as well as underlining key points to get people to think more deeper about their own art practice. It was helpful for me to see exactly what the person was talking about. Explaining the different examples and processes was useful to understand what the the writer was thinking.